The BigMarker Studio is the interface that allows webinar and channel admins full control over the design, layout and content, ensuring you give your virtual audience the best possible experience.
In this article we'll go over all of the different sections of the Studio and their capabilities, along with some best practices and tips to make the most out of your sessions.
Contents:
- Before the session begins
- Overview of the Studio
- Scene Builder
- Presenter, Producer and Audience views
- Green Room
Before the session begins
Pre-loading Content
While you have the option to upload videos, polls, slides and handouts while the webinar is live, it's best to do it ahead of time. Channel admins and session hosts can pre-load content at any time after a session is created.
Previewing Your Session
If you want to get familiar with how the Studio looks and where everything is, you can preview the Studio at any time after the session is created.
Enabling and Entering the Studio
In the session admin you'll want to ensure that Studio is enabled. This will be on by default for new webinars. Go to Production > Live Experience > Studio and you'll see this option. With Studio on, all presenters and admins in this session will have the Studio experience. By default this setting is on for all sessions you create.

From here, simply enter the room using either the Enter Webinar button in the top of the dashboard, or through the same button from a presenter link. The webinar will be available at the start of the preparation time.

Studio Overview
As you enter the Studio before your event is scheduled to begin, note that the room views will be slightly different based on whether or not you have Admin permissions or have access to the Control Panel as a presenter.
Above: Admins or Presenters with Control Panel rights will see the left hand Control Panel.

Above: Presenters without admin or Control Panel permissions will not see the left hand panel at all inside the session
If you do not have access to the control panel in the Studio, you will not be able to create or display any graphic overlays. However, you will still be able to access the bottom content navigation, the top bar, and the interactive panel as well as have access to the Presenter View and Audience View on the top control bar. You can learn more about Presenter Permissions here.
The Top Control Bar

The top control bar has a few controls that are very important to consider for your virtual session. As we see above, before the session is live to attendees, you'll see a countdown to the scheduled start time, as well as the option to manually go live at any time. Make sure you consider your waiting room settings before going live before the schedule start time.
In the top control bar you will see a timer. This timer is only for internal purposes and will only be seen by other presenters and admins. It does not connect to any other setting in the webinar,

Next you'll have the recording button. Depending on if the recording has started or ended, it will either say Start Recording, Stop Recording, or Recording Ended. When the recording is live you'll see a time for how long the recording is. If you have configuring auto-recording start at the beginning of the webinar, then you do not need to worry about clicking this during the live session.

Recordings can't be restarted once they have stopped. If you made a mistake with stopping or starting your recording, contact support@bigmarker.com as soon as you can after the live webinar ends so that we can recover the full recording.
You will also see an option for RTMP Out which allows you to stream the audience view of your webinar to another BigMarker webinar or to another website or service like Youtube or Facebook Live.

In the 3-dot menu you' find options to exit and end the webinar. When you end the webinar you have the option to change the exit URL, as well as allow for presenters to stay together in a debrief room.

Managing Content
In the bottom of the screen all presenters and admins will see the content panel. Here is where you can manage everything that is shown to attendees as part of the live stream. Depending on the presenter permissions that have been set, this view may look different from one person to another. Additionally, some buttons like those for the breakout rooms only will appear for webinars that have that setting enabled.

Camera, Audio, and Content Sharing Buttons
Click the camera or microphone buttons to enable those devices. Click settings (the "gear" icon) to display the settings for your devices, similar to what you see when you first enter the room.
In the content sharing button, you'll find all content options here, including video, audio, screen share, and slide presentations. You'll only be able to share one kind of content at a time, and you can also upload ay files here for last minute arrangements:

Content Tabs
When you have multiple different cameras and content being shared, you will start to see the content tabs populate. These appear in the top-left section of your content area, just above the stream.

Click on any of these tabs to quickly change between the content you have already enabled. You can also click the + button to access your content options, as well as options for co-browsing.

Managing presenters
As presenters enable their cameras, you will have options to manage those presenters. Whether you want to rearrange the order of how they appear to your attendees, or if you need to take control of their devices to trouble shot issues, you can do so with those presenters right in the Studio.
By using the options found in either the host control panel or in the 3-dot menu in a camera box, you'll have total control over that presenters audio and video feed. Click here to learn more about these settings.

The Engagement Panel
The engagement panel is where you and your attendees can interact with one another during the live webinar. Whether it is through publics or private chat, Q&A, Polls, or Handouts, all of them can be used and managed in this panel.

The Control Panel
The host control panel allows you to configure many different aspects of the live webinar. Here you find everything from engagement settings like enabling or disabling public chat, to the design of the stream to include lower thirds or overlays, to advanced settings like resetting the entire stream.
For a full breakdown of what you have available inside of the host control panale, click here to learn more.

Scene Builder
With the Scene Builder you are able to have ready-to-go presets of design, camera layout, and content to quickly switch to. Instead of relying on presenters to individually turn on their cameras, or to make sure you start a pre-loaded video on time, do everything at once by configuring and using scenes.
Click here for more information on how to set these up and how to best utilize them during your live virtual session.

Presenter, Producer and Attendee Videos
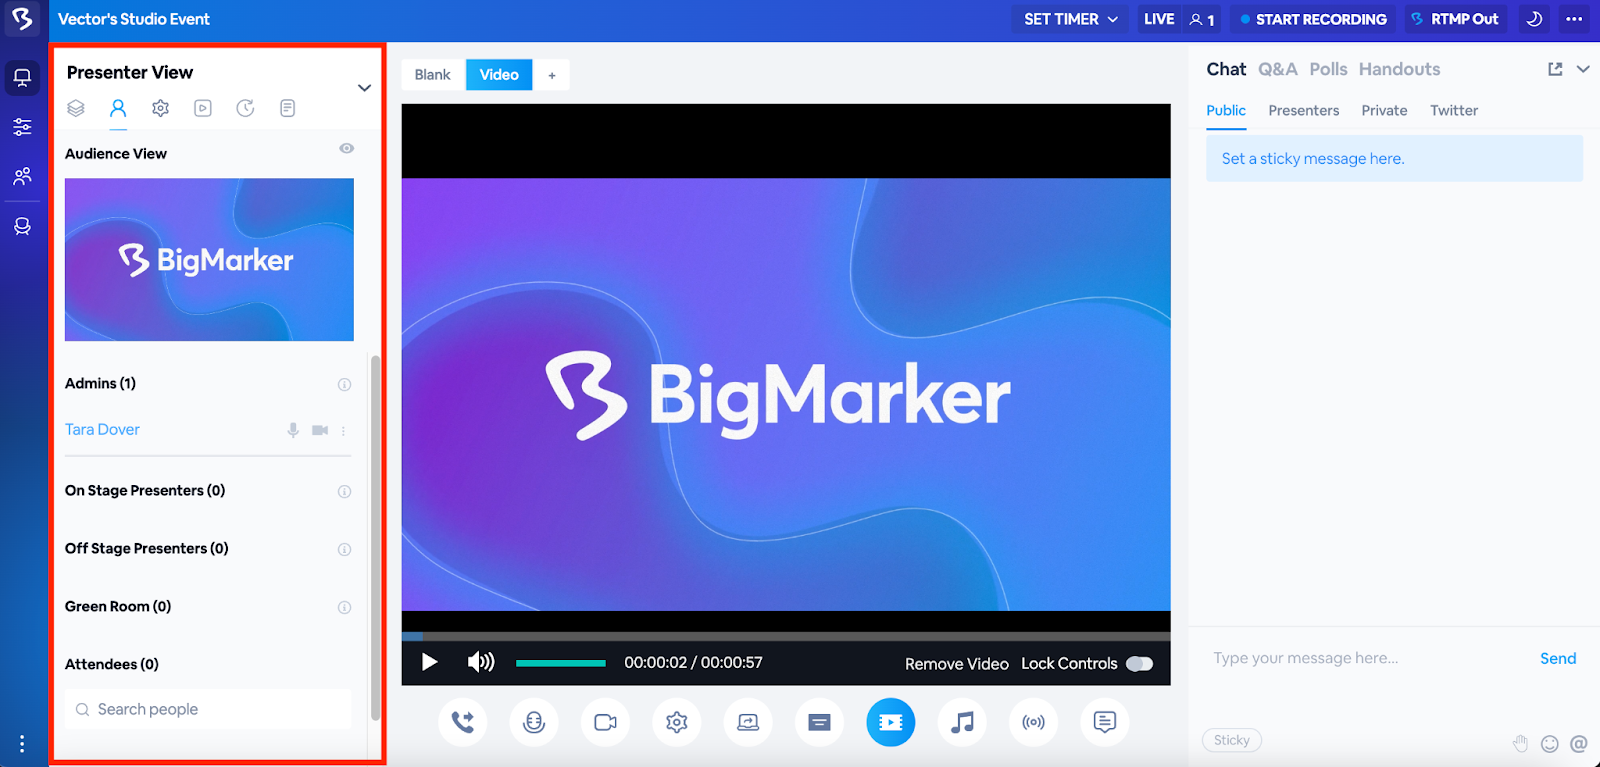
In the Studio, you have a few different views that you can look through to get the full picture of your webinar. The buttons to switch between these views are found in the left-hand panel in the Studio.


The Presenter View is what you will default to. It displays all of the content management options and all other admin settings. The content and cameras you see will have the presenter view, allowing you to use all of the controls that we discussed previously.

The Producer View still allows you to control all of the settings in real time, but the content area will change. Instead you will see a mimic of the webcast stream that your attendees see, helping give you a clear preview of your entire content in real time.

The Attendee View will take away most of the admin controls and instead only show you exactly what the webcast stream will look like for attendees, including the full design of the live attendee experience.

Green Room
The Green Room is a great way to have a holding area for your presenters and attendees before they go live to the general audience. Whether your presenters want to conference about the topics at hand before going live, or you need to check that the attendee that is conferencing in is able to connect their camera, the Green Room allows you to do that privately at easily.
Click here for more information on how to enable and manage the Green Room.
