Still using the classic admin? Click here to learn where you can find the pre-loaded content.
Before going live, speakers can add videos, audio files, slide decks, offers, and downloadable handouts to their webinars, making it easy to trigger these features mid-presentation. Learn more about pre-loading content below.
Table of Contents:
3. Pre-Load Files, Audio and Videos
6. Pre-Load Co-Browsing Website
The Pre-Load Section
To add content to your webinar, start by navigating to the session admin and look for Content >Pre-load Content. Here you'll see all the different categories of content you can add to your session before it goes live.

You can only pre-upload content before your live webinar opens. If the webinar has opened you'll want to upload content inside of the Studio. For sessions that have ended, you can update this content by customizing the recording player
Pre-Load Pop-Up Offers
Pop-Up Offers are offers that can either pop-up or slide out during your event to showcase special offers relevant to your company or the event. These offers contain customizable text, images and a URL that users are sent to when they click on it.
To create a pop-up offer, go to the Offers tab and click on the plus button.

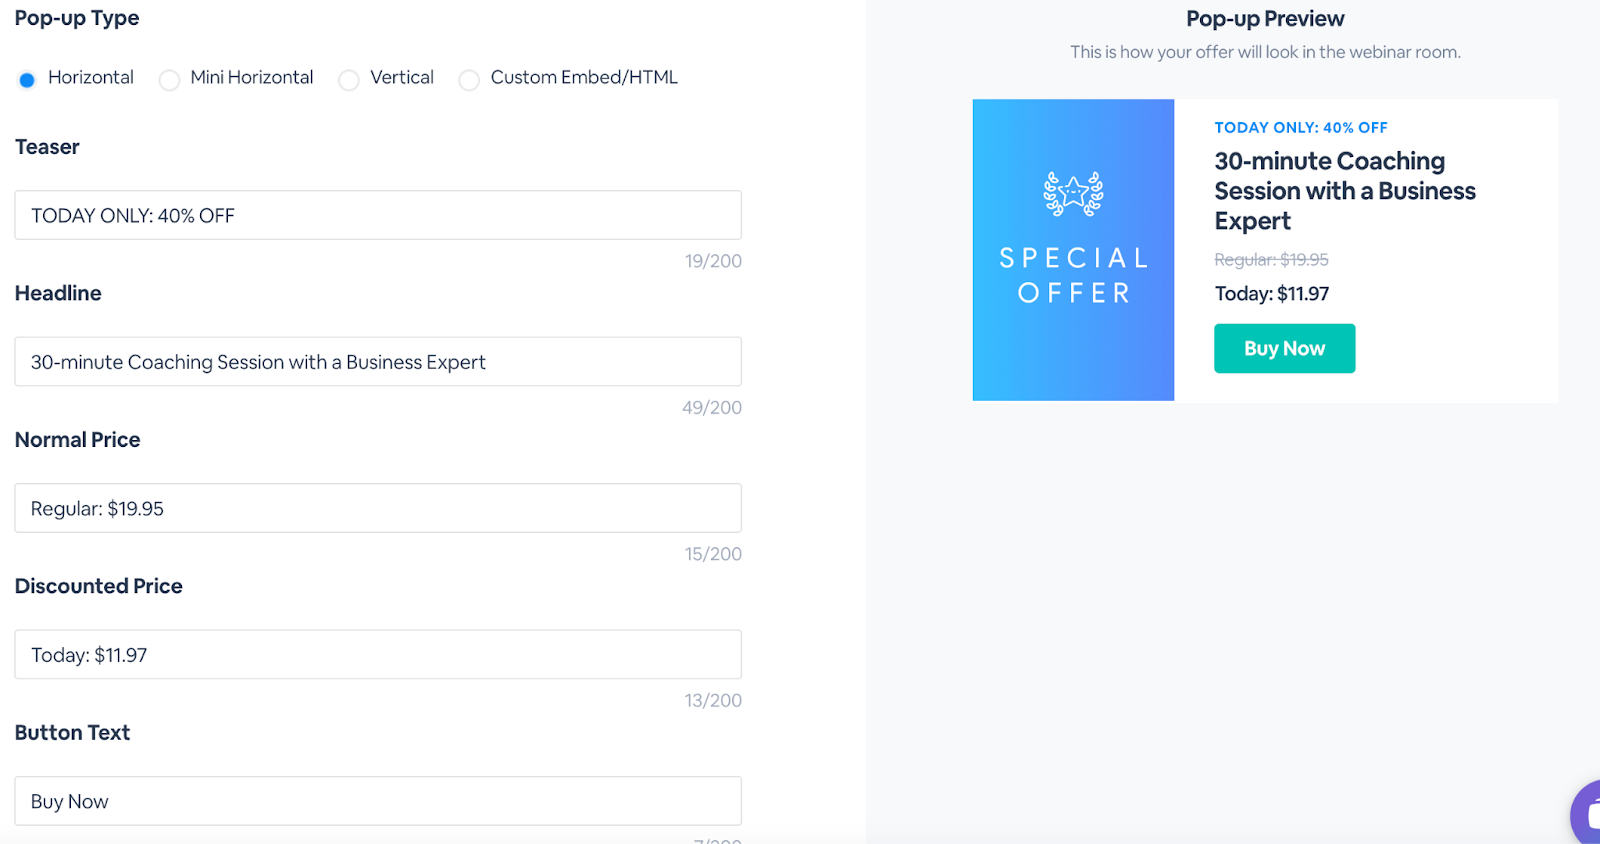
This leads to an editor in which you can enter the teaser, headline, normal price, discounted price, CTA button text and links, as well as assign colors and upload an offer image that will appear in the pop-up offer. You can create a horizontal, mini-horizontal, vertical, or custom embed/html pop-up offer. These offers appear as full-screen pop ups or slide outs to attendees. Presenters can distribute them at any point during the session.
There are three type of offers
- Custom Link: This redirects attendees to a specific URL once the offer is clicked. This is great for redirecting them to a different webinar landing page or your own company’s website.
- Post Webinar Survey: This redirects attendees to your BigMarker survey Learn more about our post-webinar surveys here.
- No Link CTA Only: This is a call to action offer that let’s attendees click without being redirected. Use this to promote an upcoming webinar, offer or for targeted follow-ups. All offer clicks are tracked and available in your webinar’s Analytics & Reporting downloadable report.
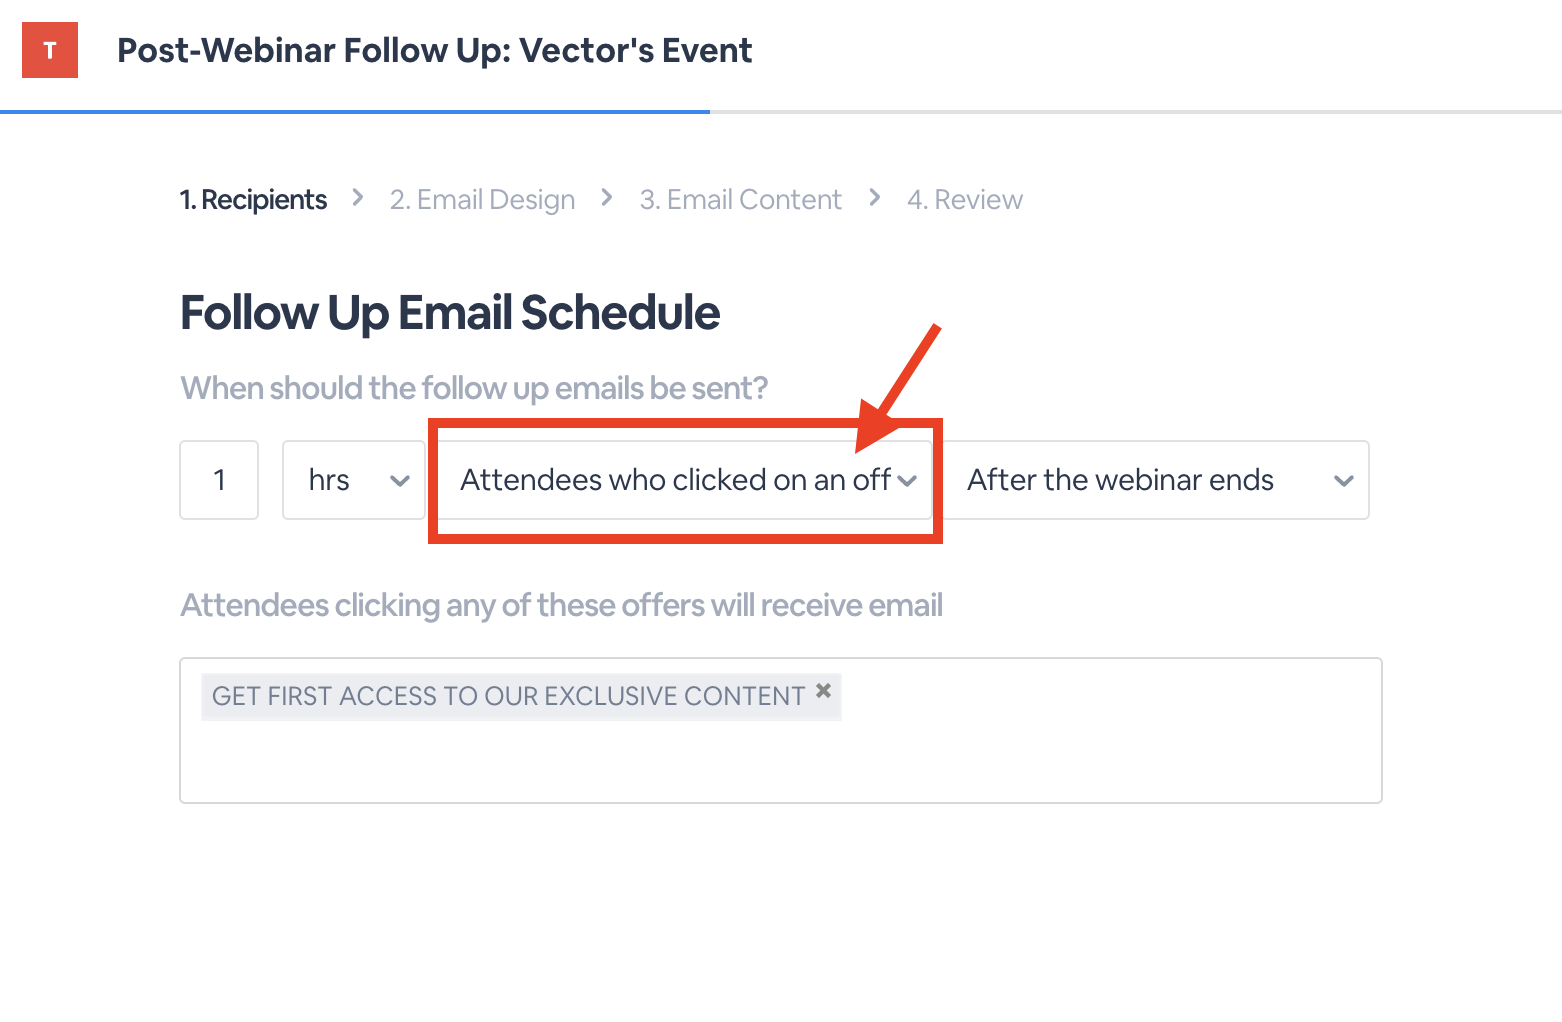
You can enable post-webinar reminder emails for the attendees who clicked on the offer to receive further information. On the Post Webinar Follow Up email, select attendees who clicked on an offer from the dropdown menu. Choose which offers qualify for the email in the box below. Learn more about our emails and invitations here.
For any offers, you have 3 selections to save the offer as:
1) Save this offer to all webinars hosted by this channel: save this offer for all events on your channel
2) Auto append BMID to button link for tracking: use your own custom code to track and identify users clicking on your offers by their BigMarker ID.
3) Auto share offer when webinar open: Automatically share the offer when the webinar starts.
Click here to learn more details about offers on BigMarker
Pre-Load Presentations, Audio and Videos
Presentations, Videos and Audio can be anything from PDFs, PowerPoints, Word Documents, Excel spreadsheets (in PDF file format) to MP3 files and MP4 videos. You will be able to share these files, audio or videos during your presentation.
Within the Pre-Load File & Videos section, you'll have three different types you can upload:
For slide decks, PowerPoints and PDFs that you want to display, select the Presentations . tab. PowerPoint files will be converted to on PDF slides unless you have PowerPoint Animation enabled on your channel.
To upload a video to play inside of the virtual session select the Video tab, then upload a .mp4 video or paste links to an already published .mp4 file. Video file limits are 4GB. Click here for more MP4 specs and ideal settings.
To pre-load a new audio file, select the Audio tab, then upload a .wav file in the pop-up that appears. Note that we only support .wav audio files at this time.

Warning: While the ability to share a YouTube video is still available in the webinar room, it is very likely that the video will not play. YouTube has updated their video policies, which impacts the method with which BigMarker delivers YouTube video content during a webinar.
Click here for a guide on how to download a YouTube video as an mp4 file for use inside of the webinar room.
Pre-Load Handouts
Handouts are downloadable documents used to enhance audience comprehension or summarize the presentation. Hosts can distribute handouts at any time during the presentation.
To add a handout, go to the Resources section. Once a file is uploaded, you'll need to share it in the Studio for attendees to see it. Additionally, handouts uploaded here will be available in the recording player and in automation.

After the webinar ends, you'll have analytics on who downloaded which handout at what time. To learn more about what you can do with handouts by clicking here
Pre-Load Polls
Hosts can poll their audiences at any time during the session to learn more about their viewers' marketing needs or check their understanding. Polls appear as full-screen pop-ups to attendees, who must answer the question before exiting the pop-up.
To pre-load a poll, select the Polls tab.

In the pop-up that after you click the plus button, you will be able to select the type of poll and enter in the question. You can select from a multiple choice, NPS score, or short answer question type.

For complete information on polls and what you can do with them, visit this page in our knowledge base.
Pre-Load Co-Browsing Website
Co-browsing is an enterprise feature that allows you to plug in a link to a website and interact with that website live during your event. This allows attendees to view videos or other sites in a collaborative way. Co-browsing can be available with audio, so attendees can listen to snippets or whole durations of audio.
You can even co-browse Zoom with audio, using the browser version of Zoom within our platform.
To pre-load a co-browse website, select the Websites tab.

In the pop-up window that appears, enter in the website's title and URL in the following boxes. Check off Append Webinar ID to Co-Browse Website to add the webinar ID to the co-browse website's URL.

Pre-loading content in the classic admin
To pre-load content using the classic admin go to the Pre-load section in the manage dashboard. Here you'll find all of the different categories of content separated out into their own tab.
