Note: This feature is available to Events and Enterprise plan holders. If interested in utilizing this feature, then please contact your BigMarker customer success manager or an events expert at sales@bigmarker.com.
Co-browsing allows you to share a specific website inside of the webinar room and interact with it, essentially turning the stream area into a simulated web browser. While this is similar to simply sharing your screen while looking at a website, co-browsing has a few advantages:
- Allows all presenters and promoted attendees to interact with the co-browse session - Imagine a project or organizing board, a form, or even a game of chess!
- Allows presenters to interact with the website while still having access to the webinar room for chat and the host control panel
- Audio can be shared directly from the website. Screen sharing with audio shares audio from the presenter's entire computer and is only available on Windows OS.
- URLs for co-browsing can be pre-loaded into the webinar
- If you have a URL for a specific widget, plugin or iframe, you can co-browse just that element as opposed to having to screen share and entire webpage that such an element exists on.
Table of Contents
2. Add Website URLs for Co Browse before Event Starts
How to Enable Co-Browsing
In order to have Co-browsing available, you'll first need to contact your BigMarker Customer Success Manager. This feature is not enabled by default, even for some already existing enterprise channels. If you do not see the features discussed below, reach out to get them enabled.
Once enabled, you'll see the option inside of the webinar room. Click on the + icon on the left side of the content tabs banner, then click Co-Browse a Website to begin.

A pop-up window will appear where you can paste the URL of the page you want to co-browse. You'll also see the sites that you have pre-loaded into the webinar previously. Click add a website or click on the three-dot menu of one of the pre-loaded websites to begin co-browsing.

When you add a website, you'll give it a name to reference in the list of sites you've added, a URL, and you can decide whether to include the website audio in your co-browsing. You can also set it to add the webinar ID to the URL.

After the URL has been added, it will appear in your list. Click the 3-dot menu and then click on Open to begin co-browsing with this website.

Once open, any presenter in the room can interact with the co-browsed website that appears in the content area.
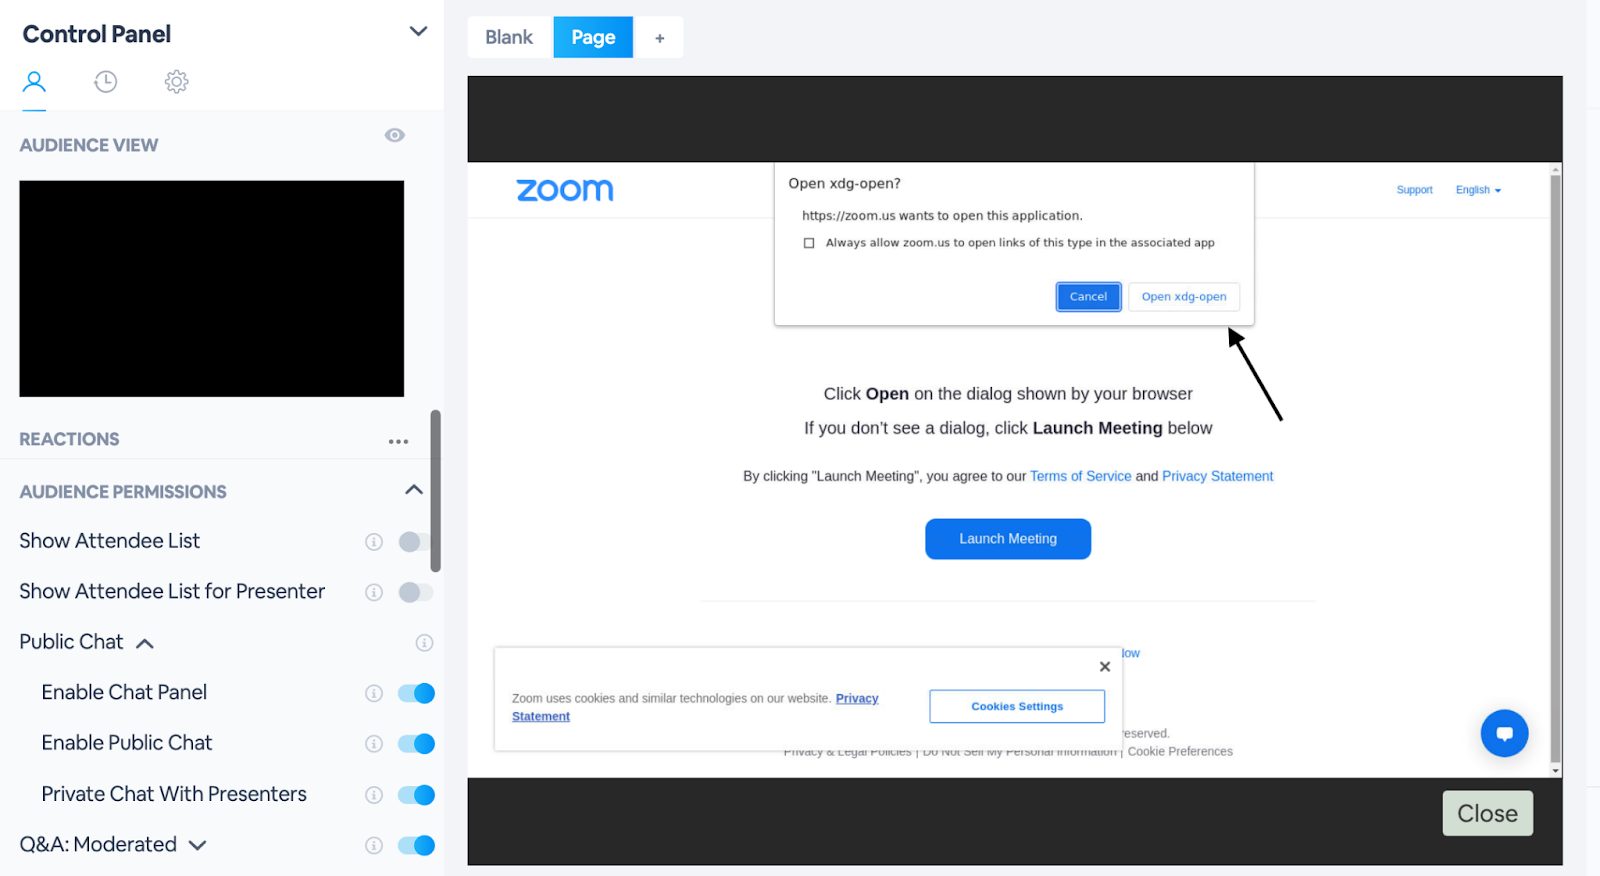
Tip: When utilizing Zoom, you will need to use the browser version. Enter in the link for the Zoom meeting, wait for it to load and then click Open xdg-open. This will disappear after clicked. Once disappeared, click Launch Meeting which will prompt the pop-up window to appear again. Click Cancel, then click Join from Your Browser at the bottom

From there, a few seconds will be needed for the website to load and display for your attendees. Once loaded, you can click, type and interact with the website as you normally would within the stream.
Note: Admins, hosts and presenters have the ability to click interactively within the co-browsing screen. Attendees cannot click within the frame

Add Website URLs for Co Browse before Event Starts
Now, preload your co-browse websites before your event starts on the Manage Webinar dashboard. Introducing the new Pre-Load Co-Browsing Website section, where you can add your websites, with or without audio, into your webinar room beforehand. This allows you to set your URLs and start them immediately when the event starts
Go to the session admin go to Content > Pre-loaded content > Websites. Click on the plus button to add websites to the list.

From here, you'll see the same options that we saw inside of the live webinar room.
