Be able to preload polls, add Polls during your live event, or add them to your automated event. View results in real-time or download analytics to see your audience responses.
Polls are a great way to keep your audience engaged with the liv session and allow you to collect important information on your audiences preferences and needs. Like many other factors of your live webinar, you can create and manage polls ahead of time, as well as get a full picture of the analytics from the results.
Table of Contents:
1) How to Pre-Load Your Polls Before the Webinar Begins
2) How to Create the Poll during the Webinar
3) Adding Your Poll to the Automation Timeline
4) Managing Your Polls in the Webinar Room
5) Real Time Results: Where to Find Them
How to Pre-Load Your Polls Before the Webinar Begins
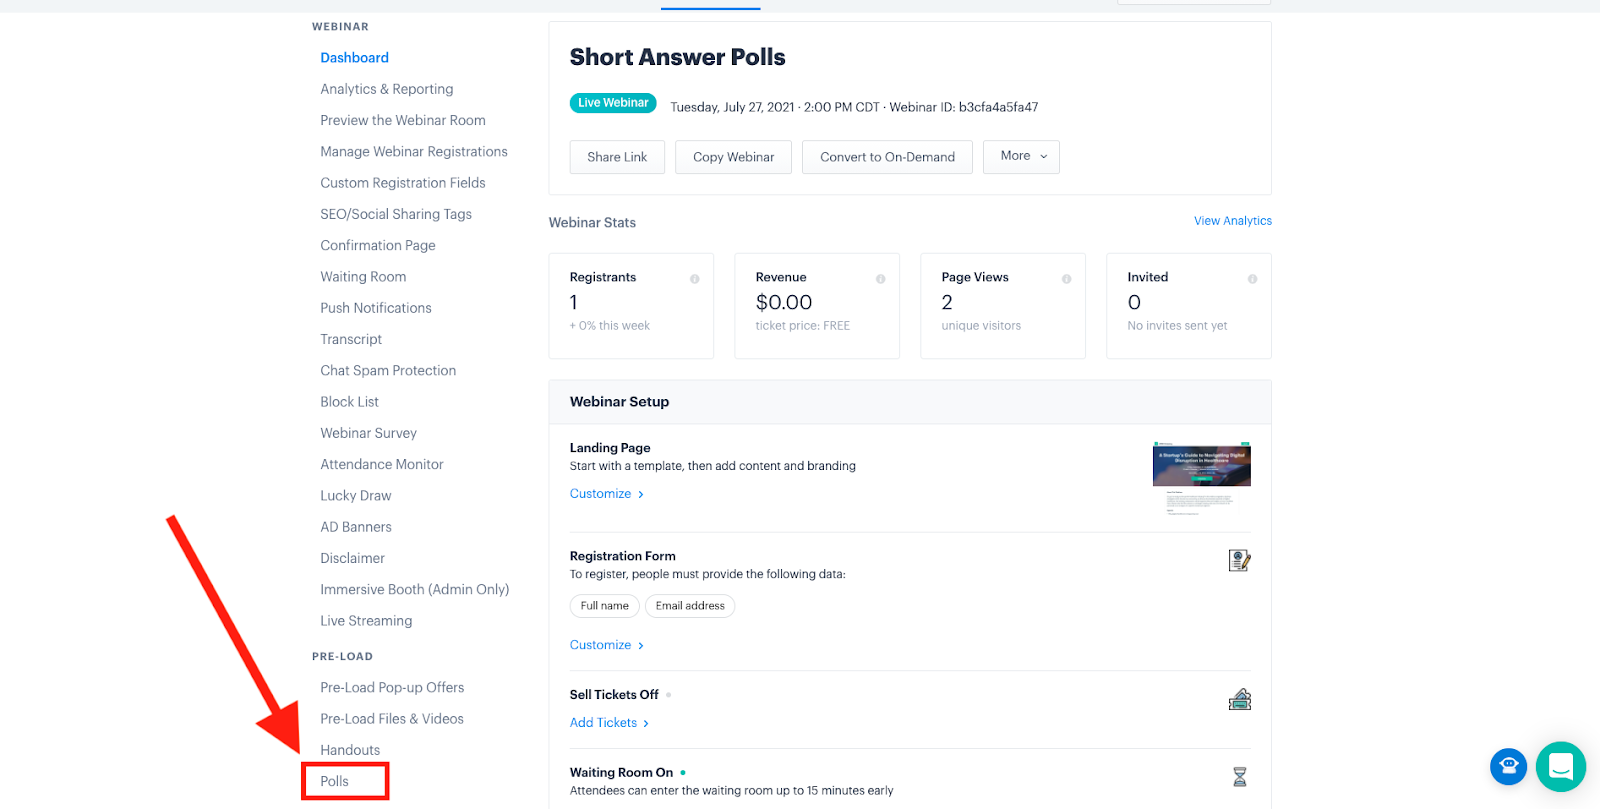
Visit the webinar dashboard and look for Pre-Load Polls in the left navigation.

In this section, select Create a Poll to get started.

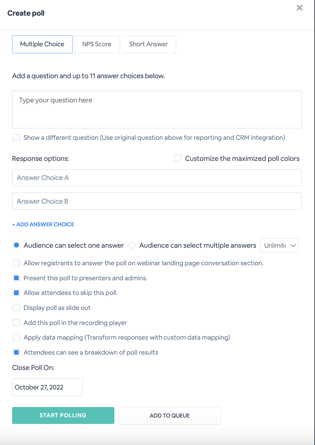
You'll see a pop up to create a new poll, and you'll have a few options to configure as part of this poll. First, you'll choose what kind of poll you want to create:
- Multiple Choice - Provide response options that your attendees choose from
- NPS Score - Attendees can choose a number between 1-10 to answer
- Short Answer - Attendees can freely write text to respond to the poll

After providing the basics, you'll also have some more advanced options to consider:
- Present this poll to presenters and admins - polls will display to all of your attendees, presenters and admins.
- Allow attendees to skip this poll - give your attendees the ability to skip the poll, where they do not have to answer or can answer at a different time
- Display poll as slide out - have the poll appear as a slide out on the bottom left hand corner rather than in the middle of the screen
- Add this poll in the recording player - add this poll to your on-demand recording for viewers to answer when they watch your video
- Open poll automatically - have the poll open immediately when the event starts
- Apply data mapping - add data mapping to your poll responses.
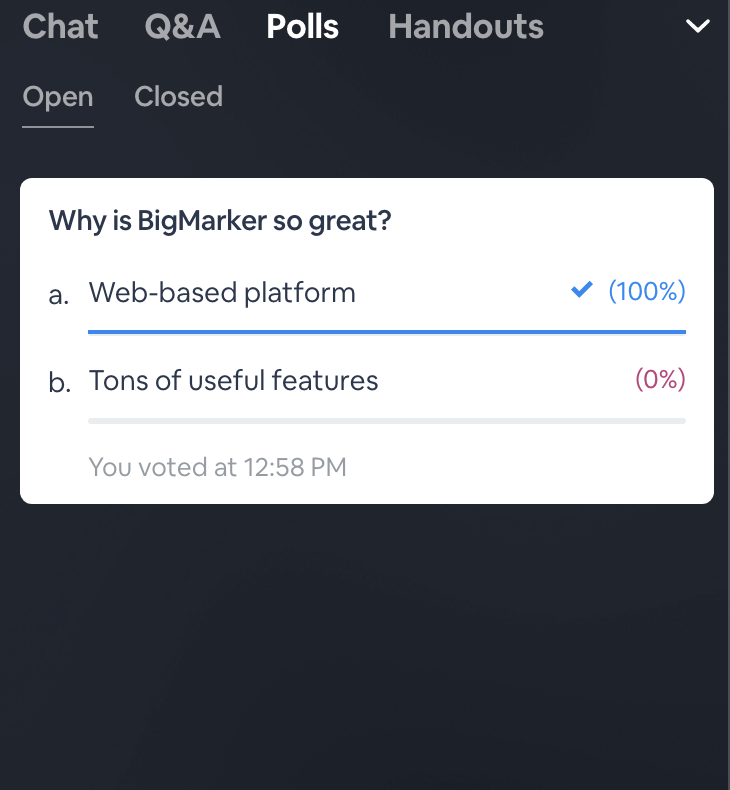
- Attendees can see a breakdown of poll results - allow attendees to view percentages and total amount of votes for each response. Here's what that could look like for your attendees in the room:
You are able to connect multiple polls together, so that attendees answer one poll then are immediately presented with another. For more information on these linked polls, click here.
How to Create the Poll During the Webinar
On Stage presenters, Admins and Hosts, and Presenters with Manage Webinar permissions can create polls inside of the live webinar room.
In the engagement panel select the Polls tab. As a default, you will be brought to the Open section of the Polls tab.
.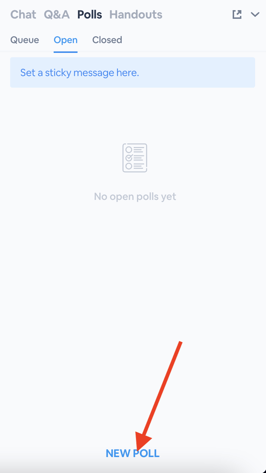
At the bottom, select New Poll and you'll get the same pop-up that appears when you create a poll in the webinar dashboard. While in the live webinar room, you can opt to start the poll immediately or create a poll and add it to the queue to start it later on during the presentation.
Adding Your Poll to the Automation Timeline
Note: Only presenters added to the webinar with manage webinar page permissions enabled will be able to access the Automations tab as well as Hosts and Admins.
Back in the webinar dashboard, visit your automation settings. Add an event and choose to add a poll. You'll now see a pop up that has most of the same settings that we saw in the previous pop-ups. The main difference is that because you are automating this poll, you have to set how far into the webinar the poll we be sent to the attendees.

You can also select a preloaded poll question to include in your automated webinars. Use the dropdown menu to select which preloaded poll you'd like to use. From there, enter in the timeline of when you'd like the poll to post and the title of the poll.


Managing Your Polls Inside The Webinar Room
Once you have begun your webinar, you will be able to navigate between the different polls through the three different viewing options you have: Queue, Open, Closed.
Queue Tab
These polls are written and ready for launch inside the webinar room. With polls in your queue, you can start polling, edit a poll or delete a poll. You also have the ability to add tags to your questions which are only seen by presenters.
Note: Attendees will not be able to see polls in the Queue, only Admins and Presenters will be able to see the queue.

Open Tab
These are polls that attendees can interact. They can be polls that were automatically started after creation or polls that were pushed from the queue. Attendees will be able to see the results of these polls in real-time (if enabled).When polls are open, the results can be maximized so that it becomes your webinar content and allows your presenters to discuss the poll topics and results with the audience.

Closed Tab
These are polls that are unable to be actively voted on and have been completed. Attendees will no longer be able to provide answers to closed polls
Real Time Results: Where to Find Them
Once the webinar has concluded, you can find the results of the polls within the Polls section of the Manage Webinar dashboard.

You'll also find poll results available inside of your webinar and series reports. These will be available both in the full analytics report as well as any custom reports you build.