Note: This feature is only available for Virtual Events and Enterprise plan holders. Please contact our Sales team at Sales@bigmarker.com to learn more.
The BigMarker Scanner App allows you to easily manage the check-in process for your in-person attendees. Users will be able to scan their QR codes to check in, confirm their details, and print their badge, all from one quick application.
Table of Contents
- Setting up your Badge Scanner App
- How to Scan Attendees in for Check In
- How to Scan Attendees into Sessions
-
How Admins Can Create an Account for Exhibitors to Log Into the App
- How to Scan Attendees into Expo Booths
- How to add Gamification to the Badge Scanner App
- Analytics for the Badge Scanner App
Setting up your Badge Scanner App
Visit the event admin and then look for Onsite Experience. Within that menu, click on Scanner App. Enabling the scanner app here will ensure that this event will be available in the app once you log in.

Any event staff you would like to use this during check in must be added as an admin to your channel before downloading the app from the Apple Store or Google Play.
To log in to the Badge Scanner app, simply download the Android or iOS version and log in using your BigMarker user information.
Setting up the Printer for Badge Printing
In order to set up badge printing for your event, you will need to contact your customer success manager. We will assist you in adding and configuring the printers for your event.
How to Scan Attendees in for Check In
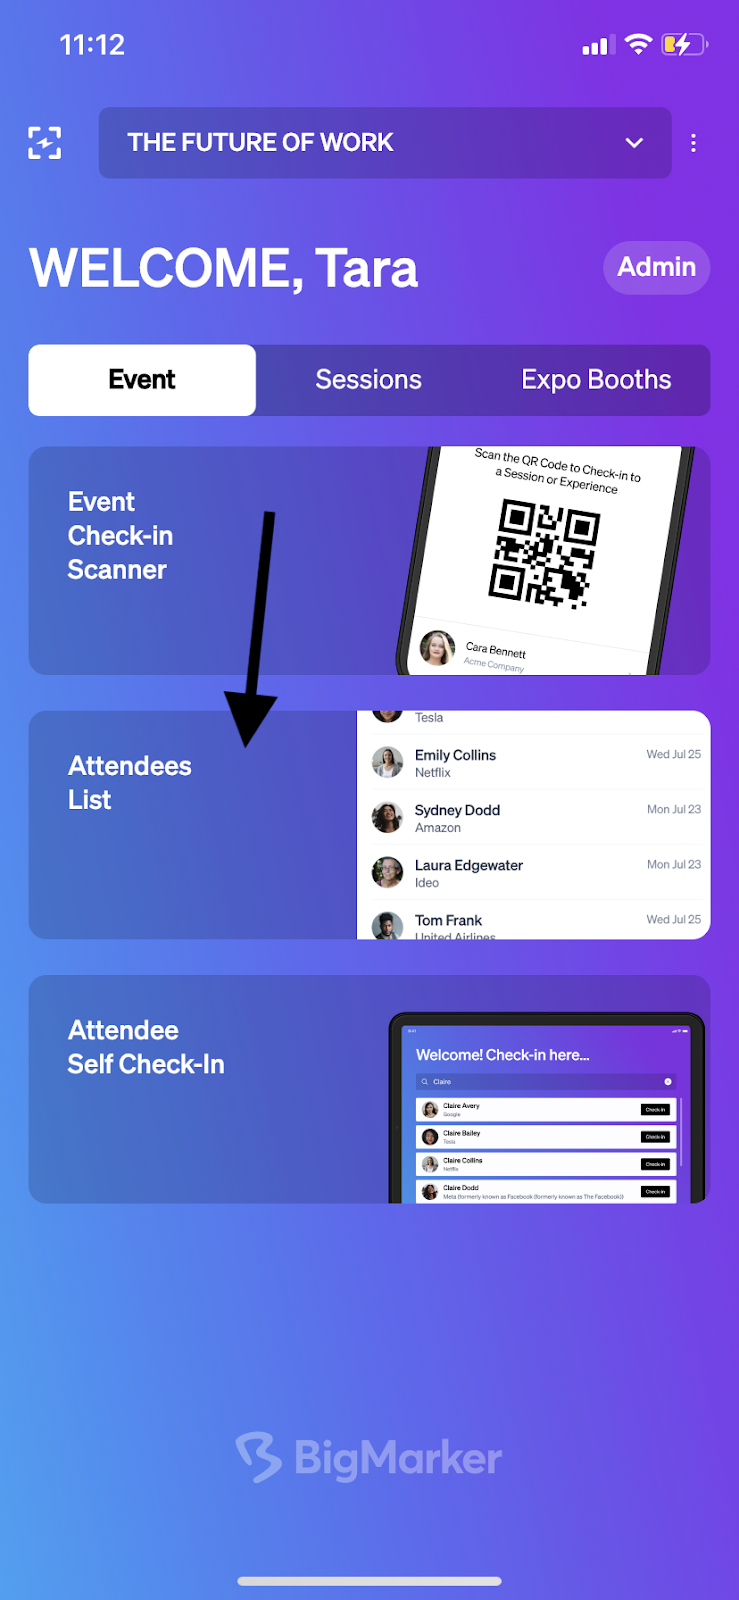
There are three different ways to scan attendees into your event. Any way that you choose to scan attendees into the event will then proceed to print out their badges.
When opening the scanner app, be sure to choose the event in question. If you BigMarker account is an admin on a channel with many events, then multiple may show up here in the top of the app.
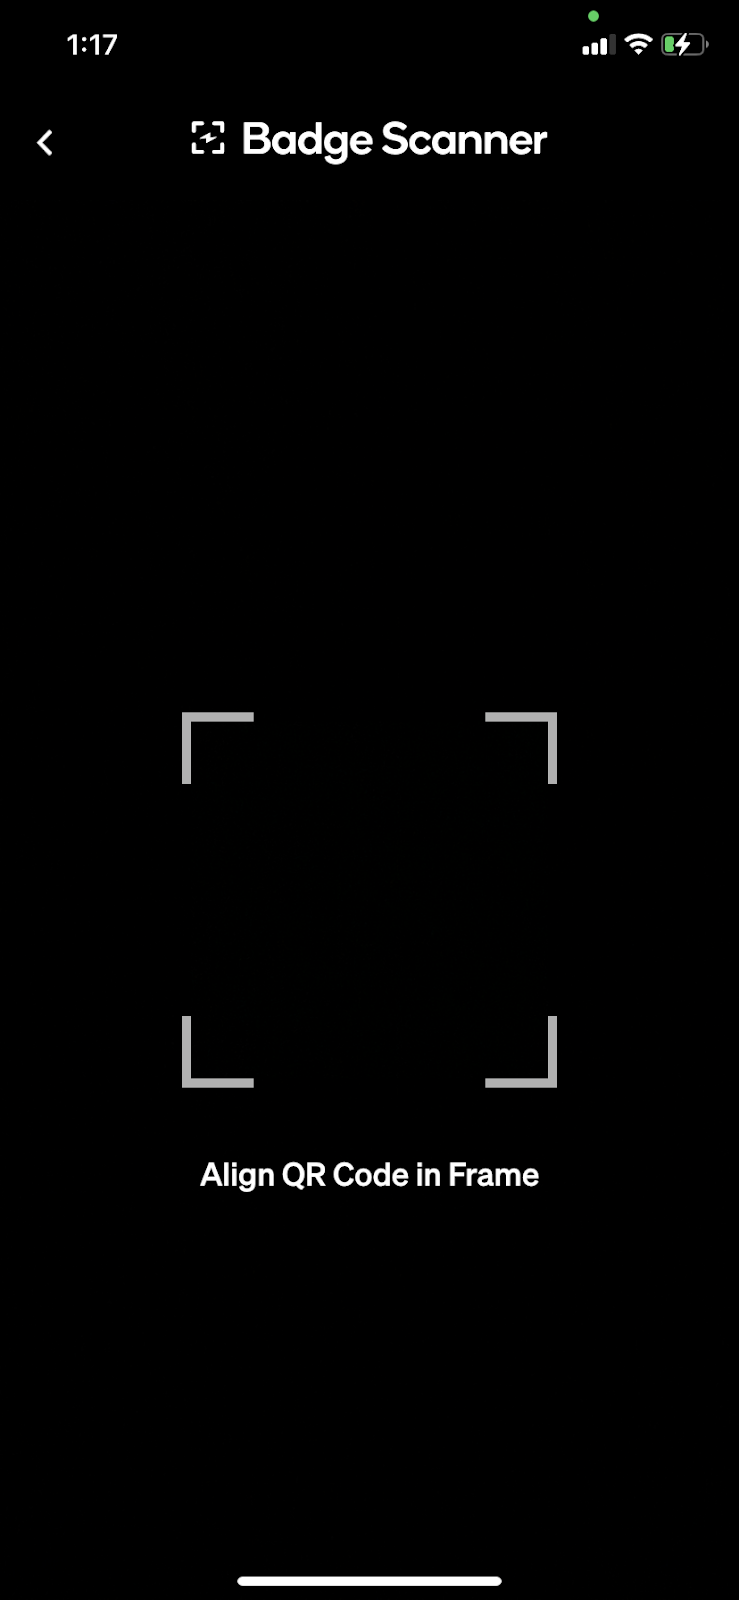
How To Scan Attendees in on the Event Check-In Scanner
After opening the app and selecting your event, select the Event Check-in Scanner

To Check-In Attendees in on the Attendees List
If a registrant is not able to provide a QR code to scan in, you can easily look them up and check them in manually. Click on Attendees List in the app home page
Search for the specific user, click on their name, then click check-in.
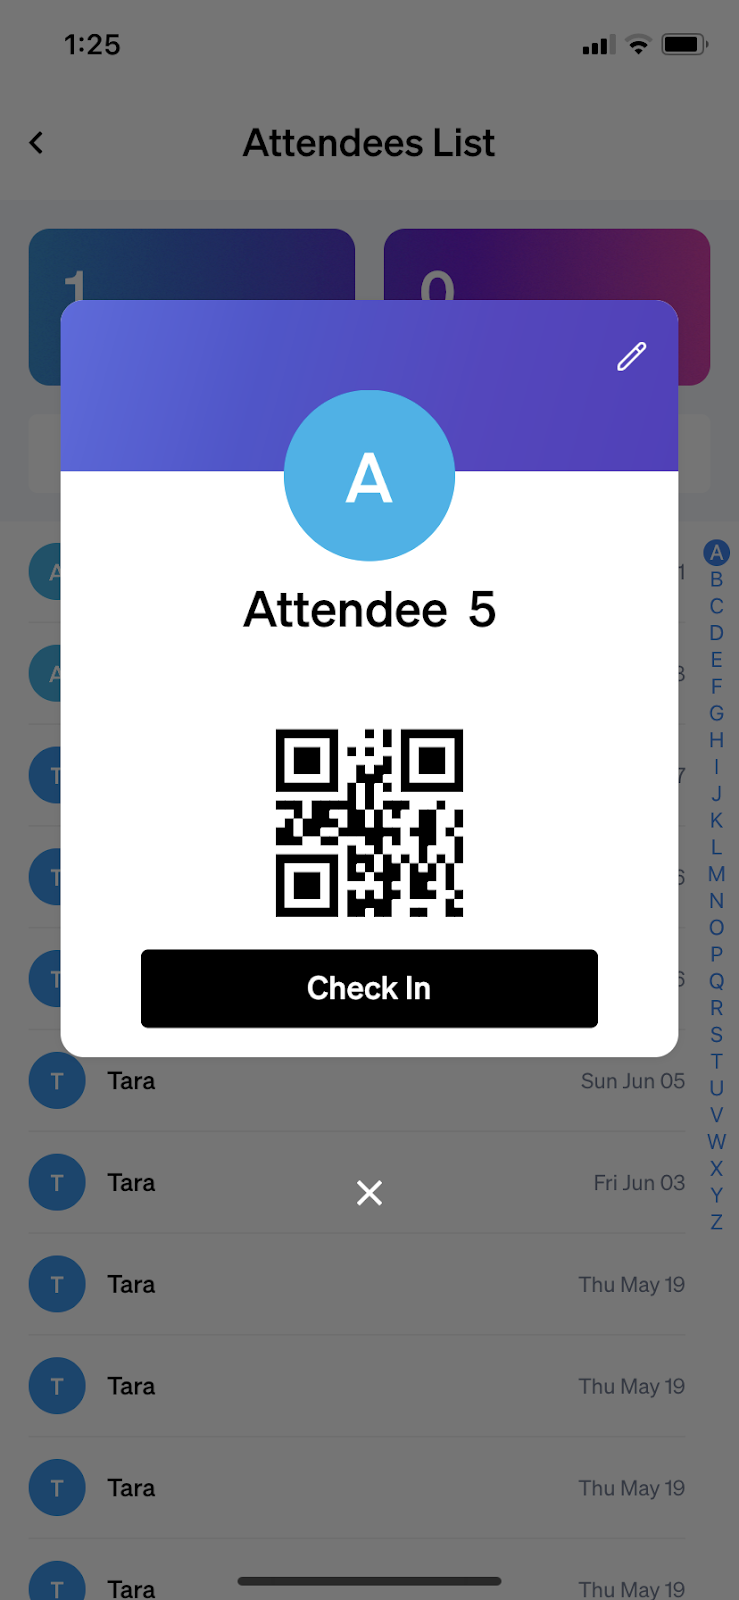
For any registrant who have checked in, you will see a green circle with a check mark indicating that they have been checked in.
To Check In Attendees on the Attendee Self Check In
You can also set the scanner app to allow users to self-checkin, which is a great way to speed up the process if you are planning on many guests entering at once. Click on Attendee Self Check-in to get started.
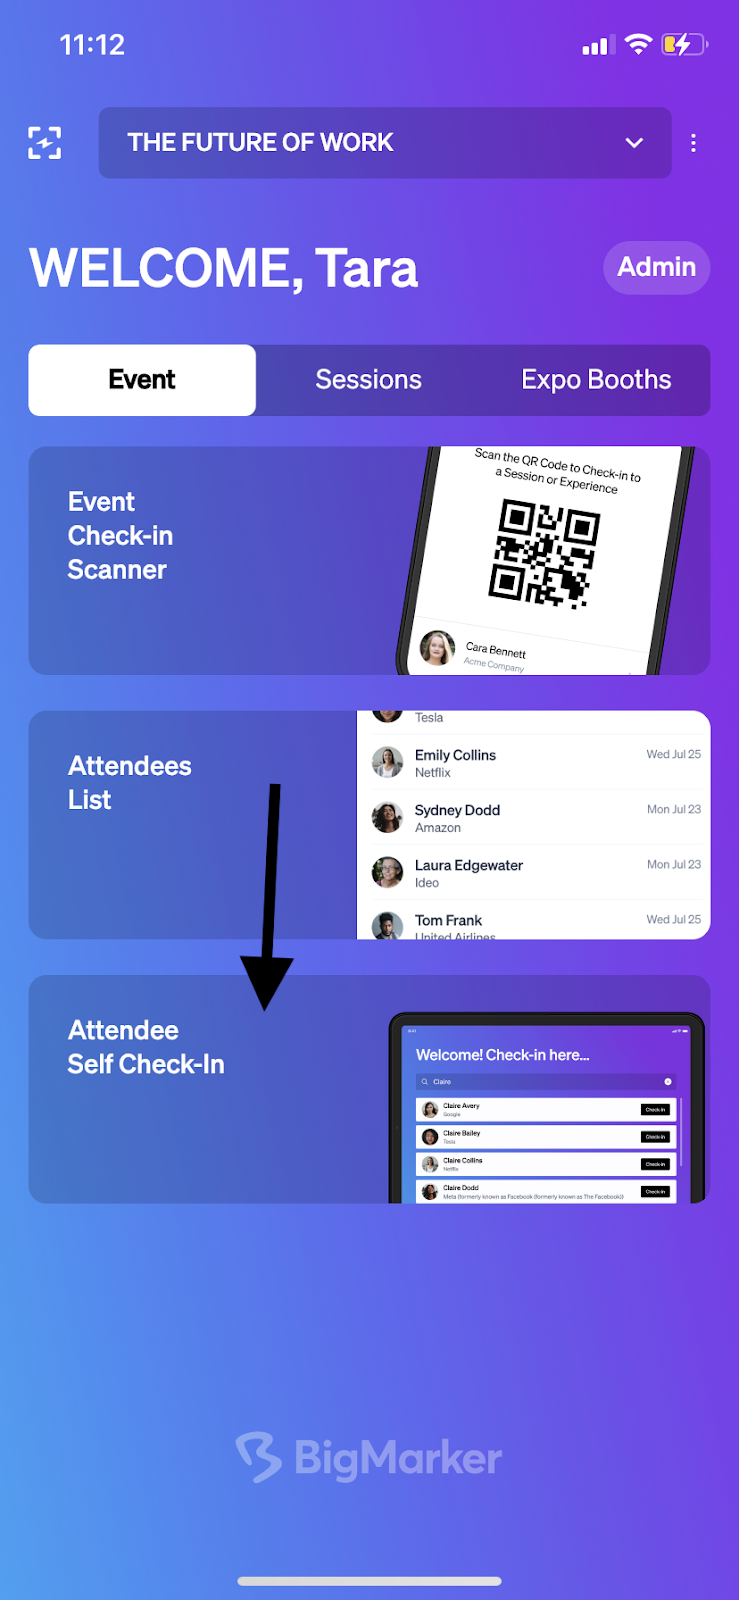
In this view the the scanner can scan the attendee’s QR code where they can confirm their check in to your event. Learn more about all of the features of attendee self check-in here. Once officially checked in, they will proceed to an event staff to get their event badge printed out by the QR code given at the end of check in.
Scanning in Attendees to Sessions
Along with checking in for the entire event, you can also use the scanner appYour event team or staff can manage the check in of attendees to individual sessions. Here, event staff can scan attendees into sessions, manage room capacity, invite more attendees into sessions if maximum capacity is not reached and verify the total amount of session check-ins.
How to Scan Attendees into Sessions
In the home page of the app, click on the Sessions tab. After that, click on the specific session.

From here you'll once again be able to scan a QR code to check the person into that session.
To prevent any double check-ins, attendees that are already scanned in will have a “This registrant has been scanned already” message pop up at the top of your screen.
If you are scanning an attendee into an event and receive an “Invalid QR Code” message, that might mean the attendee is not registered in the BigMarker System. If this happens, please direct them to a BigMarker representative to further assist.
That will successfully check in the attendee to the session. You can view the total attendance of the session on the session’s tile. This way, you will be able to manage attendance and capacity and invite more people into the session if needed.
After the event you can get the results of all of your scanning by generating the Scanner App report from the dashboard reporting page.

How Admins Can Create Accounts for Exhibitors to Log into the Scanner App
In this section, learn how to create an account for your exhibitors so they can check in their attendees and collect leads. More information on lead scanning and logging in can be found in this article.
To begin, collect a list of sponsors. This list can include ready-made emails for each exhibitor, or, BigMarker can create an email dedicated to each sponsor. The email may look something like: exhibitor_date@eventname.com. An admin can also create a consistent password across all sponsors, or provide a unique password for each booth.
The next step is associating your collected date into the backend of the BigMarker platform. In your list of Exhibitors, choose which booth you'd like to view and click Manage.

Scroll down to Expo Booth Staff and click on Edit in the top righthand corner.

Under the tab Basics, scroll down until you reach the Expo Booth Staff section. Click on the + in the righthand corner to add an individual to the booth.

From here, you can input all the information you've collected on the exhibitor's list. Save your information by selecting Invite.
Once you've created your exhibitor, find them in the existing list of Expo Booth Staff. Select Copy Link next to their name.

Open an Incognito browser. This step will allow you to create a password for your new exhibitor. Input your desired password in the provided fields.

Once the password has been created, your account has been successfully set up.
How to Scan Attendees into Exhibitor Booths
1. Click on Expo Booths
2. Use the dropdown menu to select the exhibitor booth
3. Click Exhibitor Badge Scanner
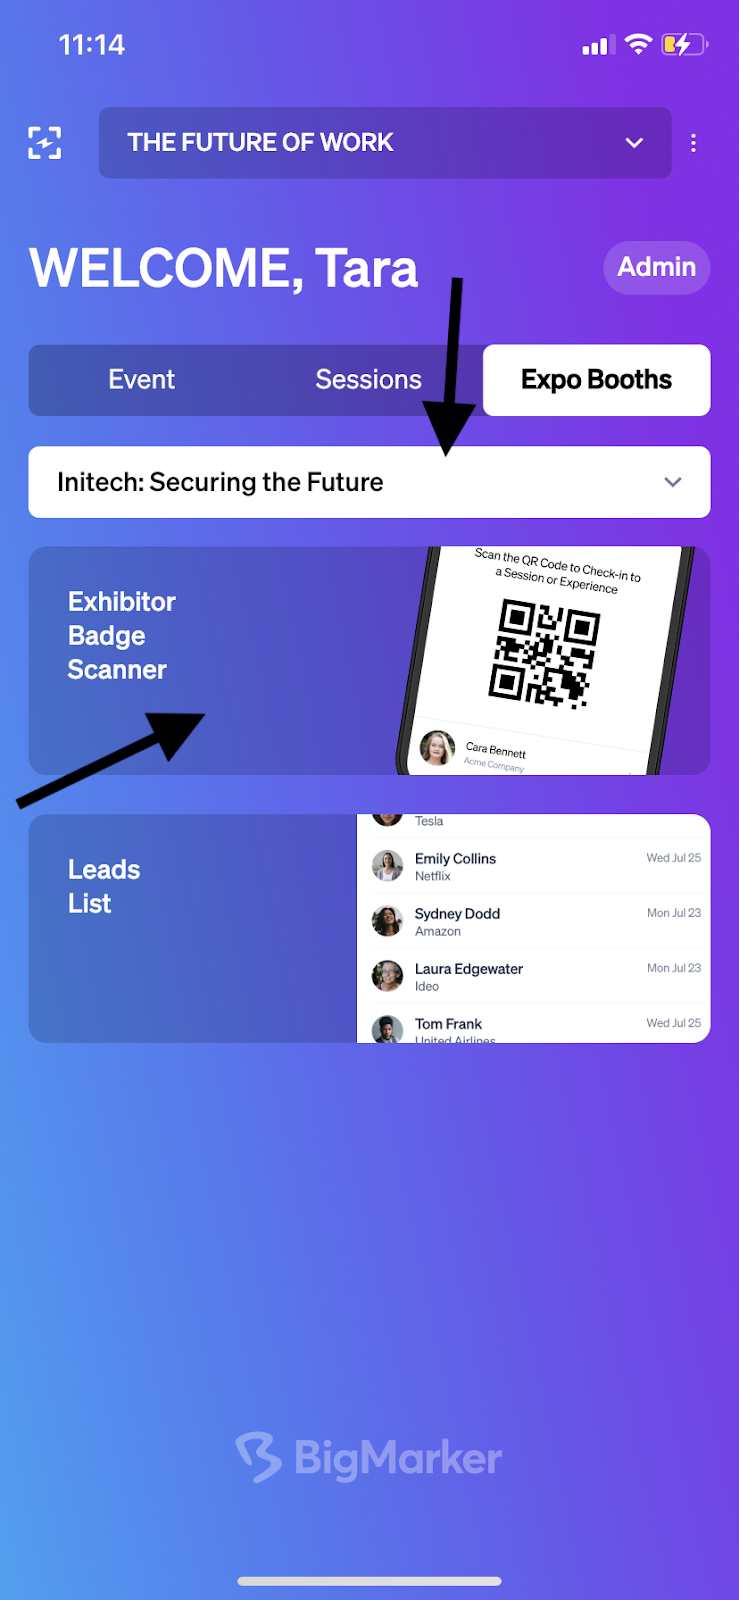
4. Scan the attendee’s QR code found on their badge or event app This will confirm the attendee’s check in to the individual exhibitor booth.
As an Exhibitor or Event staff, you can scan attendees in and add notes as well as their lead potential. When scanning in attendees, an Add details will populate below their scan confirmation where you can label the attendee as a not sure, cold, warm or hot lead and add any notes to them as well. After entering in your notes you are able to confirm their scan and check in to the booth.
The exhibitor can go to their Leads List Dashboard, on the Leads List tab, and view the attendee’s name and lead score. (Learn more about Exhibitor Booths here).
How to Add Gamification to the Badge Scanner App
Allow attendees to earn points that are reflected on the leaderboard through gamification on the Badge Scanner App. You can set up the ability to earn points based on set rules, add and deduct points through the app and view a history of each attendee’s point history. Points can be added manually (steps below) and in real time based on the rules set for points to be earned by.
Setting up Gamification on the Badge Scanner App
Note: Gamification is defaulted ON for the Badge Scanner App. You can disable this under the Mobile App section.

1. On your main series, click to the Gamification section
2. Click New Rule

3. Use the dropdown menu to select the rule type. This will be how the attendee qualifies for gaining the point. There are a number of rules that pertain to the scanner app that you can enable:
- Complete Check-in
- Attend a session in a series
- Scan QR code to attend in-person session
- Scan QR code at in-person booth
Note: If a session rule is selected, the session has to be associated with the main series

Once you determine the type and other settings for this rul, users will acquire gamification points for interacting with the scanner app.
How to Award and Deduct Points
Note: Attendees need to be checked in to the event for points to be awarded or deducted
There may be times where you need to manually update the gamification points for a registrant.
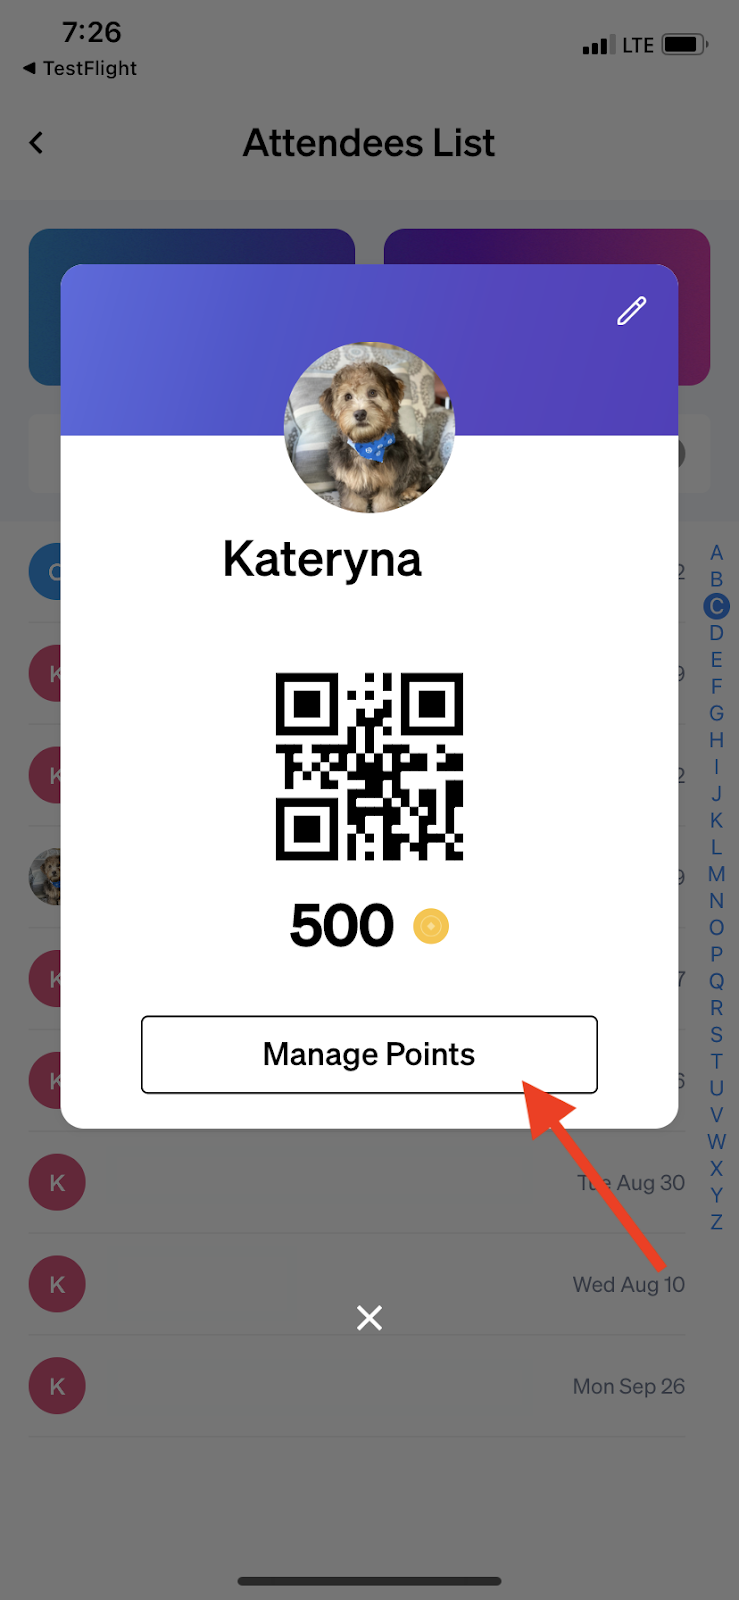
1. On the Badge Scanner App, under the Event section, click the Attendees List
2. Search or scroll to find the attendee and then click on their profile
3. Click Manage Points
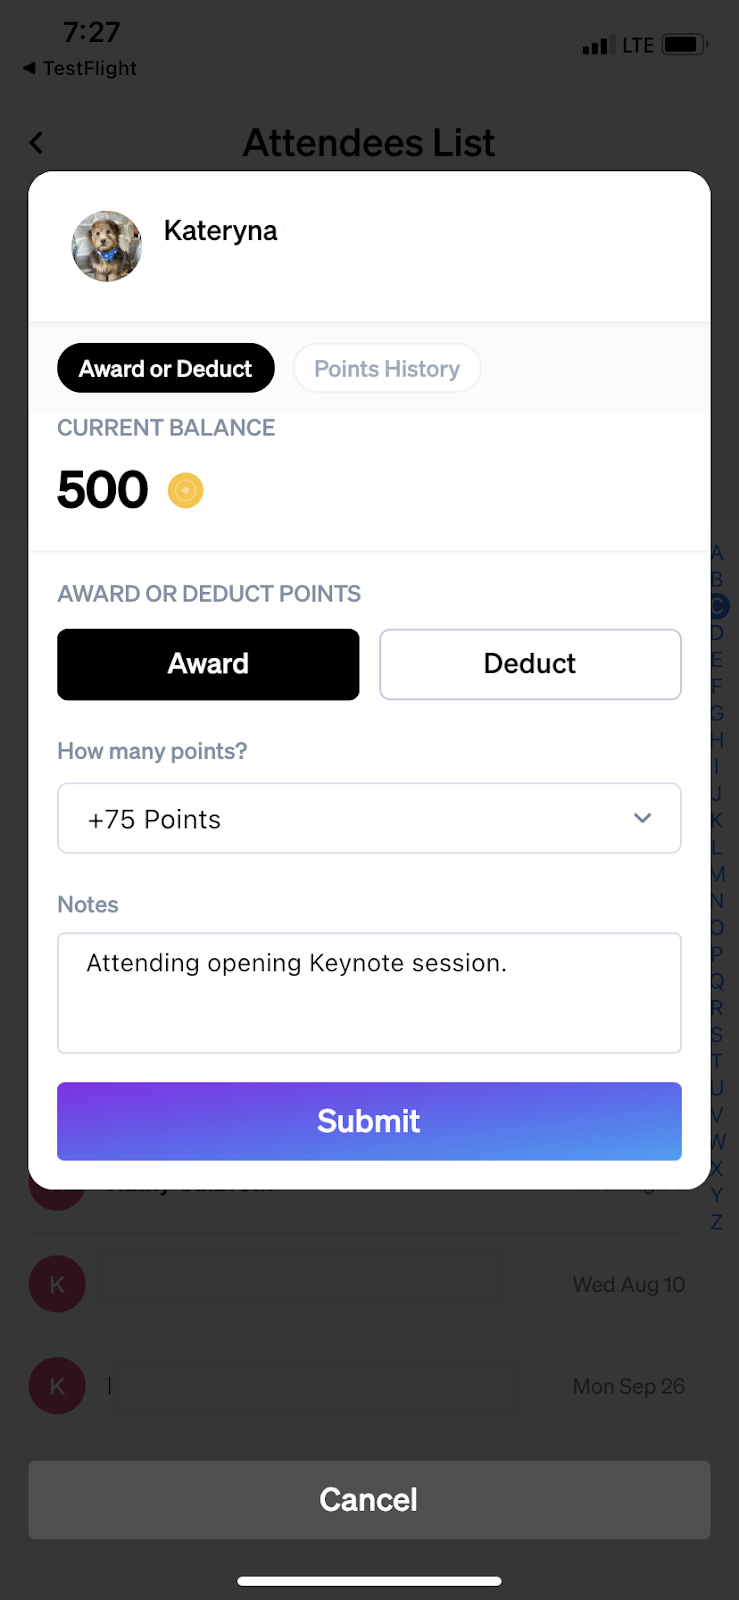
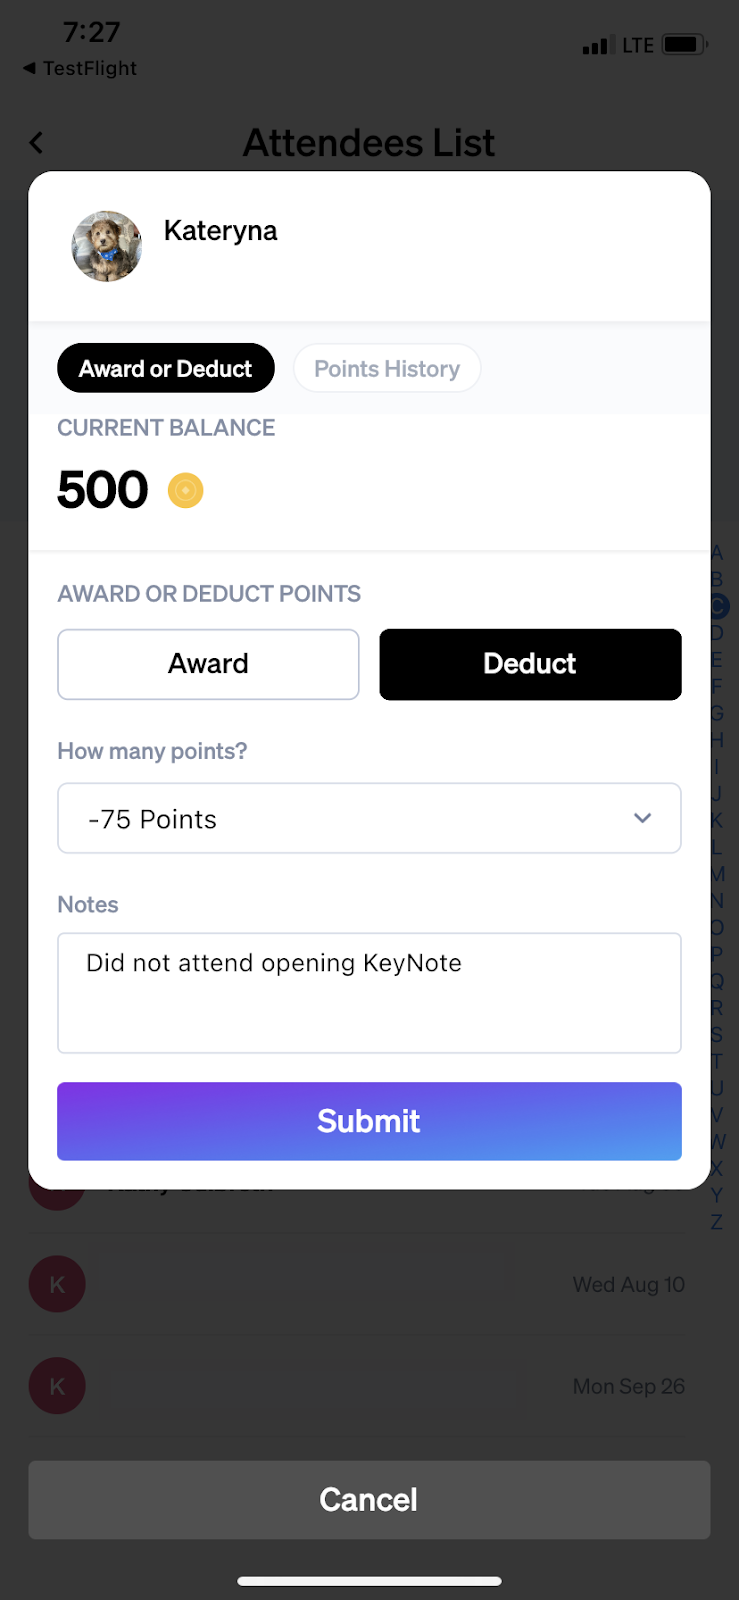
5. Use the dropdown menu to select how many points to award or deduct
6. Add any notes to the points
7. Click Submit
Their new balance will be reflected on their attendee profile. Click Manage Points, then the Points History tab. You can view a history of all the points the attendee has been awarded, deducted, what those specific activities were to earn/deduct points and the notes that correspond with each.

Analytics for the Badge Scanner App
View analytics from your Badge Scanner app along the way or after your event has wrapped up. Analytics are automatically collected once the app is enabled on and is available on your main series’ dashboard on the Analytics & Reporting section. Click Download Reports and download the Scanner App Report ZIP file.

After downloading the ZIP file, you will have 3 separate reports within: Event Check-In, Sessions and Expo Booths.
Event Check-In offers analytics on:
- First name
- Last name
- Email address
- Registration ID
- Series ID
- Check In time
Sessions offer an overview of all the sessions within your event and their respective data points. These include:
- First name
- Last name
- Email address
- Check In time
- Check In type
- Pre-registered
- Attended
Expo Booths follow the similar style of sessions, where you are able to view all the booth’s analytics in this report. The analytics on these reports are:
- First name
- Last name
- Email address
- Scan time
- Lead notes
You can also click Refresh Scanner App Report to update the analytics for any of these reports.