Expo booths are the heart of your Expo Hall, offering attendees a dynamic space to connect with exhibitors and explore their unique offerings. Visitors can engage, browse, and return at any time throughout your virtual event, ensuring a seamless and interactive experience. Each booth is designed to showcase an exhibitor’s brand, products, and services, creating an immersive environment that fosters meaningful connections and engagement.
Note: This feature is only available for Virtual Events and Enterprise plan holders. Please contact our Sales team at Sales@bigmarker.com to learn more.
Important: The Expo Hall is essentially a series containing evergreen webinars where you can automate the attendee experience in each booth, and users can return to them at any time.
Creating an Expo Booth
1. On your virtual event's Manage Event (Beta) dashboard, scroll down on the left hand side and click the Exhibitors section.

2. Click Create Booth

3. Enter in your Exhibitor's basic information:
- Booth Image - the image for the booth that appears in the Expo Hall
- Tradeshow - The Expo Hall this Exhibitor booth is under
- Exhibitor Name - the name of the Exhibitor
- Booth size - the size of the thumbnail image of the booth within the Expo Hall
- Booth title - the title of the booth
- About - A description about the Exhibitor/Exhibitor booth
- Room List - Where the booth would appear during an on-site event

4. Click Save & Exit
Repeat the above steps to create as many Expo booths needed in your Expo Hall. You can view, edit, manage, and enter the booth all from the Exhibitor section.

Customizing the Expo Booth - Edit
You can add each Exhibitor's branding and messaging to their individual booth. After creating your Expo Booth, click Edit to add customizations. There are a few different tabs to add customizations into: Basics, Graphics, Content, Automation, Features and Settings.
Basic
The Basics tab will contain the information entered in when creating your Expo booth. It contains:
- Booth Image - the image for this booth
- Exhibitor Name - the name of the expo booth
- Booth Size - the size of the thumbnail for the expo booth
- Booth Title - the title of the expo booth
- About - the description of the expo booth
- Booth Staff - the exhibitors who have access to the booth
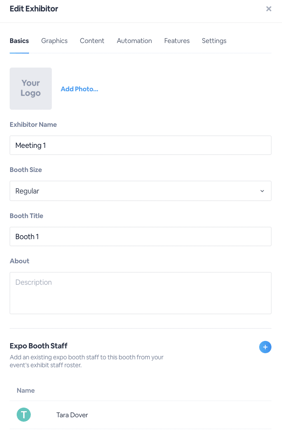
The Booth Staff are those who have access and are the presenters in that booth. You can send email invitations to those who would be the Booth Staff. Click the blue + button, then enter in the first name, last name, email address and customize or keep the meeting invite to send to the recipient. Click Invite when finished.

You can manage an individual's booth access here as well. Using the dropdown, select which level of access the individual should have:
- Booth Admin - can enter and build the booth, while being able to view analytics and download attendee lists
- Booth Builder - can only enter and build the booth
- Booth Presenter - can only enter the booth
- Meeting Builder - can enter the Meetings and Meeting settings for the Booth
Graphics
Graphics is where you can add the visuals for your Expo booth. You can add:
- Expo Hall Thumbnail - the image of the booth in the virtual Expo Hall
- Expo Hall Mobile Thumbnail - the image of the booth in the mobile Expo Hall
- Booth Logo - the logo of the booth
- Booth Background - the background image for the booth
- Pre-Load Sponsor Banners - banner images or GIFs to help monetize your session with sponsorships
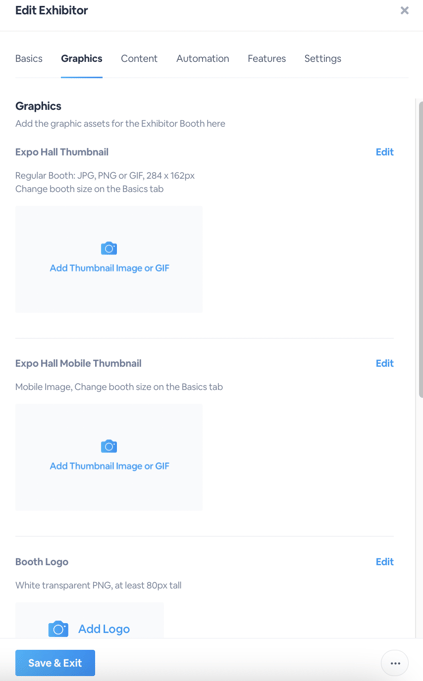
Click the Add text to select a file and upload it into the respective section. Click Edit to change the image or remove it.
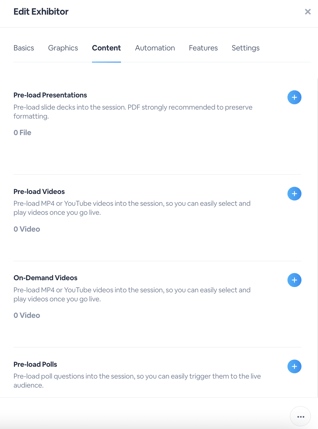
Content
Pre-load your content into your booth here. You can pre-load:
- Presentations
- Videos
- On-Demand videos
- Polls
- Handouts
- Offers
Click the + icon to add in your files/videos.
Note: To learn more about pre-loading content, click here.
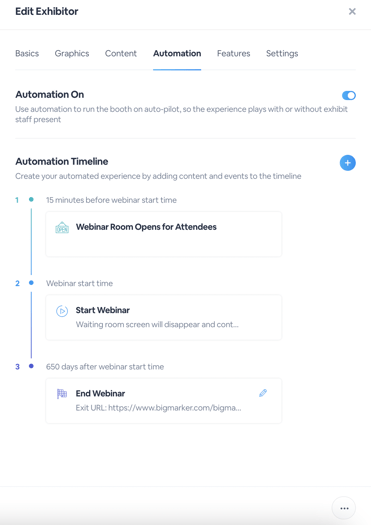
Automation
Here, add in any automation into your Expo Booth. To learn more about adding automation into your booth, click here. Each time a new user comes into the booth, the automation timeline will begin for that person.
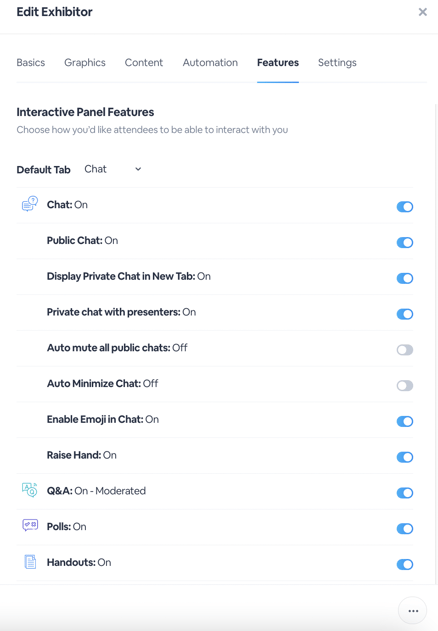
Features
The Features tab will have all the settings for customizing the attendee experience within the Expo Booth. Here you can toggle on/off engagement settings, such as:
- Chat
- Q&A
- Polls
- Handouts
- Offers
- Attendee List
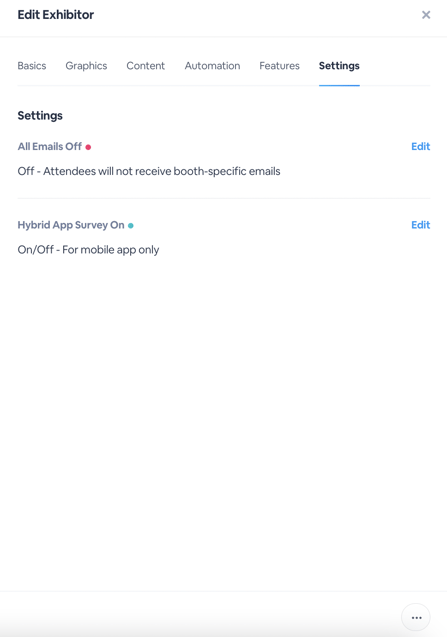
Settings
You can turn on/off emails and App surveys from this section. Simply click Edit and then turn on or off emails or mobile app surveys for the Expo Booths. Each setting will have a redirect to go to each's equivalent backend to customize there.
Each Expo Booth will have these settings to truly customize their booth based on their own unique branding and message.
Overview of the Expo Booth - Manage
After customizing your Booth, you are now ready to manage it. Click Manage to enter the Expo Booth.

You will be redirected to the Booth Dashboard, a comprehensive look inside the booth with options to customize, view your audience, and enable on our Meeting Scheduler (learn more here).
Booth Dashboard

On the Booth Dashboard you'll see all the settings you customized and set in the Edit Section. You can view the booth basics, content, graphics, expo booth staff, settings, and interactive panel features. You are able to click Edit and be redirected to its section to adjust.
You have a few more important components here. Starting at the top of the screen, you can edit the booth (at the top), go live in the booth, and enter the booth. Entering the booth will be similar to entering the webinar room as Exhibitors can enter their booth from there.
Note: In order for attendees to enter the booths, the booth must be LIVE. Enable on Go Live to allow attendee access into the booth.
In the Booth Mode section, you can select whether your booth is Automated (is on an automated timeline) or Live (an exhibitor is inside the booth manually running it) at the bottom of the example image.
Moving to the right hand side, you will be able to see the booth status, a shareable booth link, steps needed/completed for your booth and a quick booth guide PDF for further questions.
At the bottom of the screen, you have the ability to launch the designer builder for the booth. Click Launch Builder and be taken to the designer page.

Additionally, you can select Preview Expo Hall in order to see what the booth will look like within the Expo Hall. Select Edit to edit the booth settings.
Note: You will only be able to add a Logo image within the Booth Builder. The booth is a part of your Expo Hall series.
Audience
View all the guests that enter your expo booth. The Audience tab will show their name, whether they're a virtual attendee or an in-person one, title, company, and lead score.

Meetings/Meeting Settings
You can enable on our Meeting Scheduler feature within your Expo Booths, allowing attendees to schedule meetings with Exhibitors. Exhibitors can manage their upcoming and current meetings on the Meetings tab. To learn more about the Meeting Scheduler, click here.

You will be able to manage these components of your Expo's booth before and throughout the duration of your virtual event.
To edit and set certain settings for your meetings, navigate to the Meeting Settings tab and customize accordingly.

Enter Booth
Last but not least, you are able to enter the Expo Booth from the Exhibitor section. Click Enter Booth and enter your booth! When the booth is live, you are able to present, interact with attendees and more.
Note: You are able to enter the booth at any point within the Booth Dashboard.