The settings here are only available for channels with an appropriate license. For additional information, contact sales@bigmarker.com or your customer success manger.
For instructions on what you can do with the webinar landing page editor, click here
Your Landing Page is the home page for your Virtual Event. This gives a preview of your event to potential attendees and registered attendees. Anyone is able to register for your event, meet the speakers for the event, view your sponsors, see the agenda for the event and more. It's the overall first impression your audience will get once seeing your event.
The landing page template shown here uses the Virtual Event Classic Microsite template. Choose this template when creating a new event or when you are managing your event modules.
Table of Contents:
1. Accessing Your Landing Page Editor
4. Designing the About Section
4. Designing the Bottom Call to Action
Accessing Your Landing Page Editor
From the classic dashboard of your event click on view landing page to get started.

In this view you'll see the landing page as your attendees will see it. In the editor on the left-hand menu, you can begin to design your landing page.

Designing the Header
In the Header tab, you'll be able to display a clickable logo, header navigation links, and the registration/login buttons.

You can upload your own logo then add a URL for that image. Upload the logo under Logo Image, then insert the link under Logo URL.

In the above setting you'll see use global navigation links. With this enabled, the header links will come from the navigation settings in the event admin. If you disable this, you can customize the text and URLs of those links in this menu.
You'll also have options to update the colors of your banner as well as the text for your register and login buttons. If you don't set these colors here, you can edit your event-wide colors in the design section of the event admin.
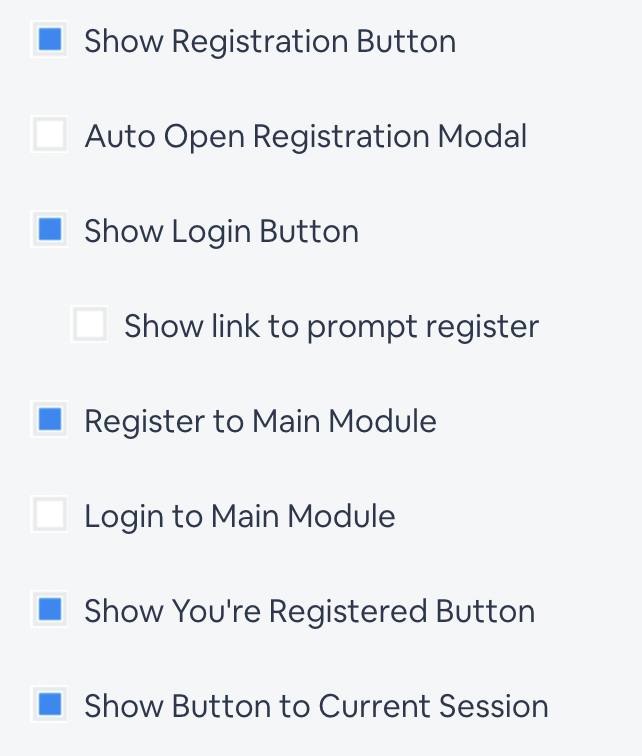
You also have a few options of buttons to show on the Header. You can enable on: The Registration Button, Login Button, You're Registered Button, and a button to show the Current Session. For the Login Button, you can enable a call to action for the users who have registered to bypass the registration form and login with their account information.
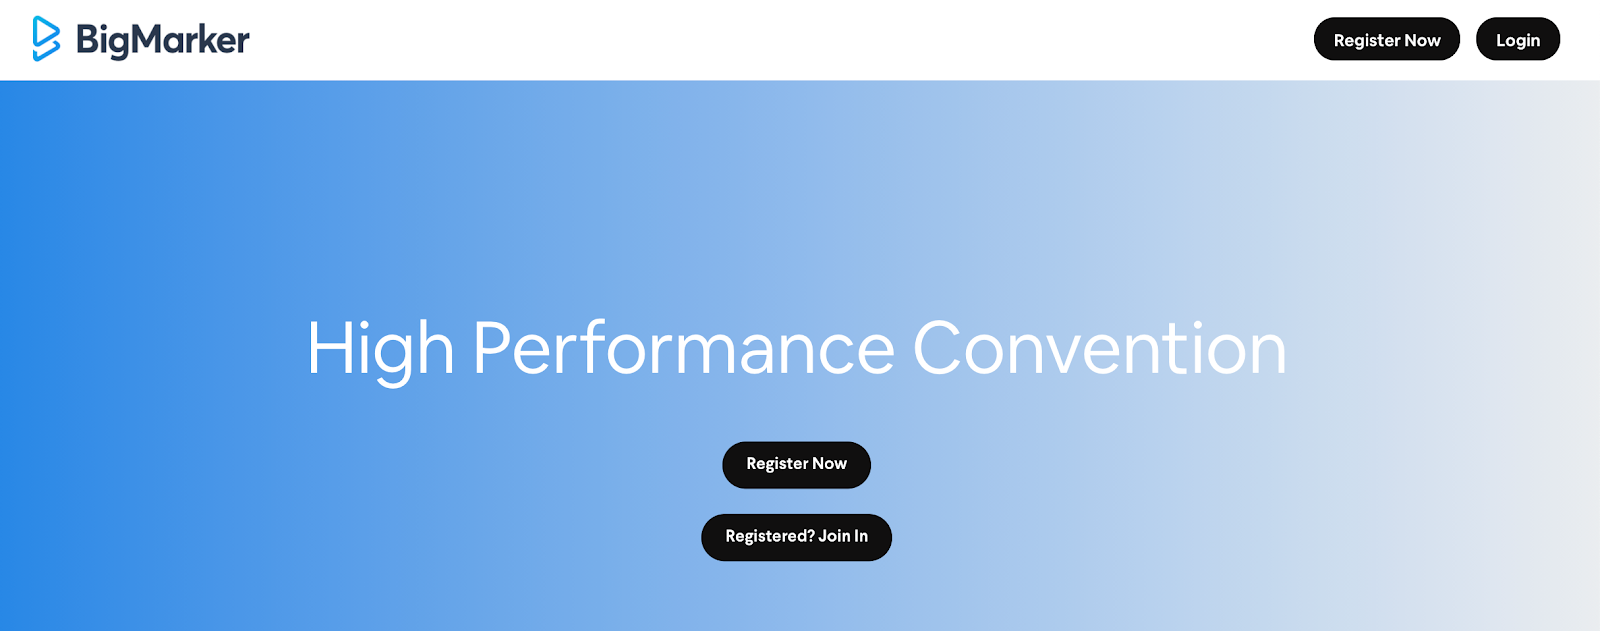
Designing The Title Banner
Once you're set with your banner, return to the main menu of these settings then click on Title Banner. In these settings you'll be able to edit and customize the first thing that your registrants and attendees see.

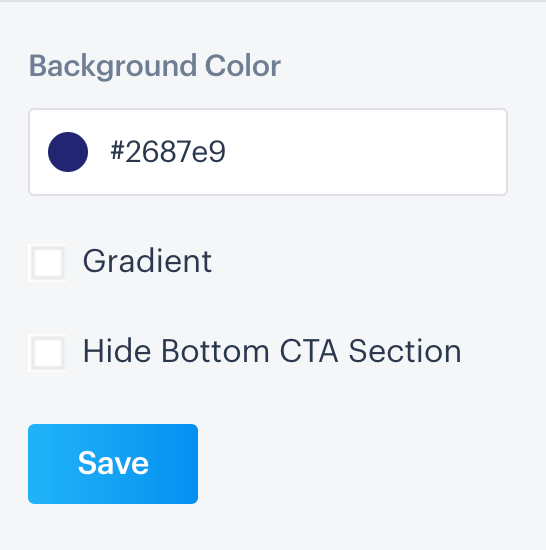
In these settings you can customize the title, teaser, background image and countdown clock. You can also set this section to show your registration and login buttons, as well as use a color gradient instead of an image.
Designing the About section
The about section allows you to add some additional text and image to help describer your event. You'll see these settings as well as the ability to hide the entire section.

Designing the track section
Click on Tracks to add some additional details about what your event is about. Tracks and added individually and can also have an accompanying image.

In the tracks section, click on add track and enter in the title, description and image for each one


Designing the presenter section
Presenters that you have added to the dashboard of this series will automatically populate in this section. If a presenter is marked to be shown on the live page, they will appear in this list. You can add, edit and rearrange all the presenters shown here.


Designing the agenda
For these pages, you'll be able to organize and edit your event agenda. As you create sessions for your event, you will assign them an agenda, then they will appear here for you to manage.
For more details on managing your event agenda click here.

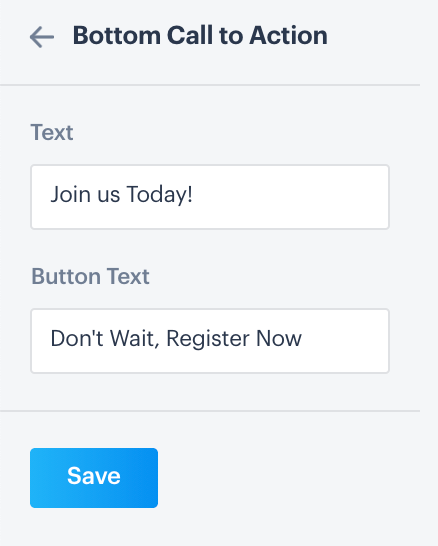
Designing the Bottom Call to Action
In the left hand editor, select Bottom Call to Action. Here, you can enter Call to Action text that will appear on the bottom of your landing page, as well as text for a registration button.
To change the background color displayed here, switch to the Title Banner tab, then change it there.

Change the background color of this section with the picker under Background Color. You can also remove this section from your landing page by checking Hide Bottom CTA section.