Sessions are the backbone of any event, whether it's virtual, in-person or somewhere in-between. Here we'll learn about how to easily create sessions for your event, and the different features available to you that are different from just creating a one-off webinar.
Note: This is only available for channels with an event license. If interested, please contact our Events Experts at sales@bigmarker.com or your customer success manager.
Creating Sessions
Before you start, it's a good idea to create webinar templates for your sessions. Configure the basics such as emails, design of the attendee experience, engagement panel settings, and more on these templates to then be copied into your event sessions
Instead of creating sessions from your home dashboard, you'll first start in the event admin dashboard and then click on Sessions. Click on Add Session to begin

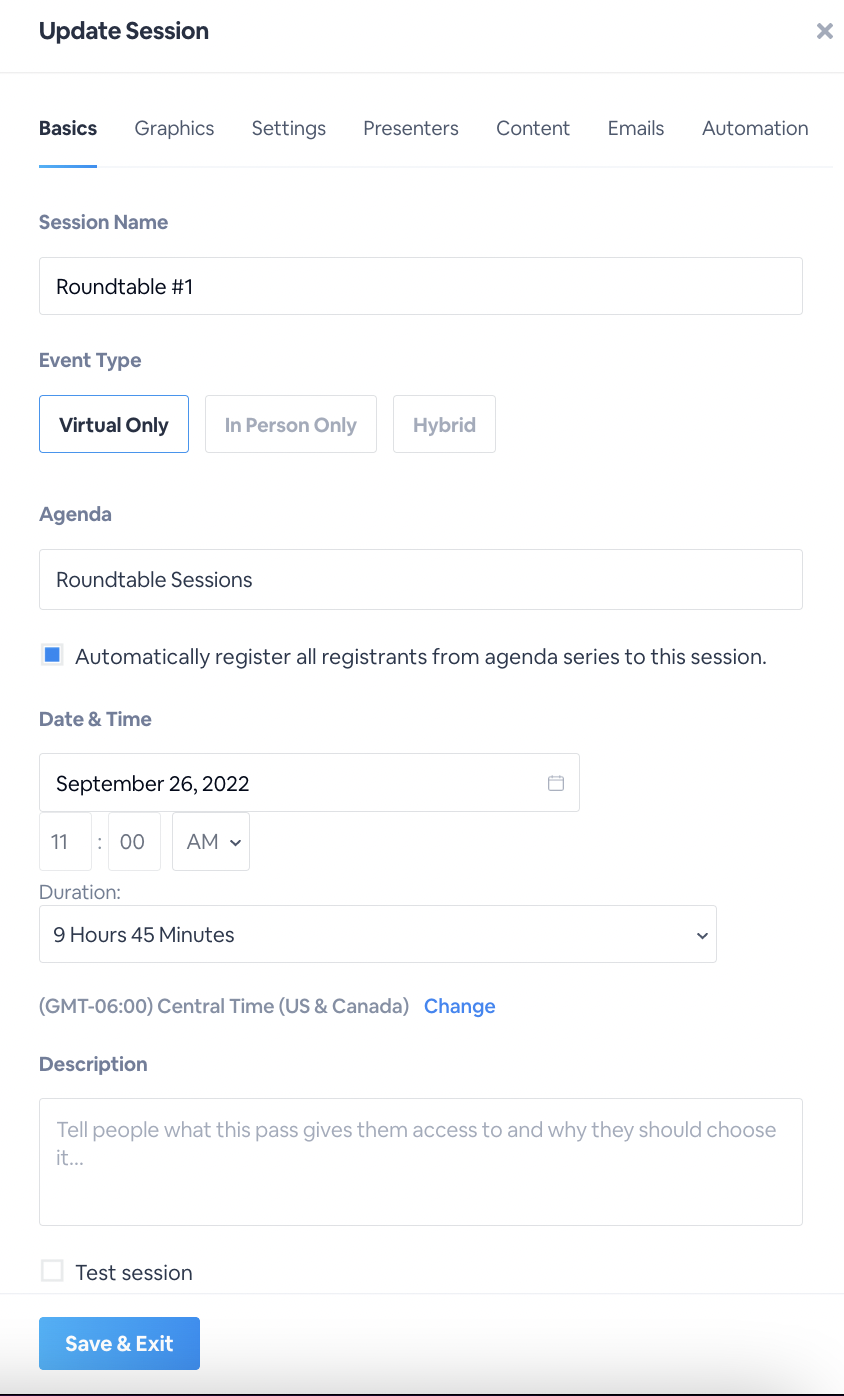
You'll be able to give your session some basic information as well as specify which webinar template to use for creating this session. Aside from these basics, there are a number of settings ere that are important for the event experience:
Selecting whether the session will be virtual, in person only or hybrid
- Virtual Only sessions are for your webcast and interactive streams. Sessions that exist only for attendees who will watch the stream from your event landing pages
- In Person Only will make it so no stream will appear for virtual attendees. You will also specify a room, which is used for the companion app experience.
- Hybrid sessions offer both streaming and compatibility with the event app.

Choosing which agenda your session is a part of
When you create a session, you'll need to specify which agenda it belongs to. In this setting, you'll get a dropdown of all the available event modules that can be used as an agenda.
Choosing an agenda is important for a few reasons
- The session will appear on the landing page of the agenda you choose
- You can include specific agendas in individual ticket passes, then add the sessions to those agendas. This makes it possible so that only certain ticket passes will have access to this session
- The companion app can display specific agendas, and thus you can set this session to show up in the mobile app or not.

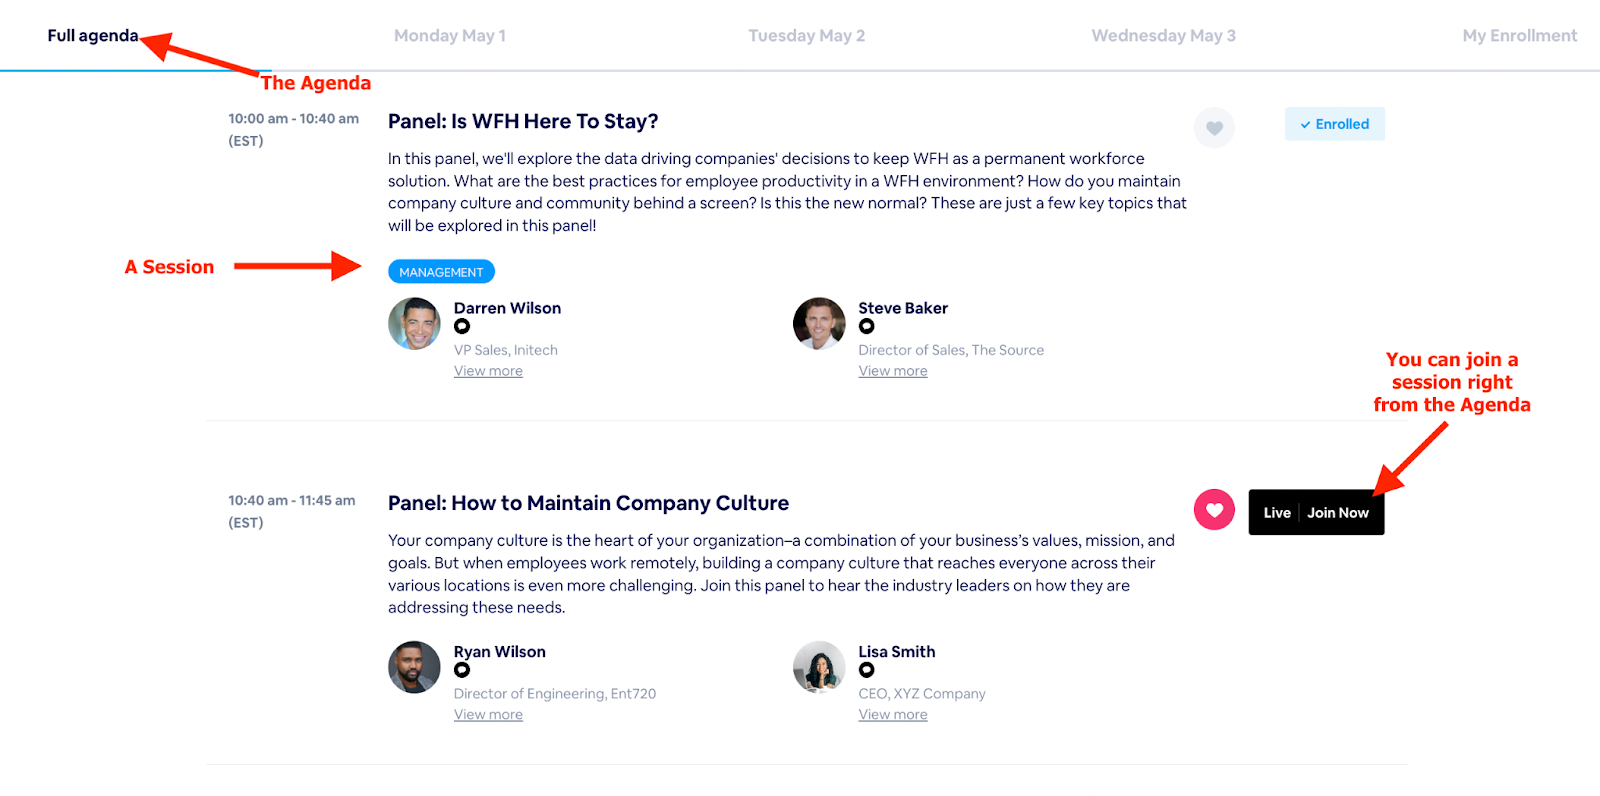
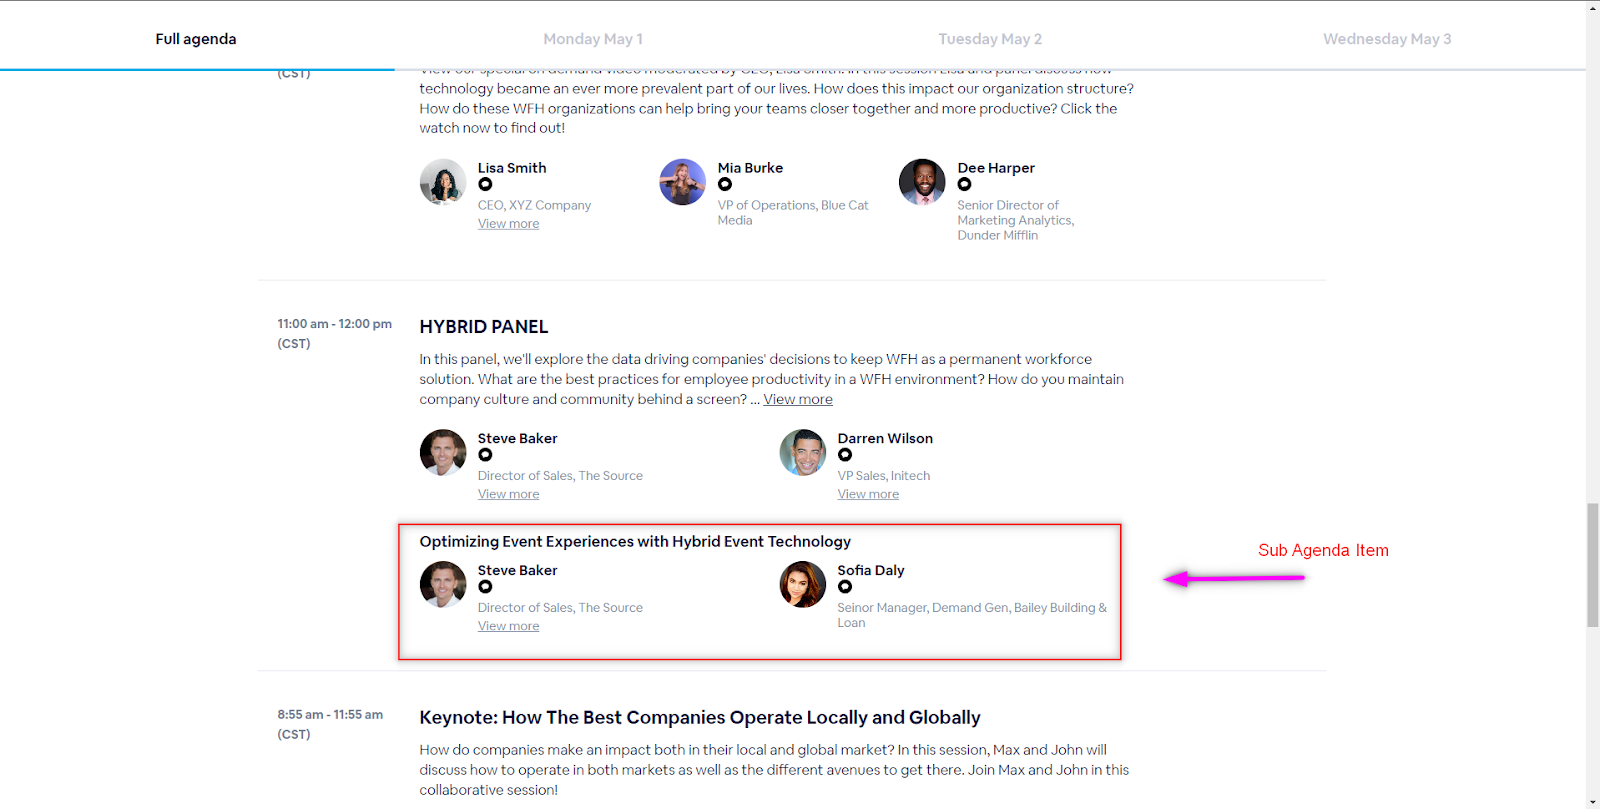
If you are using BigMarker-provided landing pages, you can see how sessions are displayed on these pages below:
Once saved, the session will appear on your Sessions tab where you can manage additional components.

Managing a Session
On the session of choice, click Manage. You'll first see the Basics tab, which is where you can edit any of the original settings created when creating your session
On the Graphics tab, you can include thumbnail images and app banner images for the session that will display on the Companion app. Click edit to upload the file for each image you’d like to display.

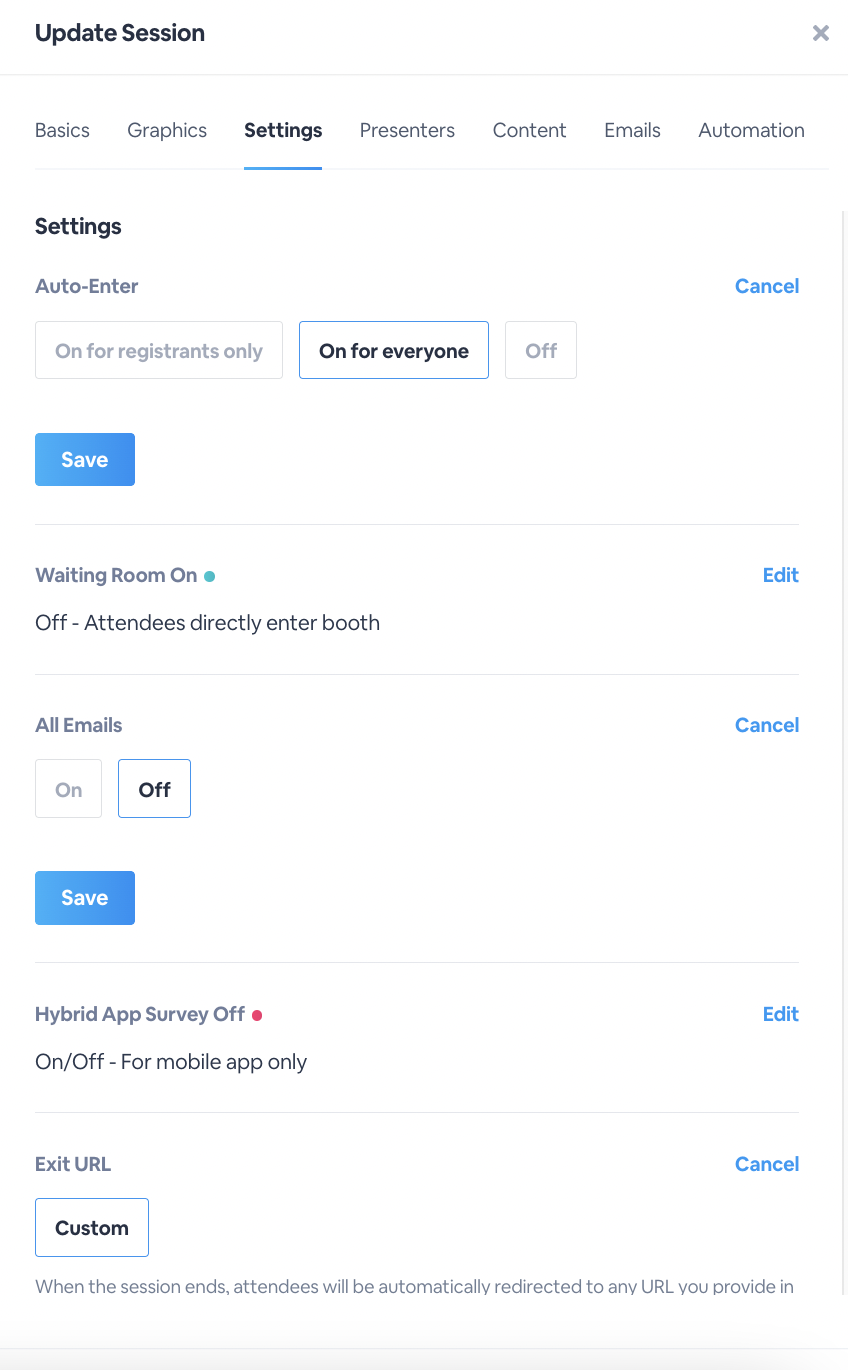
On the Settings tab, you can adjust the settings for each session. Each setting comes with more options to personalize the event. You will need to click Edit to adjust each.
- Auto Enter: Select whether you would like auto enter to be off, on for everyone or only for registrants
- Waiting Room: The waiting room is where attendees will wait before the event begins. This room can have audio or video and gives a preview of your event. Select whether you would like a waiting room for the session. If you would like a waiting room, select when attendees are able to enter it and if it should open automatically to the event.
- Emails: Setting on your emails for the session. If they are on, you can click Customize to be brought to the email backend to add in your customizations
- Exit URL: Customize the exit URL for your session
On the Presenters tab, you will be able to manage the presenters for the session. You can add presenters to the session, email them their personalized URL, copy the link for their personalized URL to manually send them or click Advanced Settings to add new presenters to the session.

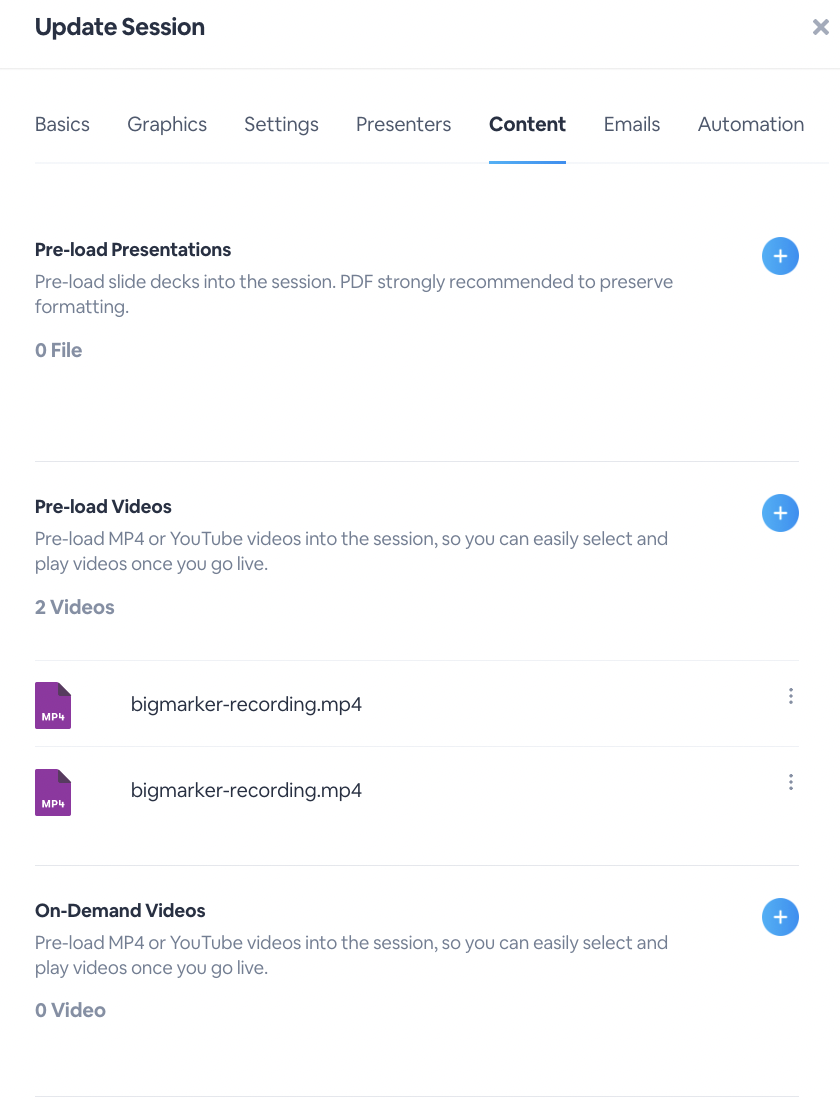
On the Content tab, you will be able to preload your session’s materials, such as handouts, polls, presentations, videos, on-demand videos, and offers. Click the plus icon to add the material into its appropriate section. If you would like any of your content automated, refer to the Automation section below.
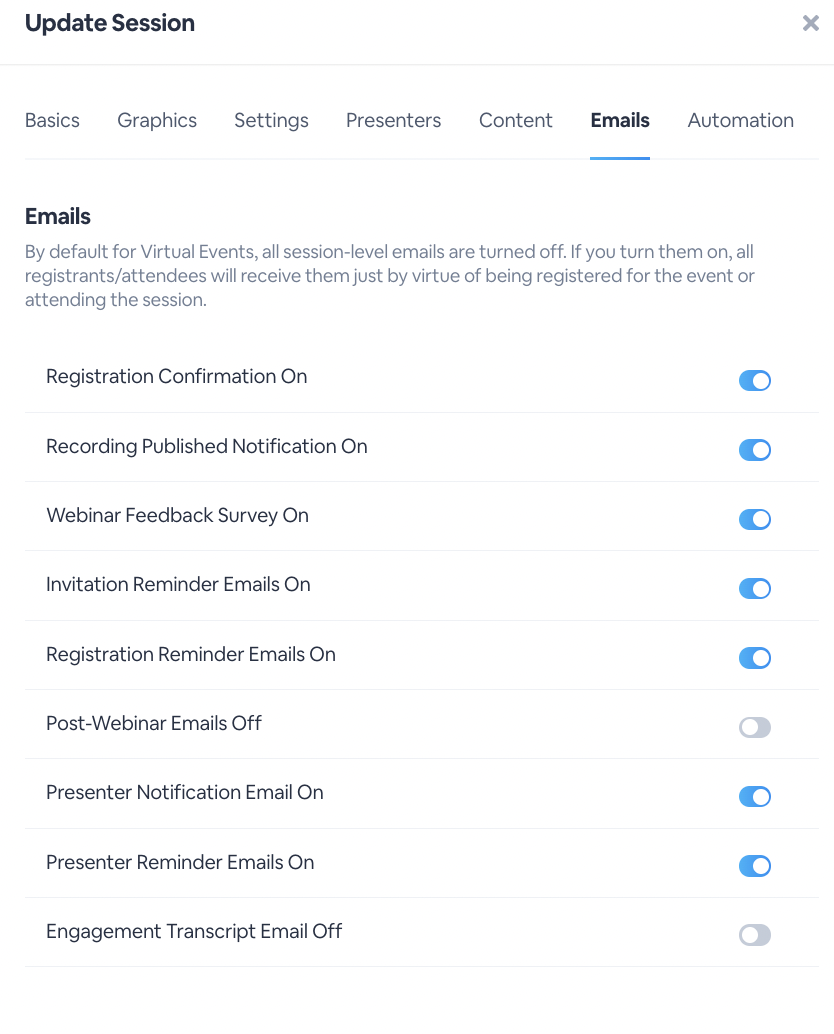
On the Emails tab, you will be able to turn on the emails needed for the session. As mentioned, you can click Customize under the Settings tab to add your customizations for each but you will need to turn them on under this tab. By default, they will all be disabled and you will need to toggle on the ones of choice.
On the Automation tab, manage the automated timeline for your session. Click the plus icon to add automation for the session.
