These feature is only available for Event Packages plan holders. If interested, please contact our Event Experts at sales@bigmarker.com or your customer success manager.
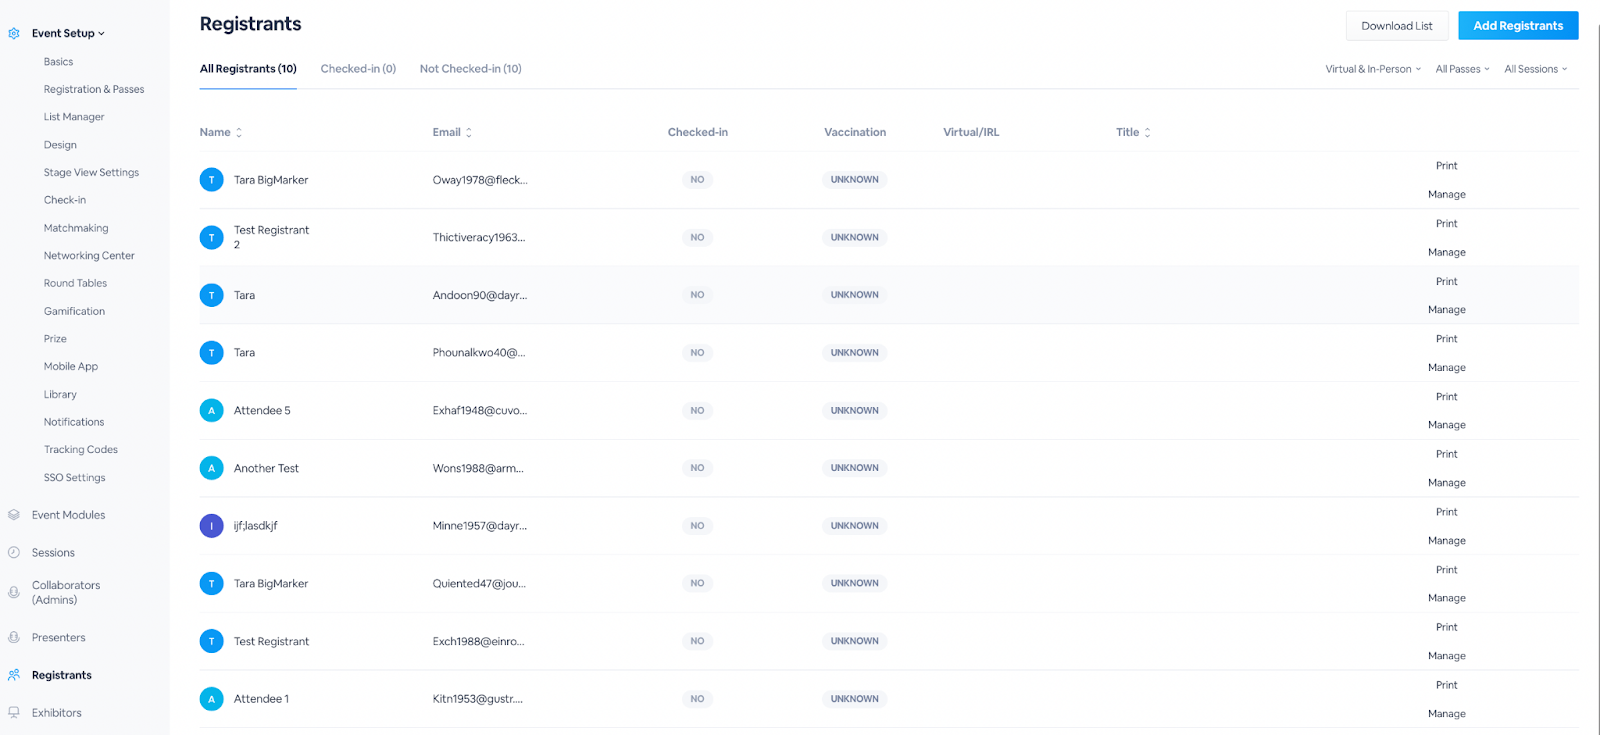
Using the registrants section of the event admin, you can see who registered for your virtual, in-person and hybrid events, their registration date and status, as well as whether they’ve checked in yet. You can also print each attendee’s badge directly from this page, thus streamlining the check-in process.
 How to Reach the Registrant Tab
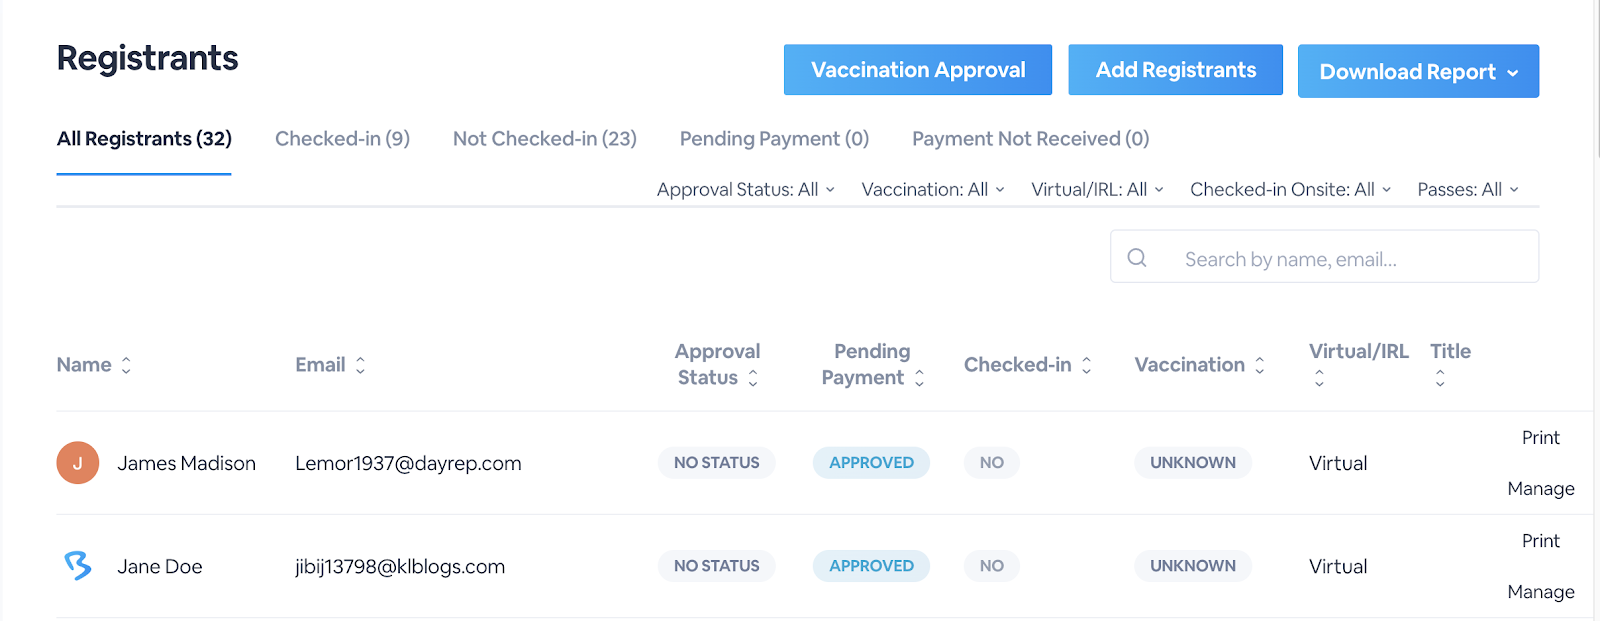
After logging in visit the event admin dashboard for the event you want to manage, then select Registrants from the left-hand navigation. Here all of your registrants will appear in a list, where you can see their name, email address, whether they have checked in yet or not, their vaccination status (if applicable), what type of event they are attending and their title (if applicable).

You can filter by tab (All Registrants, Checked-in, Not Checked-in), or by event, pass or session type.
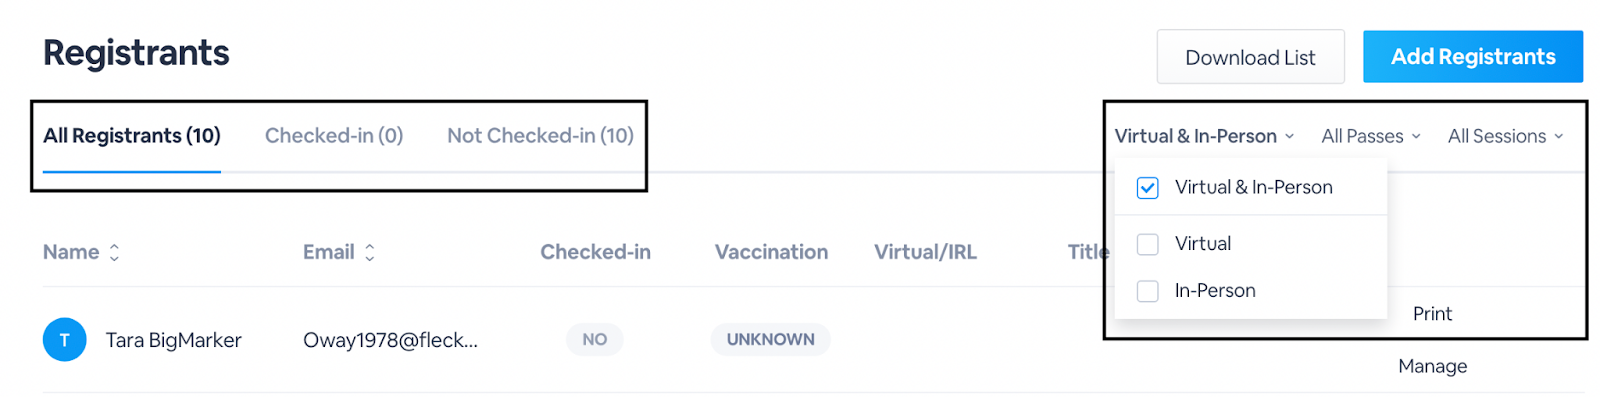
Click on table settings to be able to customize this view. Here you can determine which filtered tabs you see, as well as which columns will populate in the table. You can also add custom views and columns based on the custom registration fields you configured as part of your event.
How can I access individual registrants' profiles or print their access badges?
From this page, you can access individual registrants' profiles, print out their badges for check-in and manage their accounts. In each row for a registrant at the end you'll find four icons:
- The checkmark icon is your one-click way to check that registrant in to your event without using the scanner app.
- The QR Code icon will open up that registrants QR code image in a new tab
- The print icon will print the attendee's badge
- The settings icon to the far right will open up that registrant's profile

Below is an example of a registrant profile. This includes the participant's Pass Types, Preferences & Interests (as indicated via custom registration fields), Sessions, Activity and survey responses.

At the bottom of the slide out window, you can cancel a registrant's registration to your event. Click Cancel Registration to cancel their registration from your entire event. This will cancel their registration for any events they have already enrolled in. This will only cancel their registrant for the event and any attached sessions, their data will still be intact on the event backend.
Adding registrants to your event
To add registrants to your event, click on Add Registrants. You'll have two options, add a single registrant or add multiple registrants. Single registrants will be added manually, while multiple registrants can be added using a CSV, or quickly by just providing a name and email address.

How can I export my registrant list?
To export your registrants, click on Download Report. If you are doing this for the first time, you'll only see an option to create a report. Click that to start the process.
 Once the report is finished processing you will see new options to download the existed report, or to refresh the report. Refreshing the report will create an up-to-date report, so it's important to do this after you get more registrant and attendee data. Downloading the report will always download the more recently processed report

Can I Require Approval for my Registrants?
For registrants who purchase ticket passes for your event, you can customize the ticket pass to be approved or denied before allowing the registrant to continue exploring your virtual event. This will allow you to manage your registrants and ensure those who have completed purchase, or only certain passes, are able to enter your event in your own time.
After you’ve created your pass, and set it so it requires approval, you will be able to view the approval status for the registrant in the Registrant section under the Approval Status column.
While your registrants are waiting for their ticket approval, they will be redirected to a confirmation page, or other location of your choice. Registrants who choose a ticket pass that requires approval will not automatically receive a confirmation email, and they won’t have immediate access to the event. Instead, you will receive an email notifying you of a new ticket purchase that needs to be accepted. This email can be sent to multiple email addresses, which is set up during the creation of your approval process.
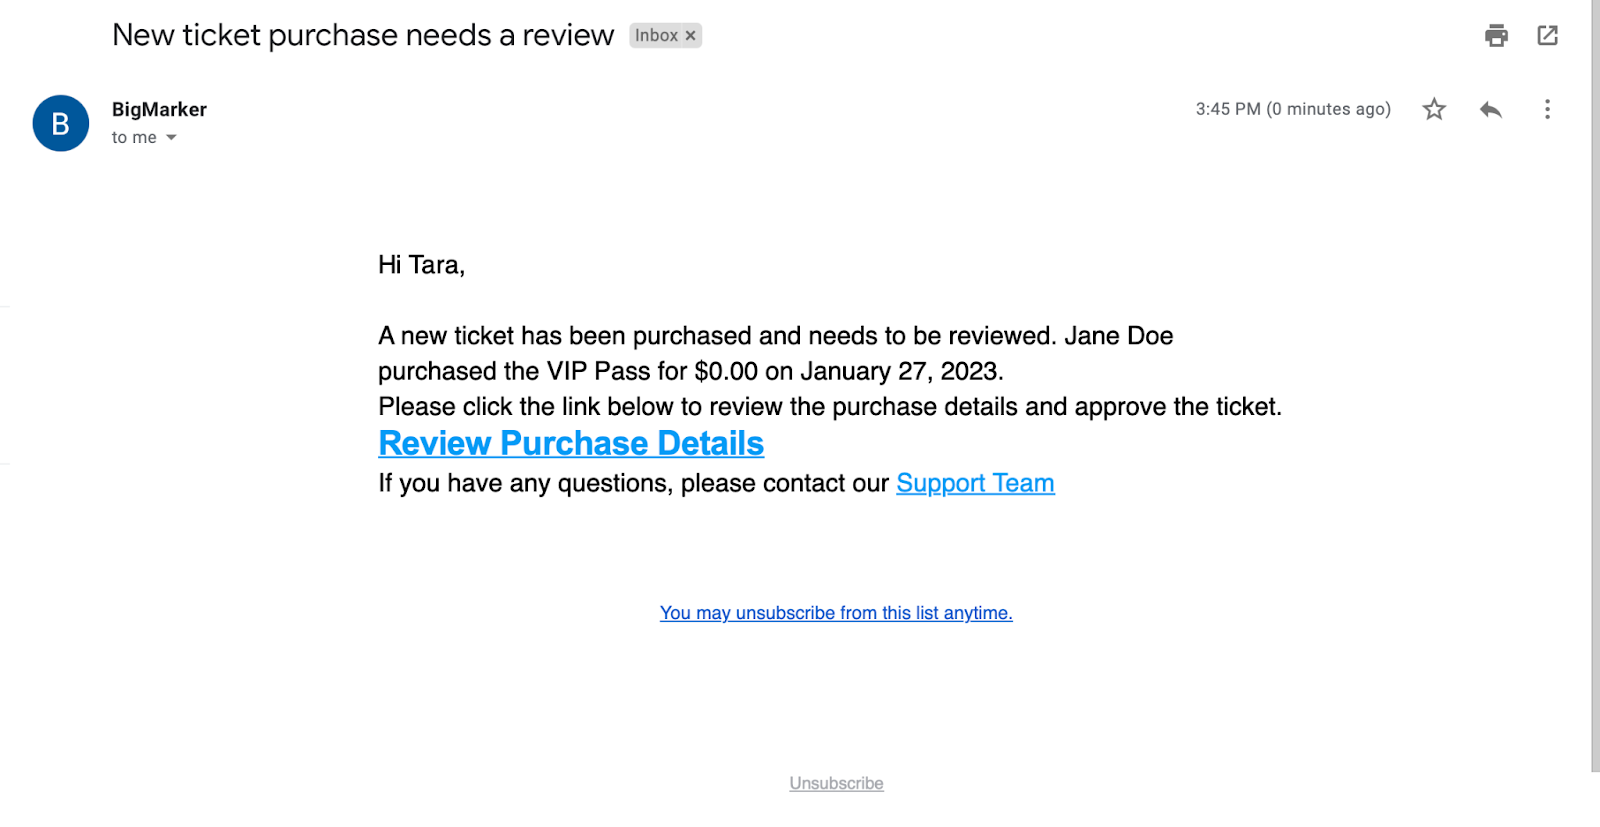
Click Review Purchase Details to be redirected to the Registrant section on your event’s backend. From there, you can click Manage and approve or decline the registration. Watch the video below to see this in live action:
Once a registration is approved, the registrant will be sent the registration confirmation email, and have regular attendee access to the event. If a registrant is denied approval, there is no automatic communication that is sent out, and their registration is canceled.
Another way you can approve registrants to your event is by using the waitlist
How to set up a Pending Approval email for registrants
This email is available to send only if you have a ticket pass that requires approval for your virtual event. Review the section above to set up ticket passes which require approval.
In your Main Series settings, under Emails & Invitations, you'll select Add New Emails under Reminders & Notifications.

Then, you'll select Registration Pending Approval Email from the list of Transactional Email options. This will ensure that everyone registering for your event will be sent an email immediately after registering.

You'll be taken to the email template page where you'll be able to customize the pending approval email to your liking. Remember to Save & Schedule your email when you've finished editing.
Back in your Series Settings, you'll see the option for Registration Pending Approval Email. Toggle this setting ON.

After your registrants have submitted their registration information, they will see a registration confirmation page that may look something like the below image:

Registrants will then receive a Pending Approval email to their selected email address. In order to approve your registrants, you'll go into Event Setup and click Registrants in the left hand navigation menu. From here you'll be able to see all your registrants and their approval status. To approve a registrant's status, select Manage on the far right side of their line item, approve them and click to Save. 
Once they've been approved, they will receive a Registration Confirmation email.
NOTE: The Pending Approval email is a single email that applies to your entire event. If you have multiple ticket passes that require approval, the same Pending Approval email will be sent to each ticket pass.