When you can only offer a limited number of seats to your event or webinar, you don't want new guests to feel left out, and you want to still capture their information. With waitlists, you can give those late registrants a chance to attend, capture their full registration information, and send them unique communications throughout the process.
Note: This feature is only available for Enterprise plan holders. Please contact our Sales team at Sales@bigmarker.com to learn more.
Waitlist is now available for webinars and non-event series with custom pages. Click here for more details.
Contents:
- Enabling a waitlist for your event
- Waitlist for individual session and series
- How can I manage my waitlist registrants on my webinar or series?
Enabling a waitlist for your event
Here’s how to set up the waitlist for your next event:
Create a Pass on the Event level of your event backend. Under Event Setup, select Registration & Passes. Select Regular Pass, then, New Regular Pass.

In order to activate the waitlist for your event, the passes need to be free (price of $0), and the total number of passes should be limited. Once you’ve edited these two fields, you’ll see that you can now enable the waitlist toggle to the ON position.
Input the rest of your Pass details: Name, Description and whether you’d like the price displayed on the ticket.
You’ll also input the pass limit next to Total number of passes available. For this example, you’ll see 200 passes as the limit. Any registration passed 200 will automatically be waitlisted.
If an attendee has been added to the waitlist during registration, they will receive a notification after confirming their registration that lets them know they’ve been added to the waitlist and their acceptance is pending. They will receive a registration confirmation email if their registration has been confirmed.
Additionally, you can notify event hosts and administrators about waitlist activity. The emails you have input, separated by commas, will be notified when the waitlist has been activated and attendees join.

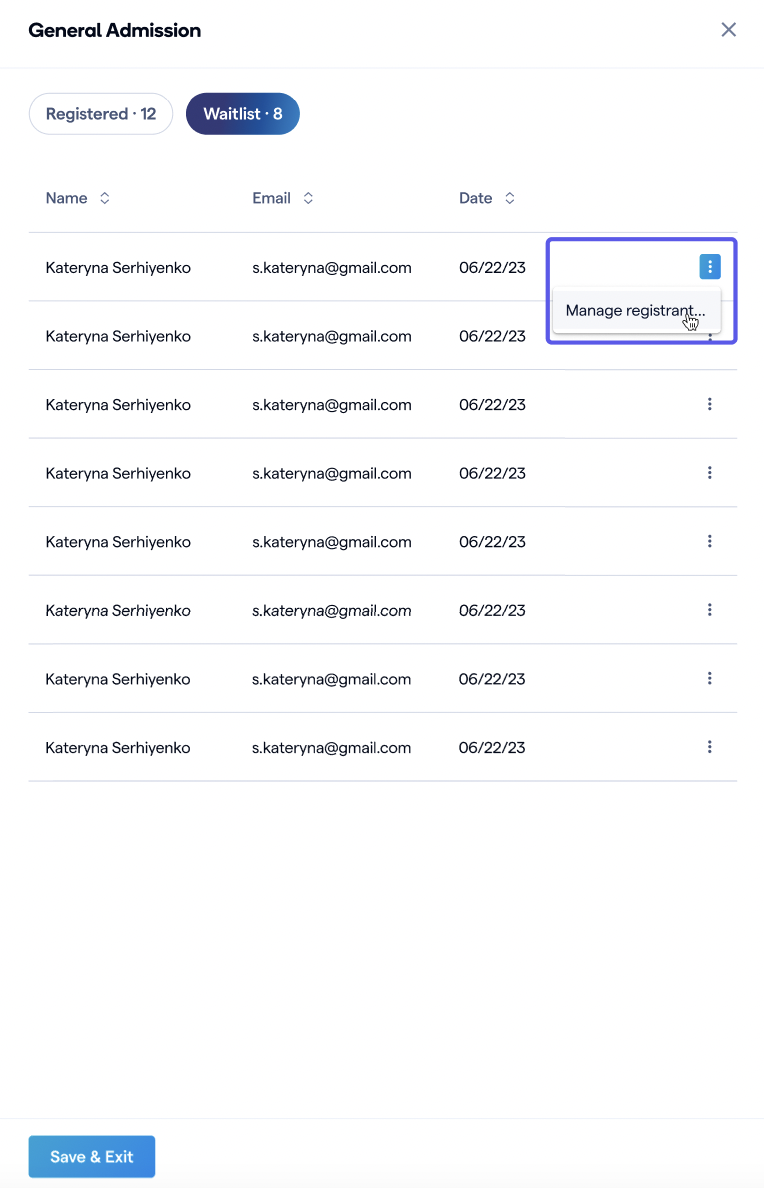
Once registration has been activated and attendees start registering for your event, you’ll be able to track those registrations at the event level under Registration & Passes. Here, you can see that 12 individuals have been successfully registered, and 8 have been waitlisted. To view and manage your waitlist, select View Waitlist beneath your waitlisted counter.

In order to view or manage your waitlisted registrants, select the three dots on the right, beside the registrant’s name, and click Manage Registrant.
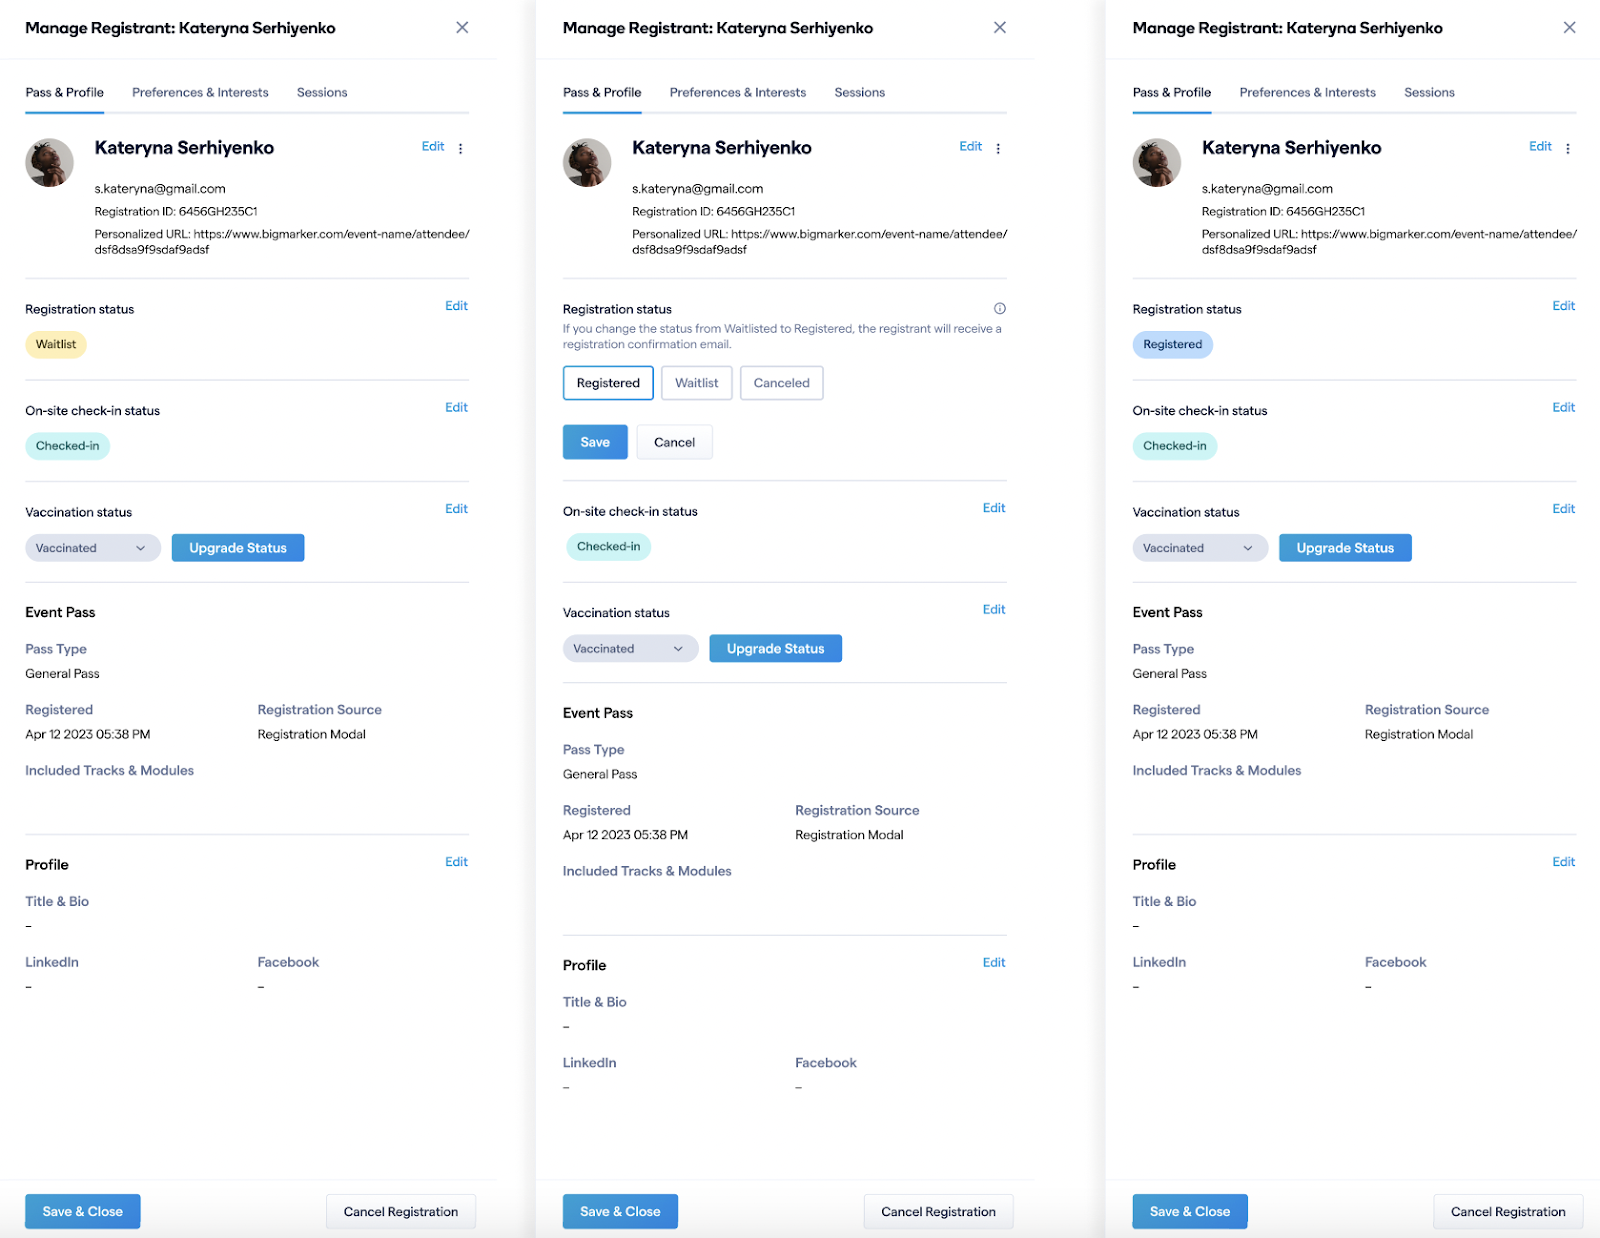
From here, you can view and manage the details of the registrant, including moving them from the waitlist and into registered attendee status. Simply click Edit next to Registration Status and select either Registered or Canceled as their new status. Then, Save. You can also cancel the attendee’s registration completely by selecting Cancel Registration at the bottom of the profile.
Once you confirm someone from the waitlist, their registration will be complete, and they will receive the ticket pass. If you included any series in the ticket pass, approving someone off the waitlist will automatically register them for those series.
The attendee will be notified of their change in status via email, and you will be able to see the change in their status back on your pass preview page. There are 3 email types available:
- Waitlist Pending - This email is sent to the registrant immediately after registering for the waitlist
- Waitlist Confirmation - This email is sent to users who are approved off of the waitlist
- Important: This email replaces the Registration Confirmation email from the webinar or main series. However, for any series that are included in a ticket pass, users will receive those registration confirmation emails as well.
- Waitlist Denied - This email is sent to users who are denied from the waitlist
For BigMarker events, these emails are always sent from the Main Series.

Waitlist is now available for webinars and series
Waitlist are available outside of events as well. For an individual session or series, here's what you need to do to have the waitlist available:
- You must first set a custom registration capacity in the webinar size settings in Basic Setup > Capacity
- Similar to the event waiting list, users can receive unique emails when signing up for a waitlist
- For webinars and series, you can also automatically register people from the waitlist as space opens up
- Registrants of webinars and series who get on the waitlist will see the same confirmation page as regular registrants. In order to personalize this experience, speak to the BigMarker team about using a custom confirmation page

How can I manage my waitlist registrants on my webinar or series?
In the Audience > Overview page of the session admin, you'll see some additional tabs for waitlisted registrants: Waitlisted and Waitlist Denied. Click on either option to see that list of registrants.

From here, click on a registrant and click on Session Log. Scroll to thee bottom of those details to see the waitlist options. Click Approve Registration to bring them out of the waitlist and put them into the regular registration list.
