How to Create Your Virtual Event's Networking Center

Learn how to create your Virtual Event's Networking Center

New as of 11/16/2022: Add a timer to Speed Networking and set your speed networking so attendees can network with more new attendees inside the room than with their current connections.
Note: This feature is available for Event Package plan holders. If interested, please contact our Event Experts at sales@bigmarker.com


To create your event’s Networking Center, first create a series for your virtual event as a whole (click here to learn how to create your virtual event). 

Once you’ve created your virtual event, you will proceed to its Basic Setup dashboard, where you will configure key settings for your event. On the left-hand tab of this page, select Networking Center. This is where you will create and manage settings for your Networking Center. 


Screenshot 2022-12-22 at 11.54.30 AM

The Networking Center Modules 

The Networking Center page lists all of the modules, tabs and activities available in your event’s Networking Center. On the Modules tab of this page, you can enable or disable each module, customize them, and reorder their arrangement in your event’s Networking Center as needed. 

Screenshot 2022-12-22 at 11.57.08 AM

You can also enable and disable the modules on the Event Modules page at the bottom and easily access the backend settings to each module. 

Screen Shot 2022-05-27 at 12.51.08 PM

What modules are available in my Networking Center? 

The People module lists event attendees and their Virtual Business Cards. Attendees can use the search filter to identify attendees, "favorite" them to connect with at a later date, and contact and book appointments with them.

Screen Shot 2022-03-22 at 8.28.41 PM

Click the <- in the top left hand corner to return to the other modules. 


The My Network module shows the attendee who is included in their network (i.e., people that they have marked as Favorites Contacts, booked meetings with, etc.). In the left-hand menu, you can change the tab’s title and choose whether it will appear on the left hand side, vertically.  


Screen Shot 2022-03-22 at 8.29.48 PM


In the Speed Networking module, attendees can conduct short speed networking sessions with other attendees. Once matched, participants can conduct video or text chats with one another — and schedule additional time if desired. 

On the left-hand menu of this page, you can customize the following: 

  • Speed Networking Tab Name 
  • Speed Networking Title: This is the title that appears at the top of the page. 
  • Speed Networking Announcement: This is the subheading that appears just under the title. 
  • Speed Networking detail instructions: This is the body copy that appears on the center of the page. Here, tell your attendees how your speed networking session will work, as well as key instructions, like how long each speed networking session will last. (If you do not add text, the default text will appear. You can also disable the Speed Networking page and change the text if desired.) 


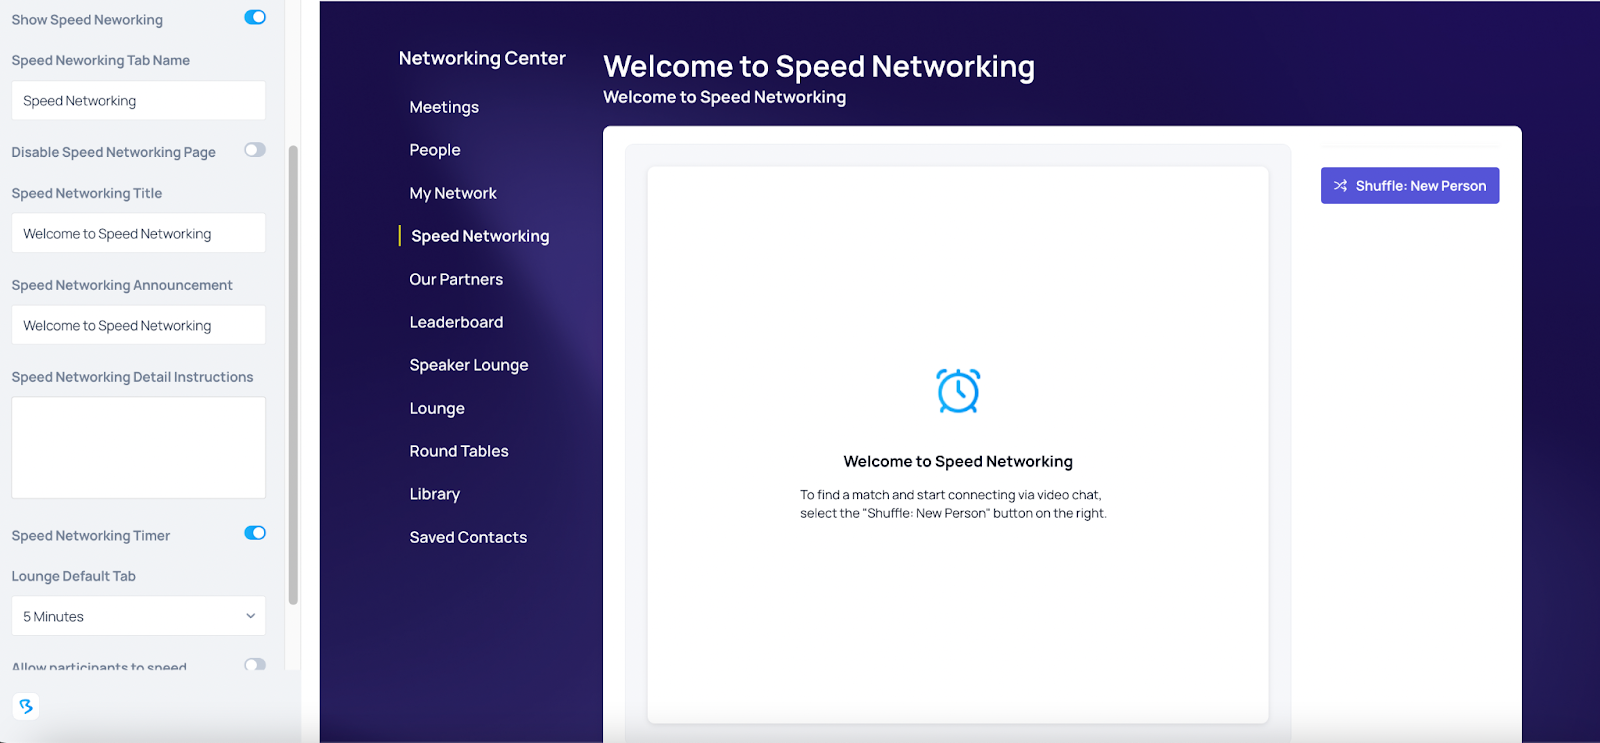
Watch the video below to see this in live action: 


Now, set a timer for your Speed Networking, so you can set the pace of networking amongst each other. When setting a timer, the time will be consistent for all networkers participating. You can customize the time using the dropdown menu.  


While speed networking, participants do have the opportunity to extend their time with one another when there is a minute left. However, if one person does not extend their time, they will get reshuffled to another participant. Watch to see this below in speed networking within our Round Tables: 


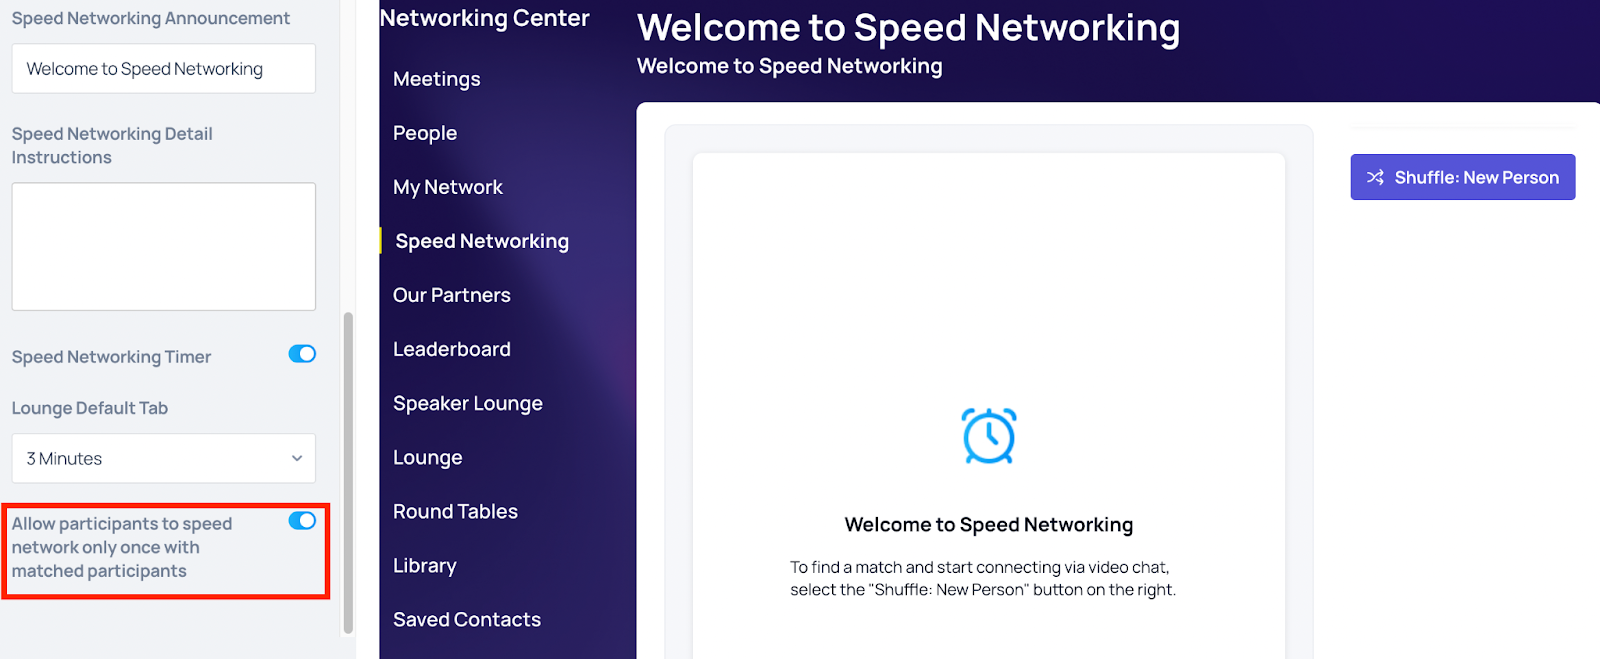
Lastly, if you are hosting a larger event, you can opt to have participants only match once with their connections present in the room, allowing them to talk and connect with more people who they have not connected with yet. To do this, enable  Allow participants to speed network only once with matched participants. 


The Prize Packs module is where gamification takes place. Gamification is a series of challenges in which participants engage in desired engagement behaviors (visiting exhibitor booths, submitting Q&A questions, etc.) to earn points, with the goal of winning “prize packs” of sponsor and exhibitor products upon hitting a specified point total. 

On the left-hand menu of this page, you can customize the:

  • Prize Packs Tab Name 
  • Prize Packs Rules and Description: Here, you can create different prizes, each with their own sets of requirements and descriptions (Several examples are shown below). Post them either at the top and bottom of the page.) 

Screen Shot 2022-03-22 at 8.30.44 PM


The Our Partners tab lists the event’s exhibitors and enables attendees to visit their booth and/or book meetings with them. This allows attendees to reach out to your exhibitors without having to visit the Expo Hall, while giving event partners more touch points to meet new prospects. On the left-hand menu of this page, you can change the tab name if desired. 


Screen Shot 2022-03-22 at 8.31.25 PM


The Leaderboard module lists the highest-earning point getters in your event’s gamification challenge. 

On the left-hand menu of this page, you can do the following: 

  • Include additional registrants from: You can add additional lists of registrants to your gamification challenge, using the provided dropdown menu. This menu will pre-populate with past series from your BigMarker channel. So if you want to add exhibitors to your gamification challenge, select series associated with your Expo Hall from this list. 
  • Removed registrants: You can remove individual registrants from your gamification challenge (like a channel admin) using the provided dropdown menu. 
  • Removed registrant lists: You can remove full lists of registrants from previous series from your gamification challenge using the provided dropdown menu. This list will pre-populate with all of the series associated with your BigMarker channel. So if you want to limit gamification to new attendees, you can select the names of your previous events from this list to block past attendees from your gamification challenge. 
  • Fields to show in leaderboard: Choose the fields you’d like to display in your leaderboard.. 

In this menu, you can also change the tab name, list size and allow registrants to opt out of the leaderboard

Screen Shot 2022-03-22 at 8.32.09 PM

The Speaker Lounge module is an exclusive backstage area for Speakers, Editorial Staff and VIP Pass Holders. Here, a centralized location for those participants to network among themselves.
On the left-hand menu of this page, you can customize the Tab Name, the Speaker Lounge picture, the Label tag, Lounge Title, the Description, and Button Text and Button Link


Screen Shot 2022-03-22 at 3.57.09 PM

The Lounge is a public chat room where attendees can engage in group and one on one text chats and conduct 1:1 video calls with one another. 

On the left-hand menu of this page, you can customize the: 

  • Lounge Tab Name
  • Chat Bubble Background Color, Chat Bubble Icon Background Color and Chat Bubble Notification Color: Attendees receive notifications of new chat messages via a bubble icon. Here, you can customize the colors of that icon. 

Additionally, you have the option to show attendee’s Business Tinder, View Connection, enable on 1 to 1 video chat in lounge, show lounge chat bubbles in the lower right in series page and associate the lounge with a series

Showing the Business Tinder is a component of Speed Networking, similar to a quick profile other attendees can view. Additionally, when View Connection is enabled on, attendees can see shared connections between other attendees. 

You can also disable private chats in the Lounge and disable the chat room.  

Screen Shot 2022-03-22 at 4.59.17 PM


In the Round Table module, attendees can join round table discussions with speakers and other attendees. On the left-hand menu of this page, you can customize the Round Tables Tab Name, as well as the title and description for each individual Round Table. 

Screen Shot 2022-03-22 at 8.33.11 PM


The Library module houses additional on-demand content, articles, podcast episodes and more. Here, you can link external websites through content or images that attendees can click on and be redirected to external resources. 

On the left-hand side of this menu, you can change the Library Page Tab Name


Screen Shot 2022-03-22 at 8.33.48 PM

In the My Profile module, attendees can view their own profile. They can check Show my profile in networking to make it visible to other attendees on the People tab of the Networking Center. 

Additionally, you can change the tab name and enable or disable registrants from uploading their own profile image.


Screen Shot 2022-03-22 at 5.31.45 PM

The Saved Contacts module lists all of these contacts, so attendees can find and follow up with them during or after the event. 

On the left-hand menu of this page, you can customize the tab name if desired. 


Screen Shot 2022-03-22 at 8.35.06 PM

The Experiences module hosts extracurricular enrichment and experiential opportunities for your attendees. You can embed an iframe into the Experiences and External 2 and 3 pages for attendees to view, or include a separate URL to redirect attendees to other destinations within your Virtual Event or external sites. 

On the left-hand menu of this page, you can customize the include: Experiences Page Tab Name, Title and description. You can also include an iframe by entering custom code in the iFrame Code box. 

Screen Shot 2022-03-22 at 5.36.18 PM

In the External 2 and External 3 modules, you can create additional experiences for attendees. These modules have the same customizations as well. 

Screen Shot 2022-03-22 at 5.38.55 PM

In the Social module, you can add social media posts onto a social wall for all attendees to see. 

Screen Shot 2022-03-22 at 8.36.58 PM

On the left-hand menu of this page, you can: 

    • Social Title: Change the title of the page 
    • Add Social Media Posts to the wall: Add a new post to the social wall by completing these subsequent fields. 
    • Title: Add a title to your post 
    • Social Media Post Embed Code: Copy and paste the embed code for your post in the provided text box. 

In the Theme Settings module, you can apply design choices to your entire Networking Center at once. You can change the Networking Center Menu Color in the color picker below. 

Screen Shot 2022-03-22 at 8.36.09 PM

On each module’s tab, you are able to go in and turn on/off the availability for each module.  

Click Save in the top right hand corner to complete. You can also click Preview to preview changes before saving. 

How can I manage permissions for my Networking Center? 

On the Networking Center page, select the Settings tab. Use the provided dropdown menus to grant access to the Networking Center as a whole, as well as the Lounge and the Expo Hall. (These menus will be pre-populated with speakers, sponsors and admins that have already been added to your virtual event.)

Screen Shot 2022-03-22 at 2.19.55 PM


How can I design and customize my Networking Center? 

Go to the Networking Center page and select Open Designer

Screen Shot 2022-03-28 at 12.18.34 PM

From there, you’ll proceed to a preview of your Networking Center, along with a design editor on the left-hand side of the page. In this tab, you can edit and customize the Networking, Speaker Badge, Sponsor Badge, and Additional Presenters and Hide Registrants sections of your Networking Center.

Design options to customize include: Networking Center Title, People Tab Title, Networking Center Text Color, Networking Center Logo, Showing the Speaker/Sponsor badges, Speaker/Sponsor Badge Titles, Showing the Speaker Title/Bio, Showing additional Presenters from an associated Series and not showing Registrants from an associated series. 


Additionally, you can customize what displays on the Networking Center. This includes the following:

  • Use New Style Networking and Show Connect Button: syncs the  networking style with the connect button on the Networking Center main page.
    • In the subsequent prompt, specify the badge height in pixels. 
  • Merge Attendees, Presenters and Sponsors: Choose whether to include attendees, presenter and sponsor profiles together in the Networking Center
  • Allow Opt Out Networking Center: Choose whether to allow attendees to opt out of the Networking Center
  • Only Show Business Card…: Choose whether to show virtual business cards only for attendees who completed check-in. 
  • Replace parent field in business card: Found on your custom registration fields, you can elect to have  your dependent field populate on your attendee's business card rather than their individual answers. This only applies when using a dependent field in your custom registration field.

Screen Shot 2022-11-03 at 3.13.11 PM

How Can Attendees Share a Virtual Business Card with Other Attendees? 

When participants complete their Virtual Business Card, they’ll be prompted to share their contact information and/or social media profiles with other attendees to encourage follow up. On the Main Series dashboard, go to the Edit tab and use the checklist below to decide whether you will ask participants to share their email address and links to their LinkedIn, Twitter, Calendly and Instagram accounts. 


Screen Shot 2022-03-25 at 2.49.22 PM


Can Attendees View Other Attendee’s Files on their Virtual Business Card? 

Yes! If a custom registration field is a “file upload” type, you can toggle on a setting to enable attendees seeing other attendee’s files on their Virtual Business Card. Create the custom registration file, and enable ON Show response in business card (Used in Networking Center). Now, attendees can opt to view other attendee’s files on their business cards.


An example of a virtual business card: