Previously, Event Producers would have to build out each session manually for virtual, hybrid or in-person events or webinars. Now, you’re able to do it all at once. And, if there are bulk changes that need to be made, the Agenda Uploader Tool allows you to simply upload one document with the changes and saves you from editing session by session.
Agendas are only available to channels with the event license enabled. Contact sales@bigmarker.com or your Customer Success Manager to learn more.
This tool is not available by default and must be activated on your channel by a BigMarker Customer Success Manager.
Download the template spreadsheet
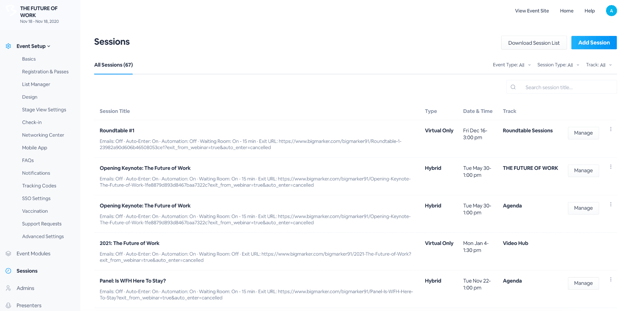
From the Event Admin, visit the Sessions page and click Download Session List from the top right corner.

An .xlsx file will download, with at least the first two rows filled out with information. If you’ve already created sessions, you’ll notice that those sessions will be in the subsequent rows.
In the examples below, you’ll see similar information, and you’ll also see that the columns are formatted with the information they need in order to upload sessions.
![]()


Add sessions to the template to upload to BigMarker
If you are planning to build your event’s agenda by uploading a list, you’ll need to add the specific information of each session, each under a different column:
- Active/Ignore: Use “Ignore” for rows to ignore when uploading, and “Active” for rows to include when uploading.
- Session ID: Unique identifier of a series session. Leave this blank in order to create a new session from this row.
- Webinar ID: Unique identifier of a webinar. Leave this blank in order to create a new session from this row. If this is a webinar ID that already exists, that session could be updated with whatever information in this row.
- Session Title: Must be in in UTC 24-hour format (YYYY-MM-DD HH:MM:SS)
- Session Description - Best to use plain text here, not formatting or HTML styling.
- Event Type: Virtual Only, In-person Only, or Hybrid
- Webinar Type: Live or On Demand
- Webinar Template ID: The Webinar ID of Webinar Template to copy during creation (leave blank to create default webinar). You can find the Webinar ID at the top of the webinar dashboard.
- Agenda Series ID: ID of agenda series this session to which this session belongs
- Session Duration: Session duration in minutes
- Presenter Emails: Comma-separated list of presenters' emails. Presenters need to be added to your event before they are included in this sheet
- Registration Check Series: Comma-separated list of series' Webinar ID's. Those series will be included in the registration check
The last 3 fields should never be edited: Webinar Manage Link, Webinar Share Link, and Session Exit URL. These fields will populate with new URLs for the sessions you create.
Uploading your spreadsheet
Now that you’ve completed your spreadsheet file with all the information for your sessions, you’ll upload the .CSV back into BigMarker by clicking on the blue Add Session button at the top right side of the page.

You’ll select Create/Update Sessions from .CSV or Excel File, then click the Upload button to select your desired Excel or .CSV file from your computer. Once you’ve uploaded your file, Save & Exit.
If you have a larger file that you’re uploading, the uploader can take some time to process and create all of the sessions. A couple of minutes is not uncommon for a large list.

You’ll see now that your sessions have been uploaded into your BigMarker Event via the Agenda Uploader.
Tip: if you have updates to your agenda, you can re-upload an updated .CSV and the new version will overwrite your previous one.