Still using the classic admin? Click here to learn where you can find the registrant settings
For any session, series or event on BigMarker, you can manually add registrants and attendees. Whether you have a one-off registration to add, or a whole list to your invite-only webinar, it's simple to do.
First visit the session admin or classic dashboard and go to Audience > Overview or the Manage Registrations section. Here is where you see a list of existing registrations and have the ability to add new registrations.

Adding Registrants to your Event
You can add your registrants into your event two ways: adding registrants individually and manually or by uploading a CSV file of your registration list. Start off by clicking Add Registrants, where the popup image below will populate.
When you add registrants from the dashboard, no restrictions will be in place. Any allow/block lists, required registration fields, or webinar capacity settings will be ignored.
For Manual Registration: Add their first name, last name and email address. Click add more... to add more fields for registrants or click Add Registrants when you're done. Note that when you do this method, only name and email address will be entered. If you want to add more details to registrations, it will have to be done once they're added.
For CSV/Excel File Registration: Click Upload CSV file and select and upload the file that holds all your registrants. In your spreadsheet, you'll want to have the different registration fields split up into different columns. Name and email address will be required fields when you upload a CSV list:

When you upload a CSV file, you'll be prompted to map the spreadsheet to the registration fields of your page. Each column can be mapped to an individual registration field. Once mapped, clicking Add Registrants will add all registrations from the list.

After adding your registrants to your event, you are able to view and manage them. On any part of the row to view the details for that registrant.
anywhere in the row of an individual registrant. Doing so will open up a side-sheet where you can view the details for that registrant and edit their details. Scroll down & click on either About Registrant or Custom Fields to update the details for that registrant.

- Overview is where you can view and edit all registration fields for this registrant. You can also cancel or delete a registrant here
- Personalization is where you can find the results of your AI fields
- Session log will give a breakdown of the registrant's activities in the live session a well as certificate and survey information. You can also resend the confirmation email from here
- Advanced will give you some additional metadata regarding the registrant
After a registrant has registered, they will be taken to your event's confirmation page and receive a registration confirmation email.
FAQs:
How many people can register to my event?
-
Free sessions can have unlimited registrants. There is no limit on the number of people who can REGISTER for your webinar, but there is a limit on the amount of people who can ATTEND your webinar if you are hosting a free session. The number of attendees (or "seats in your session") and how many tickets you can sell for your event is based on the BigMarker plan you chose.
Regular users will not be able to register past the number of seats you have in your webinar room once you enable payments for your webinar.
Is it possible to collect registrations on my own website?
- Yes! You have three ways of doing this:
- Widgets: Through our registration widget you can use to embed registration on your website. Edit/set-up your widget and get the embed code to embed onto your website.
- Integrations: You can import registration data to BigMarker. Ready-to-go integrations include: ActiveCampaign, Authorize.net, Calendly, Constant Contact, Dropbox, Drip, Eloqua, Google Analytics, HubSpot, Infusionsoft, Instapage, MailChimp, MailerLite, Mandrill, Marketo, Moosend, Salesforce, Thinkific, ThriveCart, Unbouce, Webhooks, and Zapier.
- API: You can build your own custom registration form on your own website, then pass the registration data back to BigMarker using our APIs. View our API documentation here.
When do registrants receive emails on registration confirmation and event reminders?
- Manually added registrants will immediately recieve the registration confirmation email, just as if they registered on your landing page. They'll get any additional reminders on the same schedule as all other registrants. Learn more about emails from BigMarker here.
How do I cancel a registrant's registration?
- On a registrant's detailed view, you can click Cancel Registration to cancel their registration or Delete Registration to delete their registration entirely from your event. Want to view a list of all your cancelled registrations? You can do so by filtering from Confirmed to Cancelled and downloading the registrant report which will show a more detailed look at all your cancelled registrants.
Important! Canceling or deleting a paid registration does not automatically refund any payments made during registration. Click here for more information on refunds for your registrants.
Can I block certain email addresses/domains from registering to my event?
- Yes! On your event's dashboard, you can scroll to the Block List section. Here, you are able to add certain email addresses or domains that will be prevented, or allowed, to registered to your event. You can also apply these settings Channel wide. Click here to learn more about the Block List.
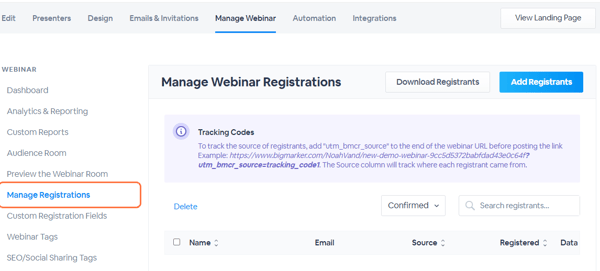
Adding registrants in the classic admin
To add registrants to your session, visit Manage registrants. Here you'll see the list of registrant and the Add Registrants button in the top right.
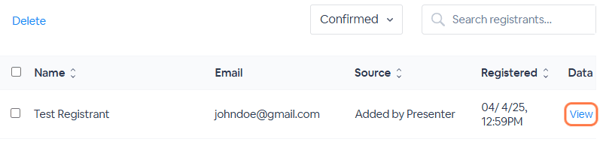
To view the details of and edit a registrant, click view on the registrant's row.