Note: This feature is exclusive to our Enterprise and Events Package plan holders.
Using the classic admin? Click here to learn where you can find the webinar tag settings.
Webinar tags allow you to label webinars so when integrating into Salesforce, Marketo, etc., the tags will carry over to your system of record. Webinar tags can also be used as search filters for webinars on your channel home page, and also can be used as filters to be used in your channel analytics.
Learn how to add webinar tags to your event below:
How to Create Webinar Tags
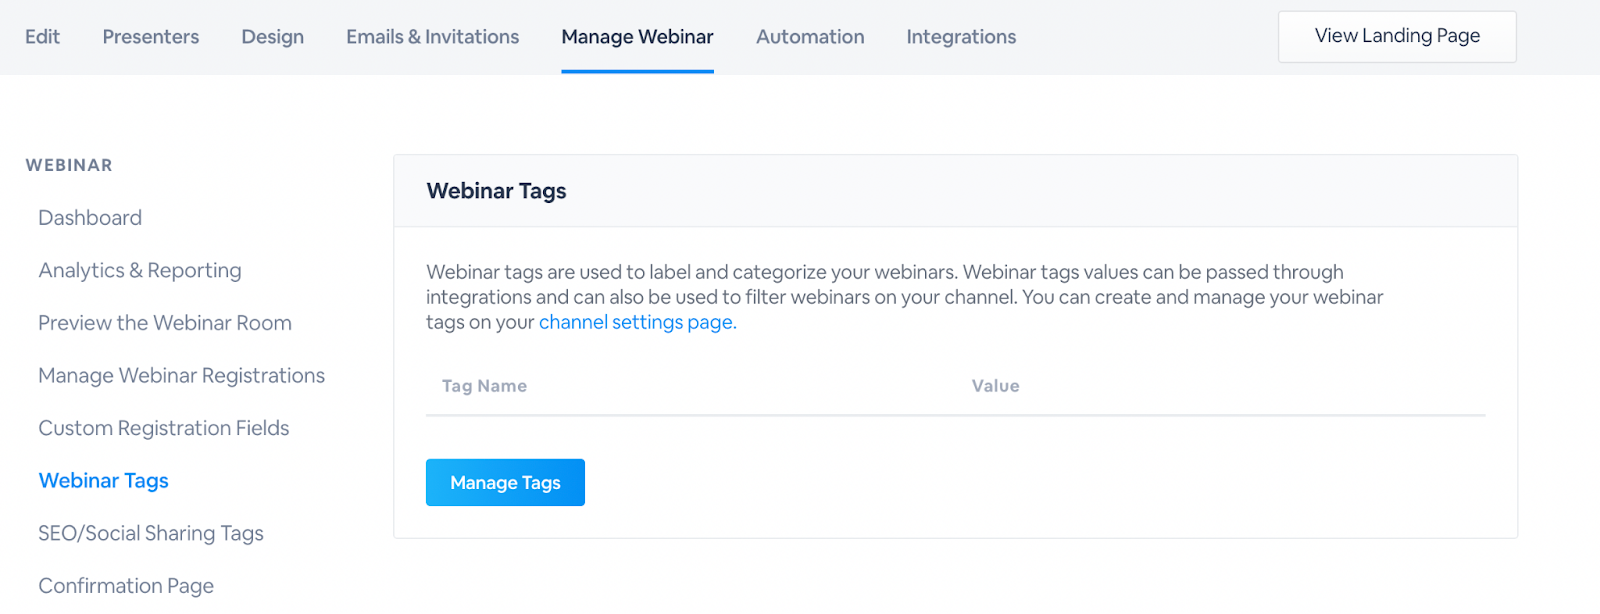
In your channel settings select the Webinar Tags tab from the left-hand side of the page. Click Add New Tag. Give your tag a name as well as choose the response type (Free Text, Dropdown or webinar selector), default values, and other settings.

Note: For Default Value, if nothing is entered, then this will display as Default Value.
Adding webinar tag values to your content
Webinar tags only start as categories, you have to add values to that category for each webinar, series and event. You have two options for adding these values:
- If you enable Enter tag data during creation on a webinar tag it will be shown when creating a new page on BigMarker:

-
In the Session Admin, there are a number of different places you are able to access the webinar tags. Keep in mind that in the new interface, the feature is called Session Tags.
First, in the Dashboard you can edit the tags from the quick actions:


You can also access these settings from the 3-dot menu in the top right of all pages.

How to use Webinar Tags as Custom Data Points for Integrations
When someone registers for your event, the webinar tag will be included as a data point in their registration profile. Thus the webinar tag — and its associated data — will automatically flow to any tool with which you have an active integration with BigMarker.
For instance, say that you create a Webinar Tag named Custom Tag 1 and you have an active integration with HubSpot. The data you collect via that webinar tag will be stored in HubSpot under Custom Tag 1.
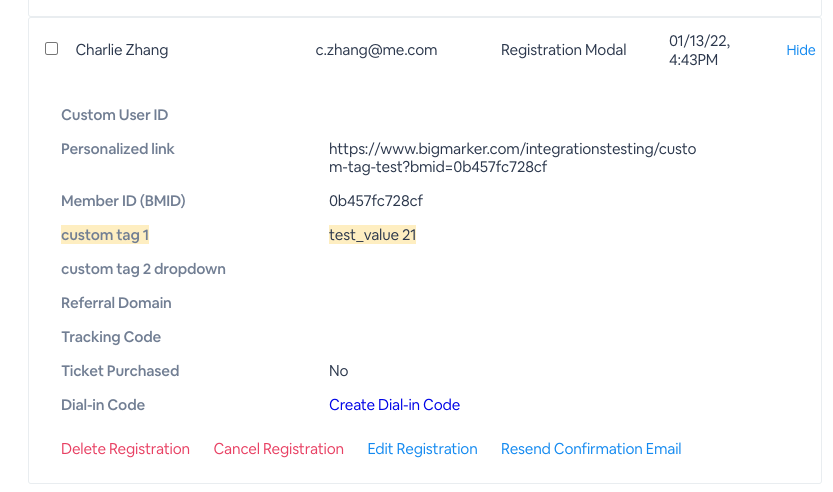
Note: You can confirm that your webinar tags are active — and collecting the right information — by checking an individual registrant's profile. To do this, go the Manage Webinar Registrations tab of your webinar, select an individual registrant's profile in the list provided, then find your webinar tag and the registrant's response to that prompt (as highlighted below). Clicking Edit Registration in this section will not show the registrant's webinar tag information.
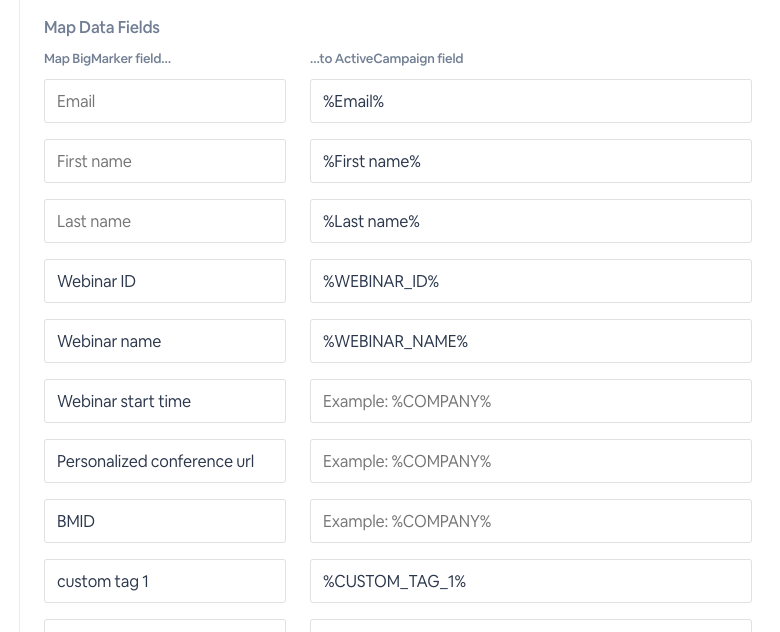
Using an ActiveCampaign integration, below is what the Webinar Tags will look like from an integration point of view:
Note: Webinar tags and their associated values will NOT be seen by users when registering for an event
Webinar Tags and Sub-Channels
Add webinar tags to the main channel and use them in your sub-channels.
If a channel has sub-channels, a new setting appears when editing or creating a webinar tag on the main channel. When enabled, the webinar tag will be available for all content within the sub-channels.

How to Use Webinar Tags as Search Filters for your Channel
- Create a Webinar Tag following the steps above.
- Next, create a new webinar (learn more here). Scroll to the bottom, and select which Webinar Tag you would like associated with your event. Click Create Webinar when finished.
- You will be prompted to select a Landing Page template, and then be taken to the Manage Webinar dashboard of your event. From there, navigate to your Channel’s Main Page.
- In the right-hand corner, you will see a new text box or drop-down menu where your Webinar Tag is located. From there, you can select as many Webinar Tags you would like associated with your event and it will filter accordingly.
Watch the video below to see this in action. In this example, the Webinar Tag’s name is States, the Response Type is a drop-down menu, the Response Options are New York, Chicago and California, and the Tag Prompt Name is Location:
Webinar Tags in the classic admin
In the webinar dashboard, click on Webinar Tags to see all available tags, and be able to add responses to each one
