Add Registration Widgets to your website so attendees and viewers can easily redirect to your sessions when they are live and view recordings after your session has ended.
Widgets will allow you to manage your content on BigMarker, but offer it to your audiences on another website. You can use these widgets for everything from simple registration form, to being a part of a live webinar, to watching on-demand content.
In all cases, you will get an iframe code to copy from BigMarker to place in your other site that you control. Some widget allow you to customize the text and design of them, such as the registration and live webinar widgets, while others will recreate the live room or on-demand player.
What kinds of event widgets can I create on BigMarker?
There are multiple kinds of widgets you can add to your event, and they all have slightly different behaviors and designs. You'll find these options in the left-hand navigation in the webinar dashboard:

The Registration Widget allows you to collect registrations on an outside page, which then can redirect or at least present an option for users to enter into the BigMarker landing page or the live room of the webinar. This widget will update automatically as the webinar is upcoming, live or on-demand:
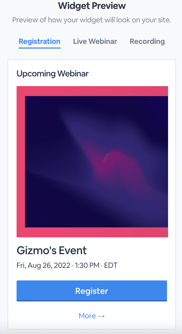

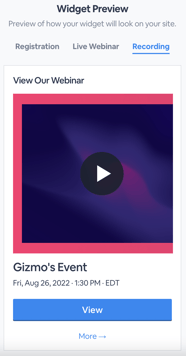
You also have some options for what kind of form is shown to your users, using the form only or an image or button that redirects them to your landing page:


You'll have the ability to edit the text and colors used in this widget, as well as add your own custom code and custom tracking codes to this widget. To get the iframe for the registration widget, look for the setting Embed Code near the bottom of the editor:

The Multi-Webinar Widget is similar to the registration widget, but it offers registration in multiple webinars from your channel. You can choose to either automatically select upcoming webinars, or manually select them to display in the widget.

The Live Webinar Widget is a way for you to host the content on your outside site. Unlike the registration widgets, this widget will become the video player that will show your webcast stream or your on-demand video. However, viewers will not have access to the engagement features from the live webinar.

In these settings you have the ability to change the design and text used in all aspects of the widget, from upcoming to live, as well as add your own custom code. Follow the steps in the designer to be able to customize if your presenter images are shown, what registration fields are shown, and adding a custom logo to the live webianr player

To get the iframe code for the Live Webinar Widget, look to the embed tab of the widget settings:

The Live Full Webinar Widget is similar to the live webinar widget in that it will display the live webinar content & it will also be a 1:1 mirror of the webcast attendee experience. It will also change into the on-demand player once the webinar is a published on-demand webinar.
Lastly the pop-up widget will allow you to create a widget that prompts visitors to join your email list, which can be use for future webinar and series invitations.
On-demand player widget
When you have a published on demand webinar on BigMarker, you can easily copy the embed code for just the player itself. Visit the dashboard for an on-demand webinar and click Copy Embed Code to get a popup showing the code for you to copy.

