How to Add Tracking Codes to the Registration Widget
You can add tracking codes to registration widgets, which they can embed on their websites. This allows you to use your preferred third party marketing tools to see how many clicks, conversions and registrations the widgets generate.
When you want to use a widget to capture registration on a website outside of the BigMarker platform, you can add tracking codes to that widget. This allows hosts to use their preferred third party marketing tools (Google Analytics, Facebook Pixel*, Hubspot, etc.) to see how many clicks, conversions and registrations their widgets generate.
Note that you will not want to add in UTM codes or other URL parameters here, only tracking code scripts.
*Important: If you plan to use a Facebook Pixel, it will most likely be necessary to use a custom whitelabel domain for your channel. This is due to an update from Facebook/Meta that limits the number of trackable events a single domain can have, To learn more details about this update, click here.
How to Add Tracking Codes to your Registration Widget
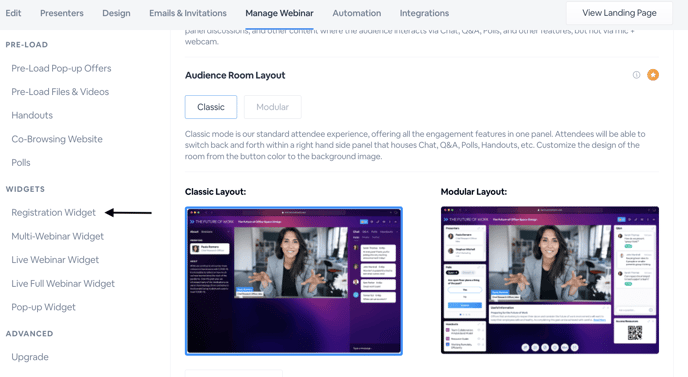
After logging in to your BigMarker account, visit the webinar dashboard and then go to the registration widget.

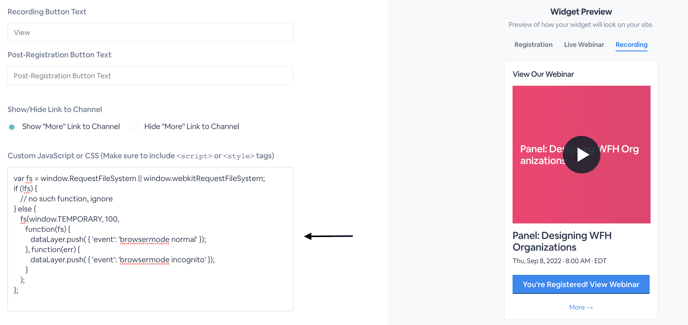
From there, you’ll proceed to the registration widget editor, where you can design and add text to the widget. Under Custom Javascript, enter the tracking code you’ll be using for your event.

Look for the setting Widget Format and be sure to choose Javascript Direct Embed

Once you configure all of your settings to your preferences, scroll down and click on Copy Code and then you can paste this code onto your site. From here, registrations that go through this widget will send information to the service you are using via the tracking code entered above.
