Customize your webinar room's background, interactive panel, content stream and banner ads with their colors, logo and more
Live Attendee Experience provides hosts greater control over the appearance and flow of their webinar or online event. Live Attendee Experience enables hosts to customize their webinar room's background, interactive panel, content stream and banner ads with their colors, logo and more.
This feature also allows hosts more control over attendee interactions. In this mode, attendees can't use their webcam or microphone, and can only interact with the presentation through the polls, Q&As, chat rooms and other modules on the room's interactive panel.
Note: The Live Attendee Experience is available only when hosting in Webcast mode.
How to Enable and Customize Attendee Experience
Note that the following instructions will be focused on the classic webcast view. For more information on the modular view, click here to learn more.
On your webinar's Manage Webinar dashboard, look for Audience Room in the left-hand navigation. Then click Customize Layout to open a new page to configure the audience view.
 You will be taken to the Live Attendee Experience editor, where you can configure all aspects of the design. Below are the following components available to edit:
- Logo Image
- Background theme color or image
- Background color for the webcast stream
- Chat panel background image or color
- Chat Panel text color
- Button colors
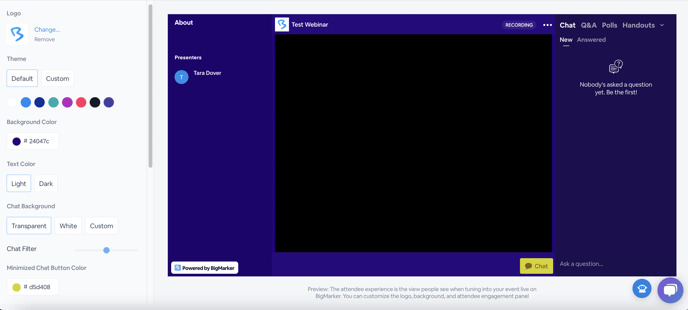
You also have the option to Show left panel with webinar and presenters info. This setting will show a new section of the webinar room that displays the webinar description as well as all presenters who are set to show in the live room. This is a great way to keep your users informed during the live session.

When you are finished, click Save and Exit or Preview to preview the room. Once saved, your audience room is ready to go and will appear like this for all webcast attendees.
If you are hosting a virtual event you can manage the design for all of your event's webinars in one place: Stage View Settings