This article covers BigMarker settings that are only visible to customers with an existing Okta SSO integration. For newer users and channels, you can now connect any SSO service using your channel's SAML SSO Settings.
You can learn more about these settings in this article.
You can now sync your Okta Single Sign On (SSO) integrations with BigMarker. Read on to learn how to set up your integration on BigMarker.

You can set up your Okta SSO Integration as part of your channel. Enabling this will mean that any admins on your channel will be able to use their SSO login to gain access to their BigMarker admin account.
Admin users from the channel are still able to sign into BigMarker through their BigMarker account.
We can disable that access, meaning that users will have to log in through their SSO in order to gain access to the platform. Any email address that is associated as an admin on the channel will not be able to log into to BigMarker normally. Please reach out to your account manager to adjust this setting.
How to Integrate Okta SSO with BigMarker
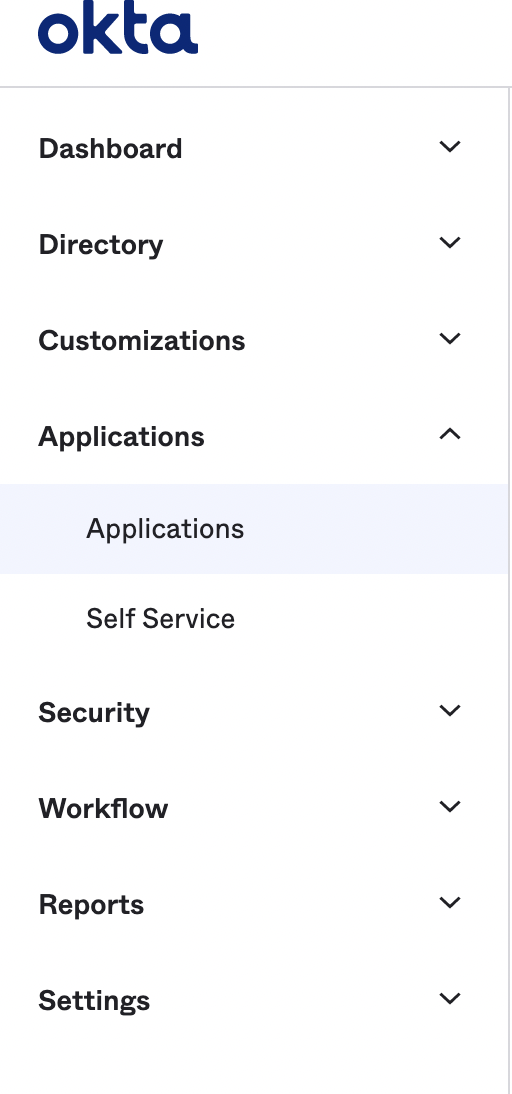
1. Log in to your Okta account. On the left-hand menu, select the Applications tab. From the options that appear, select Applications again.
2. Click Create App Integration, then select the SAML 2.0 protocol. Click Next when finished.

3. From there, you will be prompted to create your SAML integration. Enter in the App Name for your integration in the text box. You can add a logo in the box below if desired
4. Check the box Do not display application icon to users. Click Next when finished.
Note: If applicable, also check Do not display application icon in Okta Mobile app.

5. You will be redirected to the Configuration page for Okta. Depending on where you would like your Okta SSO configured, go to your Channel Settings or the Series Integration page and copy the Single sign on URL (SAML Assertion Consumer Service (ACS) URL) from BigMarker and paste into the Single sign on URL box in Okta.
6. Next, copy the Audience URI (SP Entity ID) URL in BigMarker and paste it into the Audience URI (SP Entity ID) box in Okta.
7. Next, scroll down to the Attribute Statements section in Okta. For BigMarker, we require first name, last name and email address. In Okta, you will need to enter the attribute statements as seen in BigMarker.
7.1 First, add first_name under the Name column, and use the drop-down menu to select user.firstName in the Value column.
7.2 Click Add Another, and add last_name in the Name column and user.lastName in the Value column
7.3 Click Add Another, and add email in the Name column and user.email in the Value column.
8. Scroll down to the bottom of the page in Okta and click Next.

9. Check off the box I am an Okta customer adding an internal app, then scroll down and click Finish.

From there, you will be redirected to a separate page, where it shows your settings for your SSO. Scroll down the page and locate the Identity Provider metadata link. Click there, and you will once more be redirected to a page that will show you a block of code.
Copy the URL of that block of code, then click back to your BigMarker page, and paste the URL in the Identity provider metadata box under the BigMarker Okta App Settings(Get IDP Metadata Url from Okta app) section.


Click Submit to complete. A blue bar will appear at the top, reading Success which indicates that your Okta SSO account has been fully integrated with BigMarker.

For more information on Enterprise plans, please contact our Sales Team at sales@bigmarker.com