How to Set Up Modular Attendee View
Within Modular View, all your engagement features (Polls, Chats, Q&A, Surveys, Handouts) will be present in their own module in the webinar room. Learn how to set up Modular View for your attendees.
This feature is only available for Virtual Events and Enterprise plan holders. Please contact our Sales team at Sales@bigmarker.com to learn more.
Modular View is way to configure the audience experience so that your attendees have more control over the layout of the live webinar room. Within Modular View, all your engagement features (Polls, Chats, Q&A, Surveys, Handouts) will be present in their own module in the webinar room. Attendees can keep these present throughout the whole event, maximize them to get more details, or minimize them to give more screen space when viewing the event.

Table of Contents:
- How to Enable Modular View
- How to Customize Modular View
- How to Show/Hide the Modules
- How to Move the Modules
- How to Add Custom Modules
- How to stream your slides separately
How to Enable Modular View
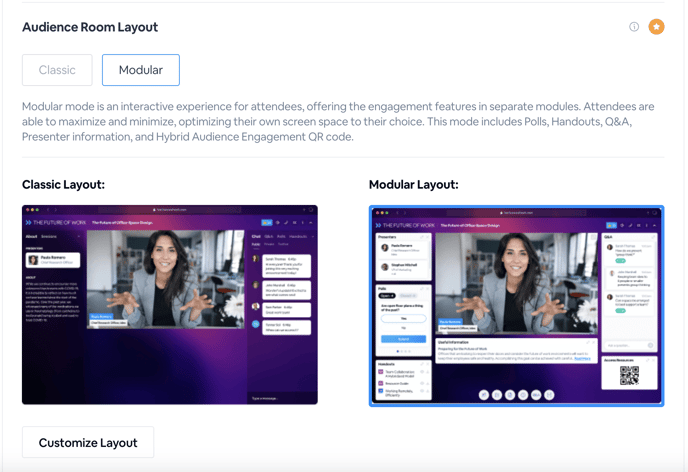
Visit the webinar dashboard and visit the audience room settings. Here you'll be able to choose the modular room. Once you do, click on customize layout to begin configuring your modular room.

You can also set Modular View on the manage page of the webinar dashboard. Under the Live Webinar Settings, under Audience Room Layout. Click Modular to enable Modular View.

How to Customize Modular View
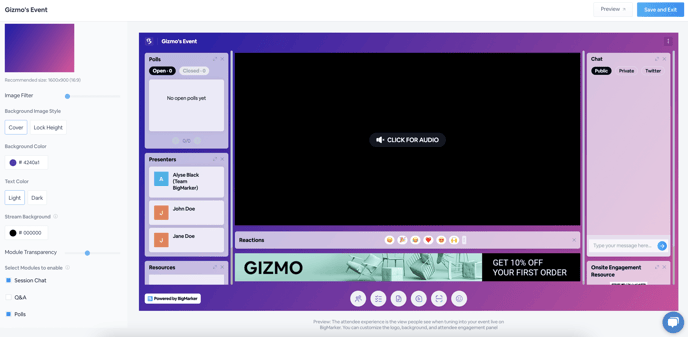
Once you click on Customize Layout you'll be taken to the designer for your modular room. In the left hand navigation, you'll be able to set the logo & theme, customize transparency settings on your background image and your modules, and select which modules you'd like to enable during your webinar.

How to Show/Hide the Modules
In the modular room, the different aspects from the engagement panel are split up into individual modules: Chat, Q&A, Polls, Offers, and Handouts. You'll also have options for showing the presenter list as well as the QR code for Hybrid Audience Engagement.

In the customization settings, you'll see checkboxes for each of these modules. Turning them off here means the attendees will not see them. If you show a module, you also have additional options to change the name shown at the top of the module, and also whether or not attendees see the expander, which maximized the module.
If you disable the dock users will not be able to close any modules, and will only see the video you customize here.
How to Move the Modules
As the webinar Admin, you are able to move the modules around by a simple click and drag. Simply, click and then drag the modules to the location of choice. You can do this in these customization settings, or you can do this in the webinar preview room.
You can also click and drag the bottom of each module to change the height.
Adding a custom Modules
In the modular view, you can add a custom widget to the attendee experience. When you do this, the widget will appear as it's own module. This is a great way to have a call to action, important safety information, or make a 3rd party application available for your attendees.
How to stream your slides separately
With modular view, you have the option to add a module that will share the slides shown in the webinar. With this enabled, the module will mirror any presentation you are sharing. Attendees won't have control, and it will change slides/pages as you do. With this enabled, attendees can maximize the slides content to get a closer look at those files without having to download them.
Even with this setting enabled, the slides content will still show in the webcast stream and in the recording. Look for the Slides checkbox when enabling each module. In the screenshot below, you'll see the slides maximized, and the webcast stream sill plays in the top left corner.

