Creating an event is simple and straightforward, and once it's complete you can design, manage and publish your event as soon as you are ready.
The event admin is only available for channels with an event license. For more information contact your BigMarker Customer Success Manager or sales@bigmarker.com
1. On your BigMarker home page, click Create Webinar, and then Create a Virtual or Hybrid Event

2. You will be redirected to the first step in your virtual event setup. In Event Basics you'll enter the event name, dates, landing page template, event type and privacy settings.

In almost all cases, you'll want to use the Virtual Event Classic Microsite template
3. In Registration Settings, enter in your registration open date. The open date is important to consider, as BigMarker will restrict people from registering before this date.

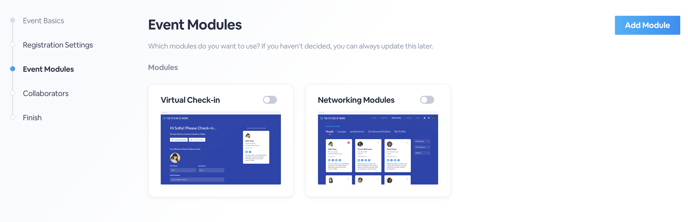
3. In Event Modules, toggle ON the modules you would like for your event. You can toggle on:
-
- Virtual Check-In - attendees can enter in their information and other virtual preferences for your event
- Networking Modules- the different networking features attendees can utilize to connect with other attendees
- Based on your event, you can keep it simple with these two modules or add on more event modules, like an Expo Hall or an Agenda page. To do so, click Add Module and add a new module of choice. If you are not sure, you can skip this step, as all of this can be configured later.
Click Next: Collaborators when finished.
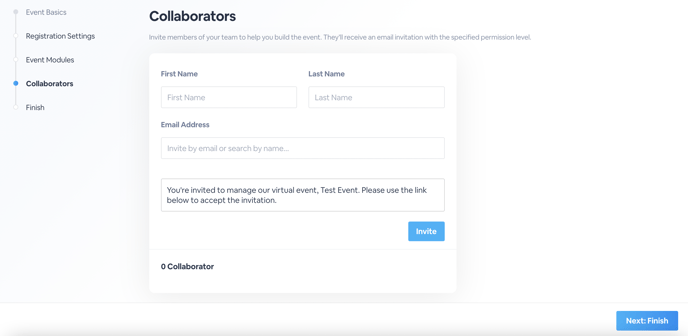
4. In Collaborators, add those that you would like to have access to the settings to your virtual event. Enter in their first name, last name, email address and customize the message if desired, then click Invite. This collaborators will need to create a BigMarker account in order to have access to this dashboard.
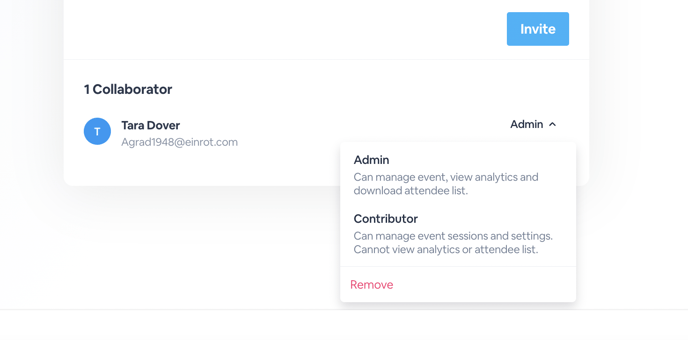
After inviting your collaborators, they will populate below with their respective information. Here, you can toggle their permissions level, making them either an Admin (can manage the event, view analytics and download the attendee list) or a Collaborator (can manage event sessions and settings; cannot view analytics or attendee list.)
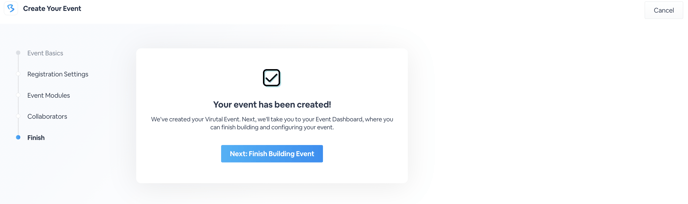
5. Click Finish at the bottom and your virtual event has been setup! Click Next: Finish Building Event to be taken to your virtual event's backend for more customizations and settings.