Using the new Session Admin? Click here to learn where in the new dashboard you can add a UTM code
UTM codes are snippets of text added to a URL that helps track the performance of a specific marketing campaign. In BigMarker, you'll make a hidden registration field for each UTM code and then add that information to the URL that someone uses to register.
How to Add UTM codes to your BigMarker sessions and series
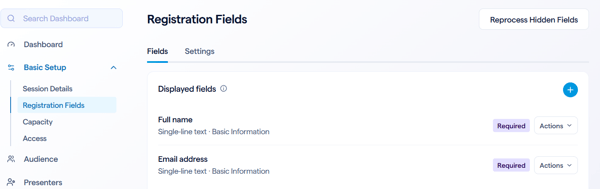
Visit your session admin for the content you want to add a UTM code to. Head to Basic Setup > Registration Fields to get started.
Under hidden fields there are 3 default UTM codes created: utm_medium, utm_source and utm_bmcr_source (unique to BigMarker under share links). These default UTM codes align with commonly used UTM codes, or are linked to the share link settings like utm_bmcr_source. These fields are hidden and have do not display in registration form enabled. Do not change these settings to avoid any issues if you plan on using these codes.
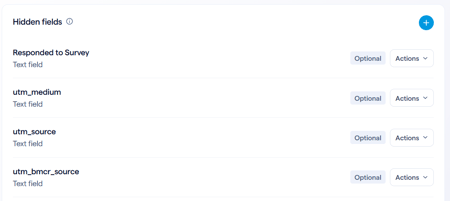
Click Add Field if you want to add a new UTM code. For best compatability, the title you give this field should not contain spaces. For example, if you wanted to title it “Date Location”, it would be “Date_Location.” In the list below the Field Title, go to the Integrations & Analytics section and check off Do not display field on registration form. This ensures that your tracking code is not visible to registrants as they fill out the registration form.

Creating a link that contains UTM codes
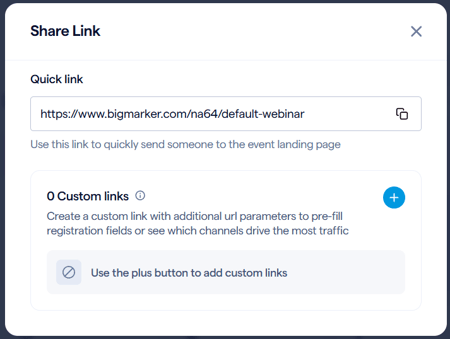
Once you have all your UTM codes set in the registration fields, you are ready to share a URL using these codes. First you'll want to get the URL of the webinar or series by clicking on Share Link on the main dashboard page.

You will see a new popup allowing you to customize your share link. Click the plus button to get started.
From here you will give you link a name and decide which UTM codes you want to use. Select the field and the input the value for what you want to show up for everyone that uses this link to register. For example, a link shared on social media might have a value of "Social" for the "utm_medium" field.
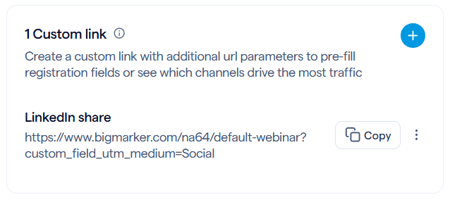
You can also use these same settings to pre-fill other registration fields, not just UTM codes.
I shared a link with a UTM code without adding it as a registration field, can it be added even after setup?
You have the ability to reprocess UTM codes. If a link containing a UTM code was shared and used to register but that UTM code was not set up as a custom registration field, they are able to be added in by reprocessing the hidden fields.
In the Custom Registration Fields section, add the UTM code following the steps above. When finished, click Reprocess Registration Hidden Fields, and a popup will appear to confirm if you’d like to reprocess your hidden fields for all registrations. Click Ok, then go to the Manage Webinar Registration section. You will now be able to view the UTM code for the registrant.

When reprocessing UTM codes, they can only be applied to registrants who registered up to two weeks prior.
How can I ensure my UTM codes are tracked in my CRM?
When you are setting up your integration, you will be prompted to map data fields from BigMarker to your CRM. (The screenshot below shows the data mapping step of any typical integration setup.) This ensures that the data fields you collect on BigMarker will be transferred to your CRM and saved in the appropriate place.
So if you are using the "utm_medium" UTM code to track participants registering via email, and you call that data field "Registered by Email" in your CRM, type "Registered by Email" in the field next to "utm_medium".

Adding UTM codes in Session Admin
To add a new UTM code or to edit your existing ones, go to Basic Setup > Registration Fields. Scroll down to find the list of hidden registration fields. Click the plus icon to add a new field, or click Actions > Edit on any field to edit it.
