Using the classic admin? Click here to learn you can find the closed caption settings
Closed captioning is a key component In making your virtual sessions accessible to all viewers. Whether you are accommodating persons with visual impairments, or you want to be inclusive to an international audience, closed captions can help.
Note: Closed Captioning is only available for Enterprise plans. If interested, please contact our Events Experts at sales@bigmarker.com or your customer success manager
Contents:
- How to enable closed captions
- How attendees turn on closed captioning
- How attendees can turn on captioning in interactive mode
- Adjusting my closed captions
- Closed Caption Analytics
How to Enable Closed Captions
From your session admin, go to Production > Languages & Captions. The settings for the closed captions will be contained within the Live Closed Captioning tab.

Once enabled, select the original and display languages select the languages attendees can see closed captions in. The original language is the language that your presenters will be speaking in. At this time, you can only select one original language. The display language setting is where you choose which languages your attendees will be able to see the captions in.
Note: When no display languages are selected, attendees will have the option to choose from all languages
Closed Caption settings inside of the Studio
Closed caption settings can also be found inside of the studio. From the left hand panel, click on the CC icon to view the settings. Here you can enable/disable the setting, choose your original language, and choose the display languages. These settings update in real time, so whether you are trouble shooting or need to swap the original language for different presenters, these settings allow you to do that.

Keep in mind:
- If you are enabling closed captions within the studio, allow up to a minute for the feature to initialize and begin providing captions.
- These settings will not be available if you have AI Audio Translation enabled.
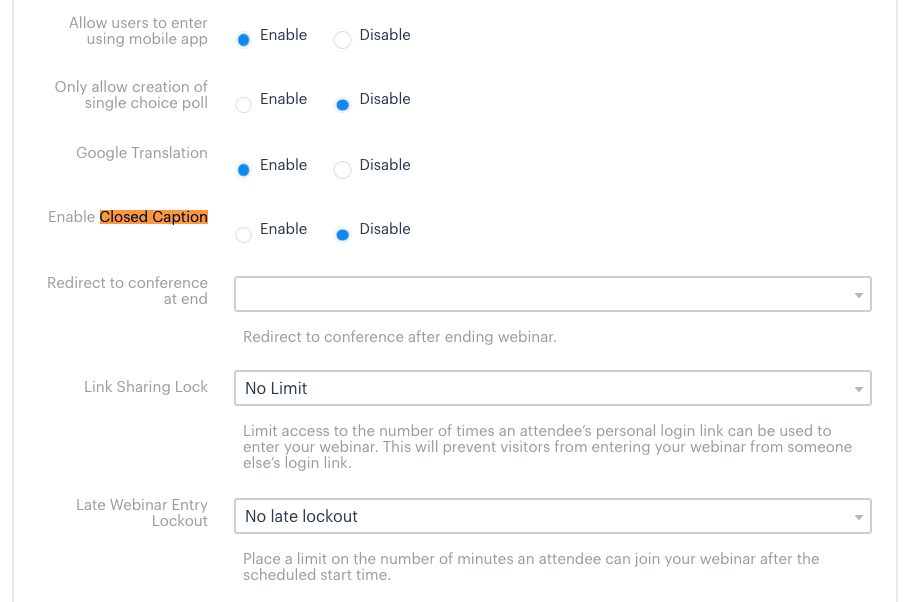
How attendees can turn on closed captioning
If closed captioning is enabled during a session, the CC icon will appear in the top right hand corner of the webinar room. Click this button to turn on closed captioning for the session. Closed captioning is available for both Interactive and Webcast mode*
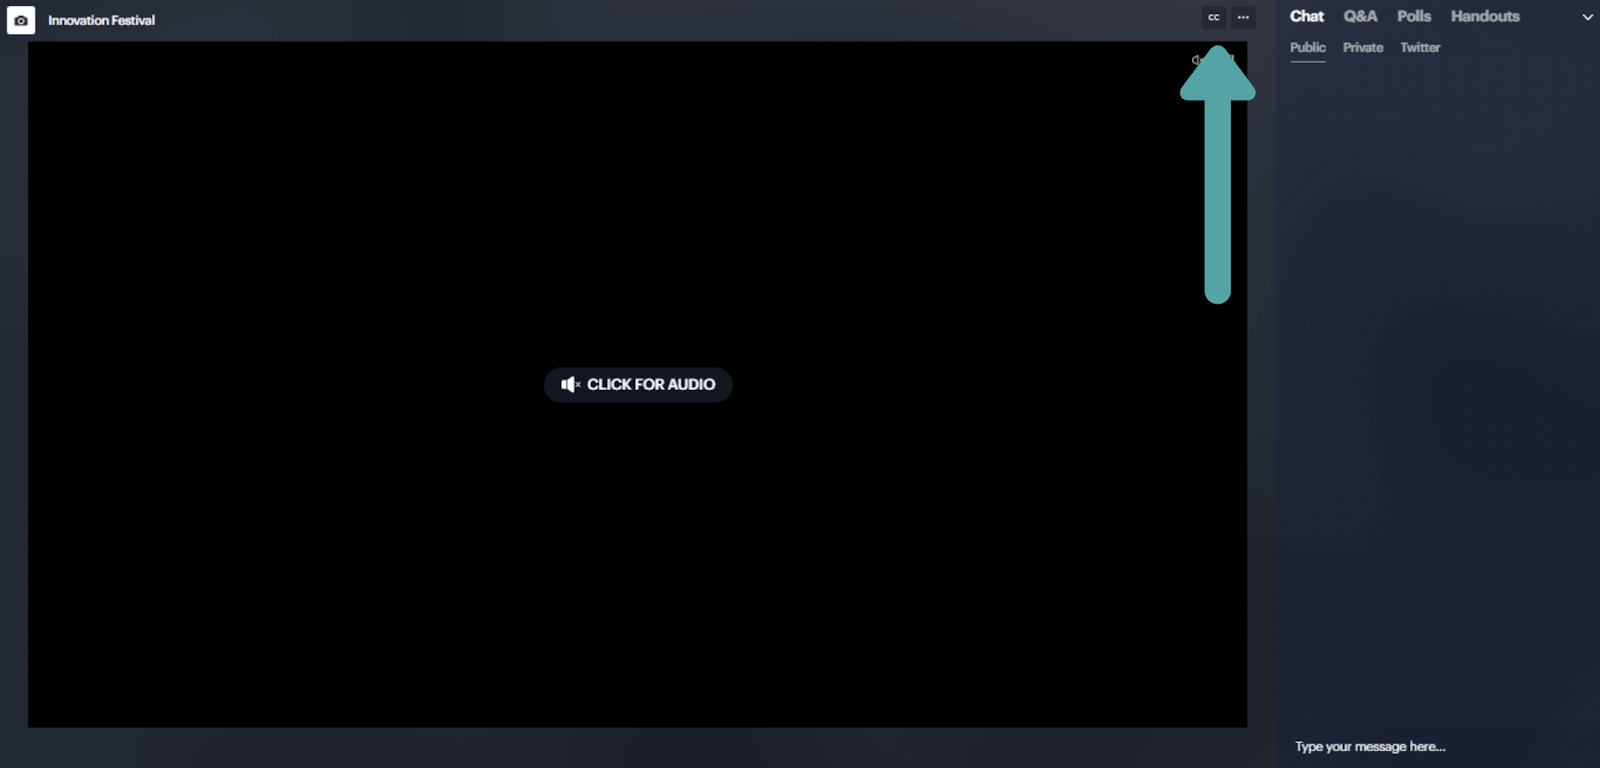
A dropdown featuring the display languages you chose earlier will display. Attendees will click their preferred display language. Once a language is selected, closed captioning for the session will appear in this language.
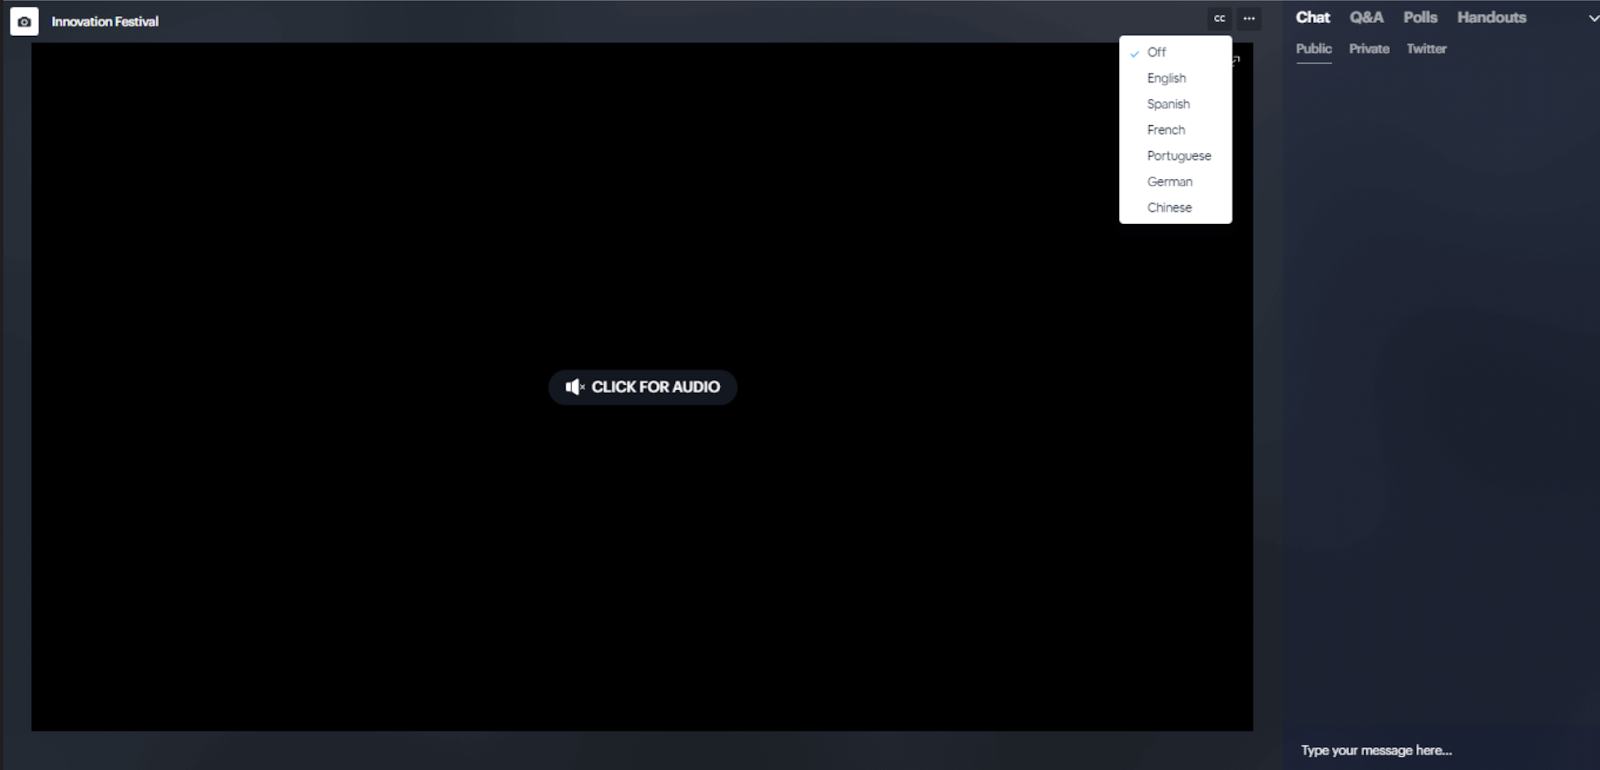
How attendees can turn on closed captioning in Interactive mode
Note: Closed Captioning is only available in one language in Interactive Mode*
In Interactive Mode, attendees and presenters will be able to turn on/off closed captions by clicking the CC icon and using the three dots to select which language they would like them to display in. Closed captions will only display to the attendee or presenter who click the CC button.
In Interactive webinars, closed captions will only display in the language chosen for the Closed Caption Original Language.
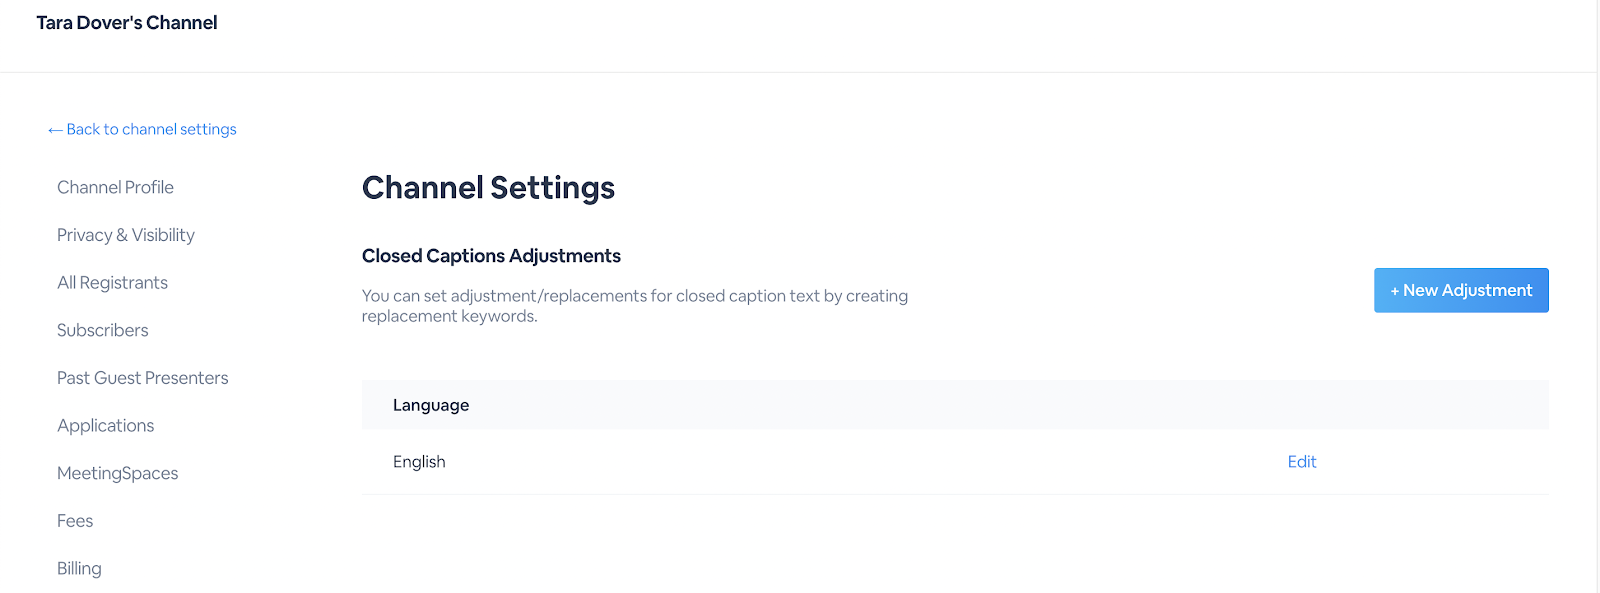
Adjusting the closed captions
To ensure proper spelling and capitalization for less common names, company names and abbreviations, you can add closed caption adjustments to your channel. For example, if your presenter says the company name “vector” and you would prefer “Vector” to display in the captions, you can do so with these settings.
In your Channel Settings, click to the Closed Caption Adjustments section. From there, you can add a New Adjustment, select the language, and enter the keywords or phrases you’d like to have adjusted. For each word or phrase, you would give a Target and a Replacement. After saving, all captions shown on the channel will replace the target word/phrase with the replacement automatically.
You can also add your adjustments by uploading a CSV file. In the CSV file you upload you will just need two columns with no header row. The first column will be your target words/phrases, and the second column will be the replacements.

Categorize these based on languages, as clicking Add will add a new target word/phrase field to enter in under that specific language. Once saved, you can see all your languages that have adjustments and can Edit from there.
Can I View Analytics of my Closed Captions?
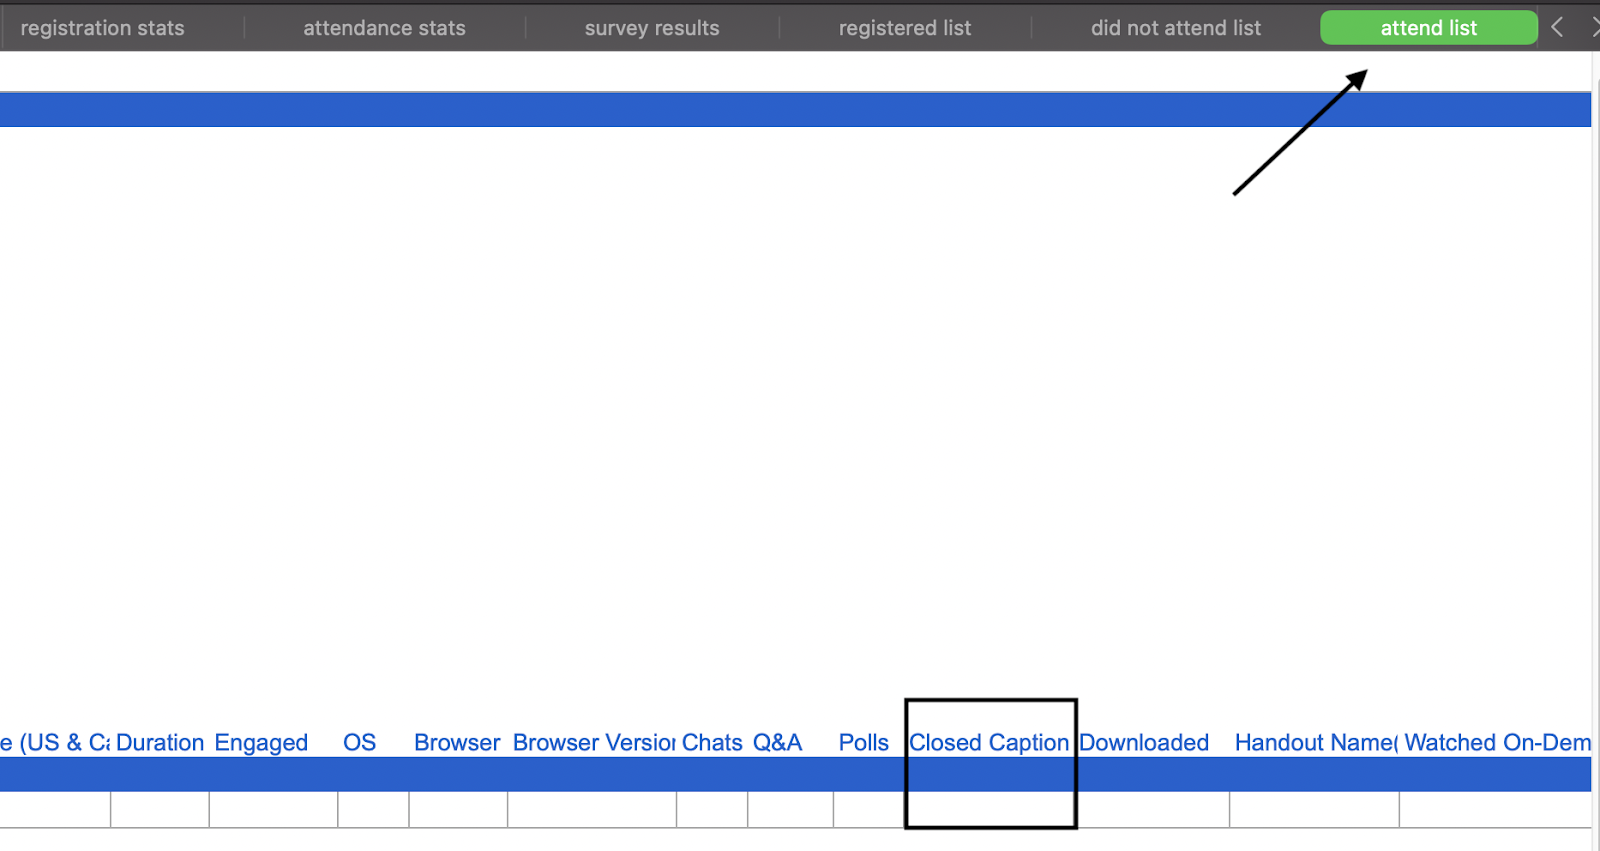
View attendees who used closed captions and what language the closed captions were in for live, on-demand and evergreen webinars. When viewing your reports, you are able to see the attendee’s name and what language of closed caption they used under the Closed Captions column.
In Live and Evergreen Webinars, this is found under the Attend List section and in On-Demand webinars, this is under the Viewed Recording List section.
Closed Captions in the classic admin
To find the closed caption setting in the new Session Admin, go to the Edit tab. In the left-hand menu that appears, select Advanced Settings. Using the CTRL-F or scroll function, find Enable Closed Caption, then select Enable.