Note: This feature is only available for Virtual Events and Enterprise plan holders. Please contact our Sales team at Sales@bigmarker.com to learn more.
Hosts can now require attendees to upload their COVID-19 vaccination cards to the platform before registering for an event. This allows hosts to verify their in-person attendees’ vaccination status and store it in one central location.
With this update, you can:
- Require in-person attendees to upload their vaccination cards before completing registration
- view the vaccination cards of each attendee
- approve or deny registration based on vaccination status
- verify that your attendees are protecting themselves and others against COVID-19.
Use it when you are hosting a hybrid event and want your in-person attendees to provide verification that they have had their COVID-19 vaccination. Read on to learn more about Vaccination Card upload and verification process.
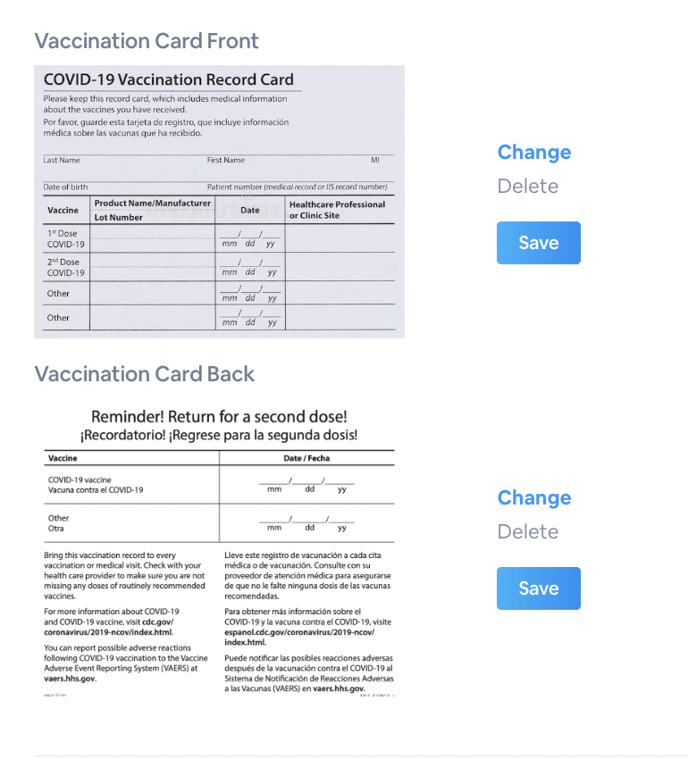
Table of Contents:
1. Setting Up the Vaccination Card Required Registration Field
2. Setting Up the Email Notifications for Invalid Vaccination Cards
3. How to Verify or Reject Registrant’s Vaccination Status
Setting Up the Vaccination Card Required Registration Field
The first thing you will need to do is to create your virtual event (learn how to do so here.) Next, you will need to create ticket passes for your event (how to create here and how to customize here).
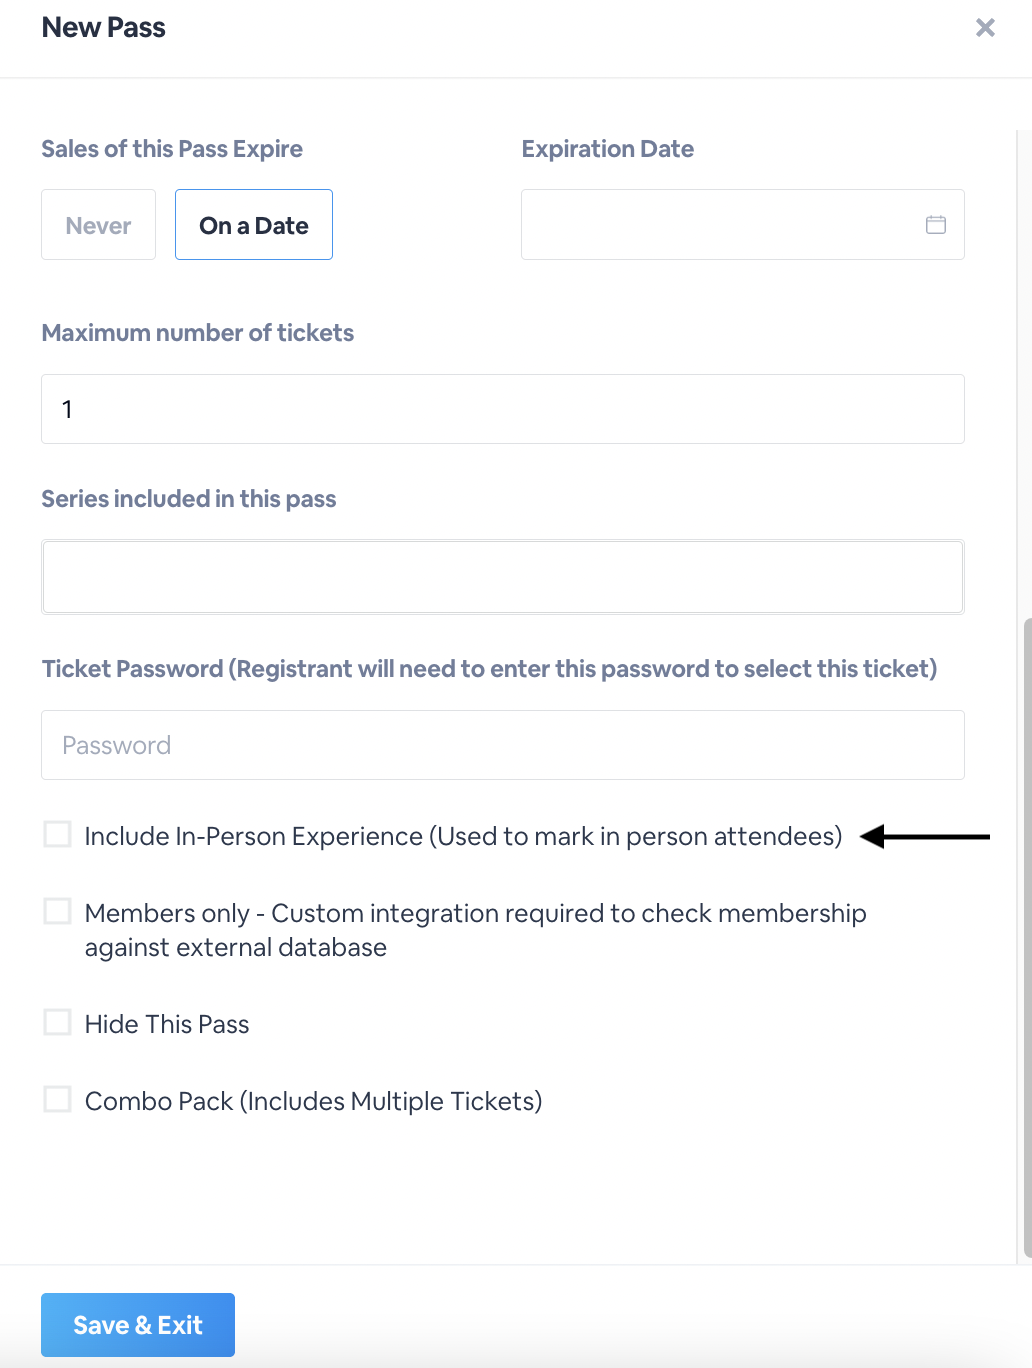
When creating your passes, check Include In-Person Experience ON. This denotes that all registrants under that pass will be in-person attendees — and that attendees with this pass will need to upload their vaccination card to the platform before completing registration. .
Next, click to Vaccination. Under the General Settings tab, switch Switch Enable Collect Vaccination ON. This automatically populates the Vaccination Card Front and Back custom registration fields needed when registering for your event.
Note: The Vaccination Card front will be a required field, while the back will be optional. You can change this on the Custom Registration Fields section on the backend. Learn more here.

Setting Up the Email Notifications for Invalid Vaccination Cards
Attendees will be prompted to upload their vaccination cards to the platform during the registration process. Those with invalid vaccination cards — or uploaded an invalid file type — can receive an automated email alerting them that their credentials are not valid.
To send these emails, toggle ON sending emails when their vaccination card is invalid. Then use the provided email designer (shown below) to edit the content of this email, including the email’s sender name, sender email address, email subject, email logo, content and email tokens.
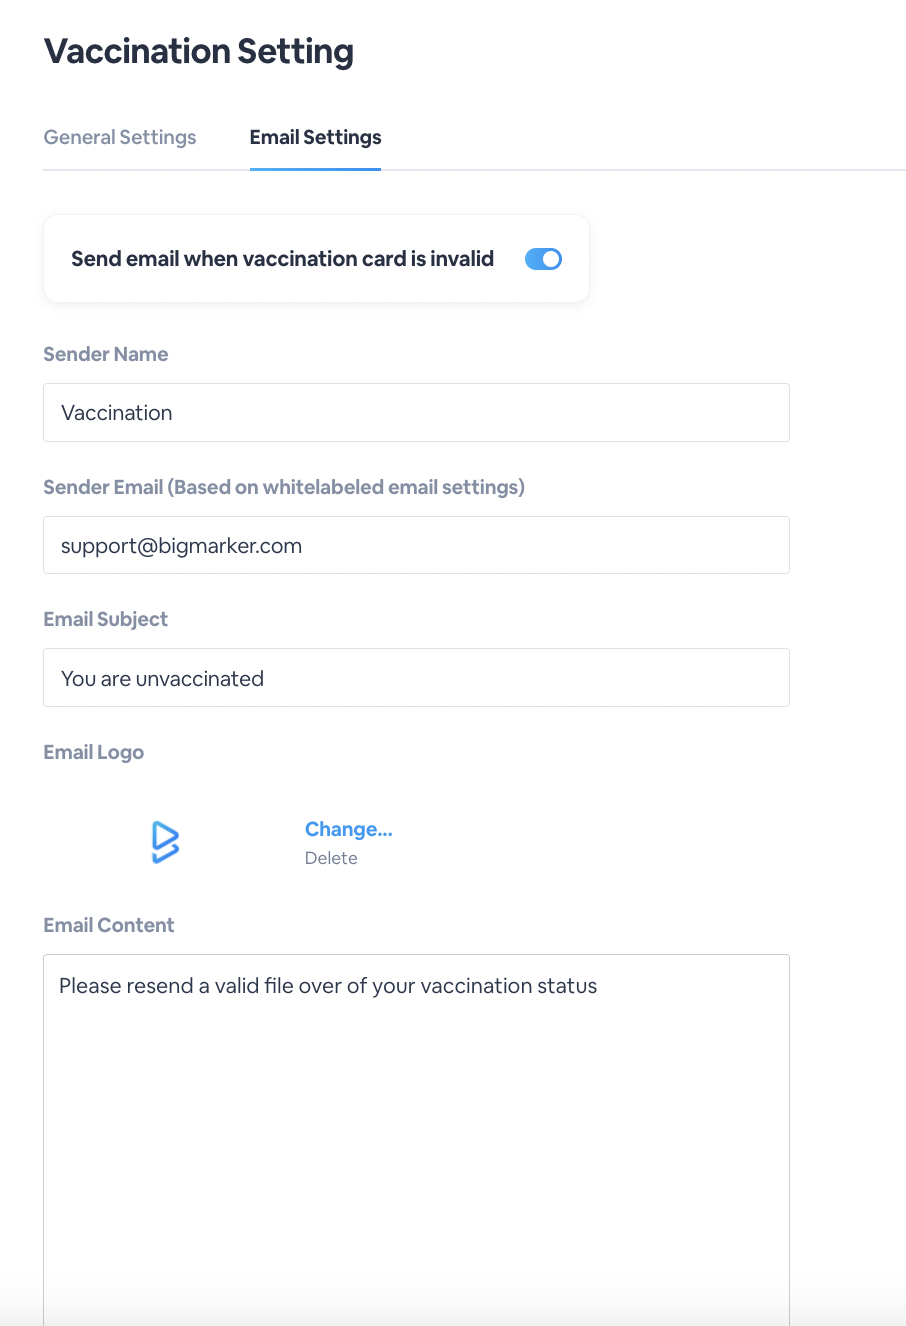
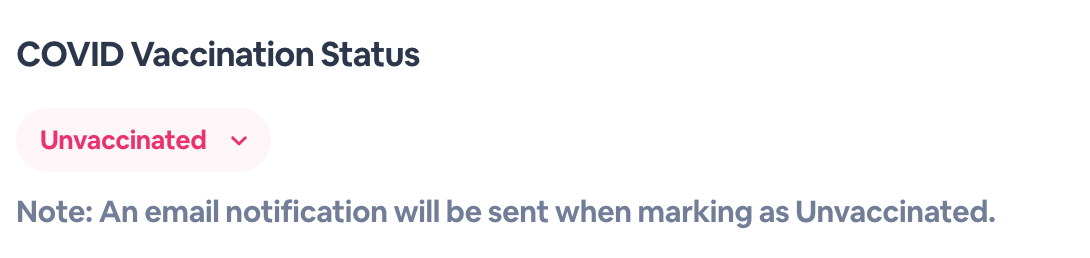
When this email notification is toggled on, a note will appear below the vaccination status dropdown menu to alert you that when marking registrants as unvaccinated, they will be receiving an email.
Attendees who receive this notification won’t be able move forward in the registration process without uploading a new image file of a valid vaccination card.

How to Verify or Reject Registrant’s Vaccination Status
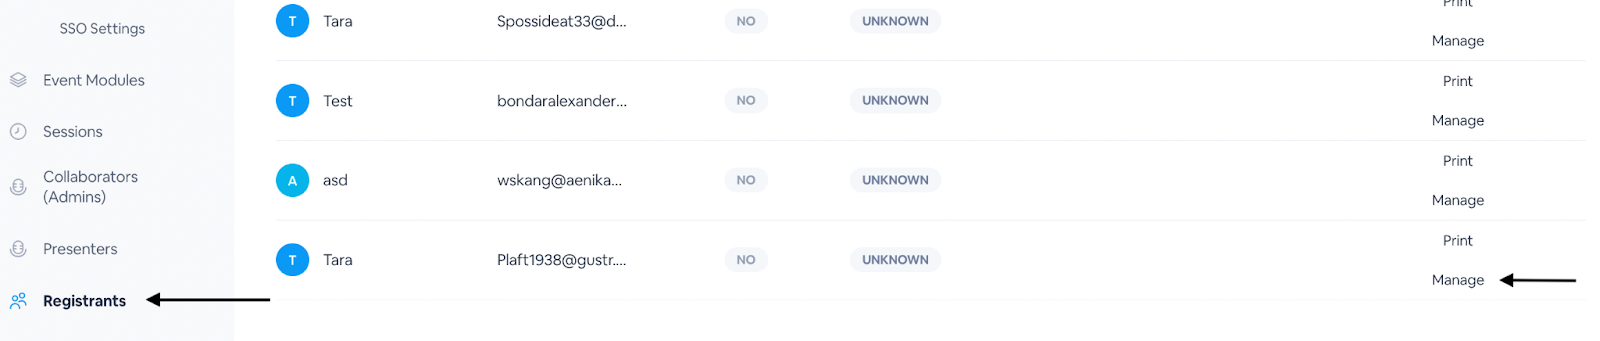
On the registration management dashboard, you can view and verify each registration’s vaccination card. To do this, navigate to the Registrants tab, select the registrant of choice, then click Manage.
From there, you’ll proceed to the registrant’s profile. Under the Pass & Profile tab, you’ll see an image of their vaccination card. You can see a thumbnail image of the vaccination card or hover over the image to see it in a larger view.
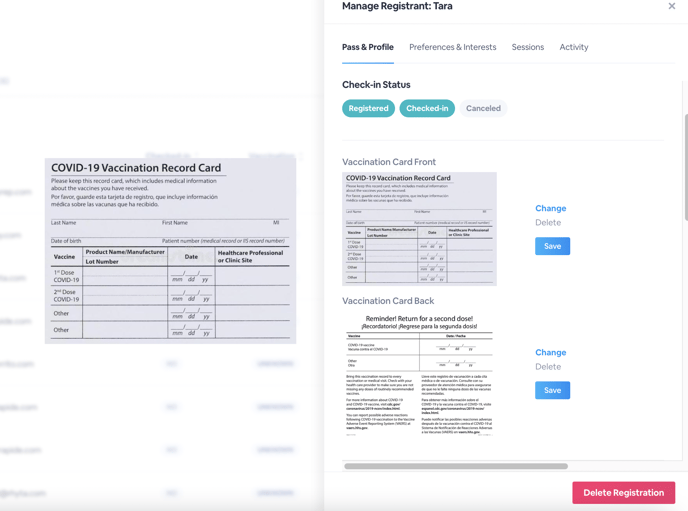
Below the vaccination card, you can approve or reject that registrant’s credentials, depending on the file they uploaded. Under the COVID Vaccination Status section, use the dropdown menu to label the registrant as vaccinated, unvaccinated, or unknown. Click Update Status to update their vaccination status.
Below this button is a full record of activity on this page, including who denied/verified the vaccination and when. Watch this process in action here:

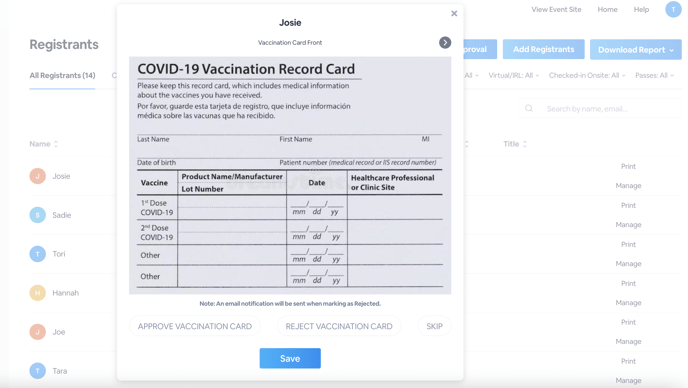
Want to verify all of your registrants’ vaccination cards at once? Navigate to the Registrants dashboard and select Vaccination Approval, a blue button located on the top right corner of the page.
In the pop-up that appears, you can see the front and back of the first registrant’s vaccination card. Click Approve Vaccination Card or Deny Vaccination Card, then click Save. Once saved, your next registrant’s vaccination card will appear in its place. .
This way, you can quickly scroll through the list and mark each registrant as vaccinated, unvaccinated or unknown.