Whether you have existing data that you want to import, or if you want to export your registrant and attendee information, integrating with Marketo is simple and powerful. In this article we'll earn how to import, export, use progressive profiling, and more.
Table of contents
Setting up Your Marketo Integration
Using Multiple Marketo Instances
Setting up your Marketo Integration
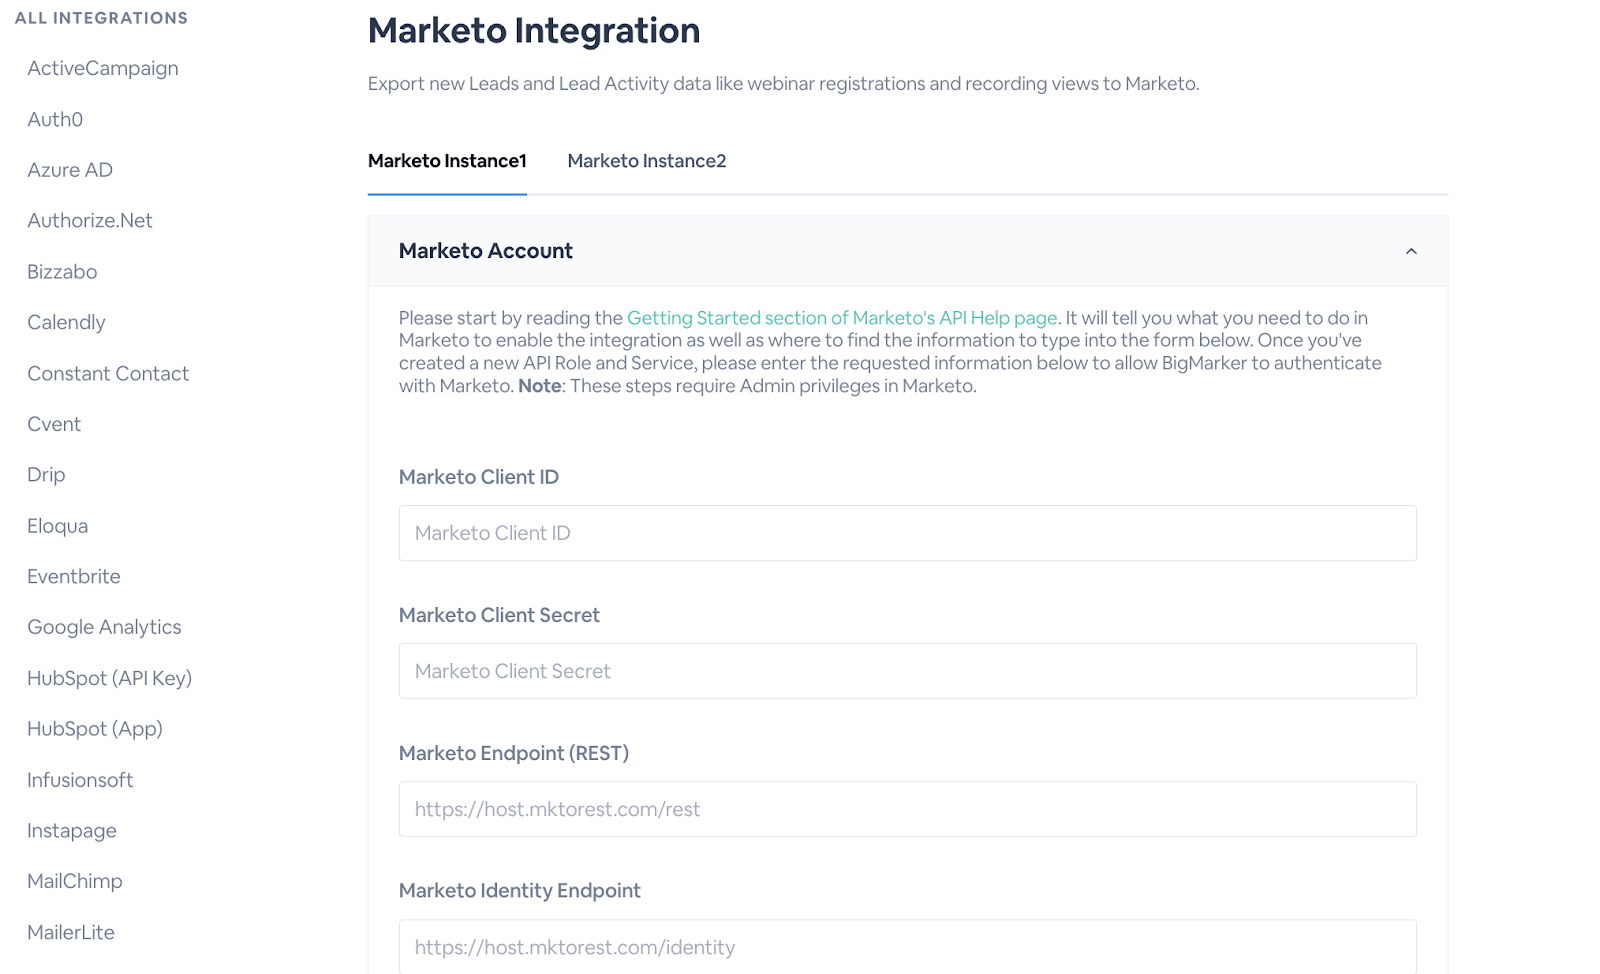
On the session admin or the classic dashboard of your webinar, series or event, you'll find a tab for Integrations. Click on that then look for the Marketo settings in the list of available integrations.

Enter your Marketo Client ID, Client Secret, Endpoint (REST) and Identity Endpoint into the fields below. Because BigMarker is not listed in Marketo Launchpoint, you will need to assign the user an API Only role on Marketo, then add BigMarker as a custom service so that you can use BigMarker with the ReST API.
Follow the steps provided in the links provided, then return to BigMarker to enter the requested information.
Using Multiple Marketo Instances
Integrate multiple Marketo integrations simultaneously for your webinars and series with our separate, secondary Marketo integration. This can be used to export the same data across different teams’ accounts or used to import/export information separately based on conditional fields, such as custom registration field values.
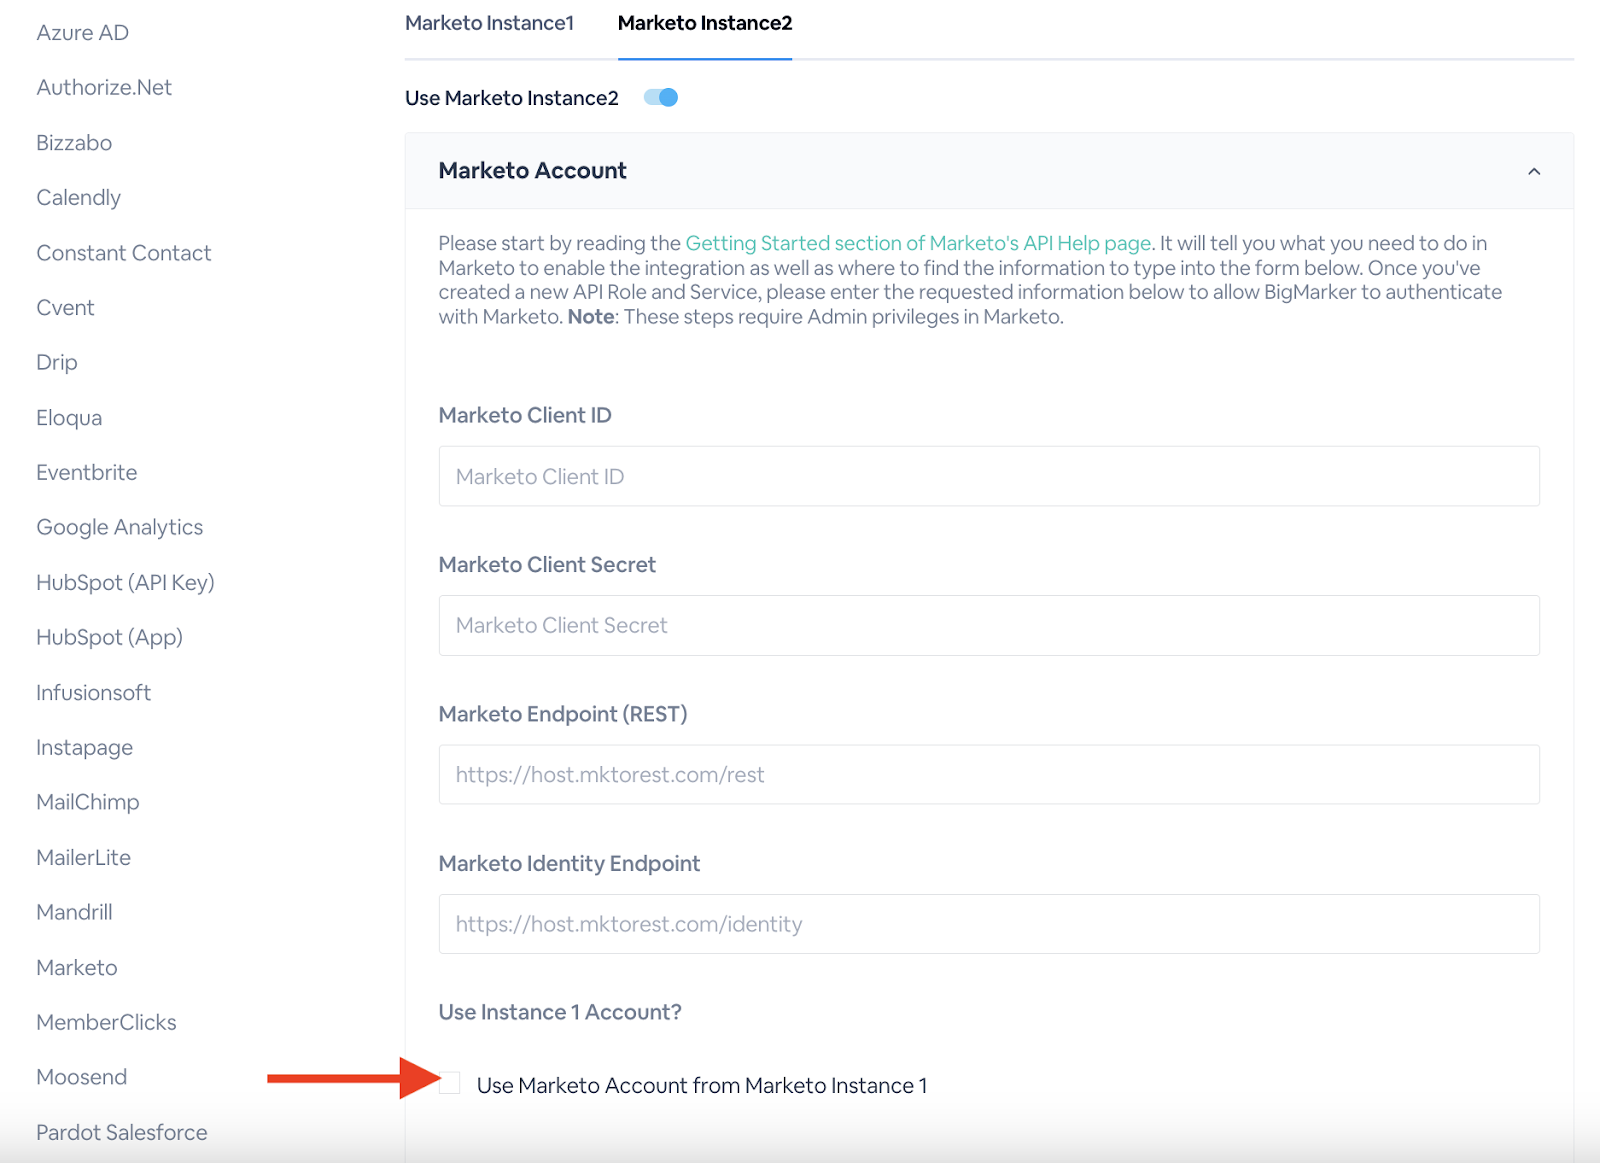
Simply switch over to the Marketo Instance 2 tab, and toggle on Use Marketo Instance2. This opens up another Marketo account for you to set up with new parameters and programs. If you would like your secondary Marketo Account to sync with your first account’s credentials, check off Use Marketo Account from Marketo Account Instance 1
Call Logs
As you use your Marketo integration, the API calls made to and from BigMarker will be listed in the Call Log tab. You'll see a list of calls, their timestamp, which instance it came from, the message type, and whether it was successful or not. Click on View for any call to see further details for that call.


Importing Leads
If you want your BigMarker account to be constantly updated with new leads that have been added to your Marketo account, check Yes, import new leads. Doing so will show settings for you to choose which Marketo Program to import from. You will also see the list of registration fields on BigMarker and which Marketo Lead Field corresponds to it. You also can determine a Marketo status that designates who will be imported
Marketo will sync every 15 minutes with new leads to add to your BigMarker webinar or series automatically. The registration fields will be filled with the values from Marketo based on the mapping you set.

Exporting Leads
If instead you want to collect registration on BigMarker and then export your registrants to Marketo, you can set that up here in the Export Leads section. Much like the Import settings, you will choose a Marketo program to export to, and also map the registration fields from BigMarker to Marketo.

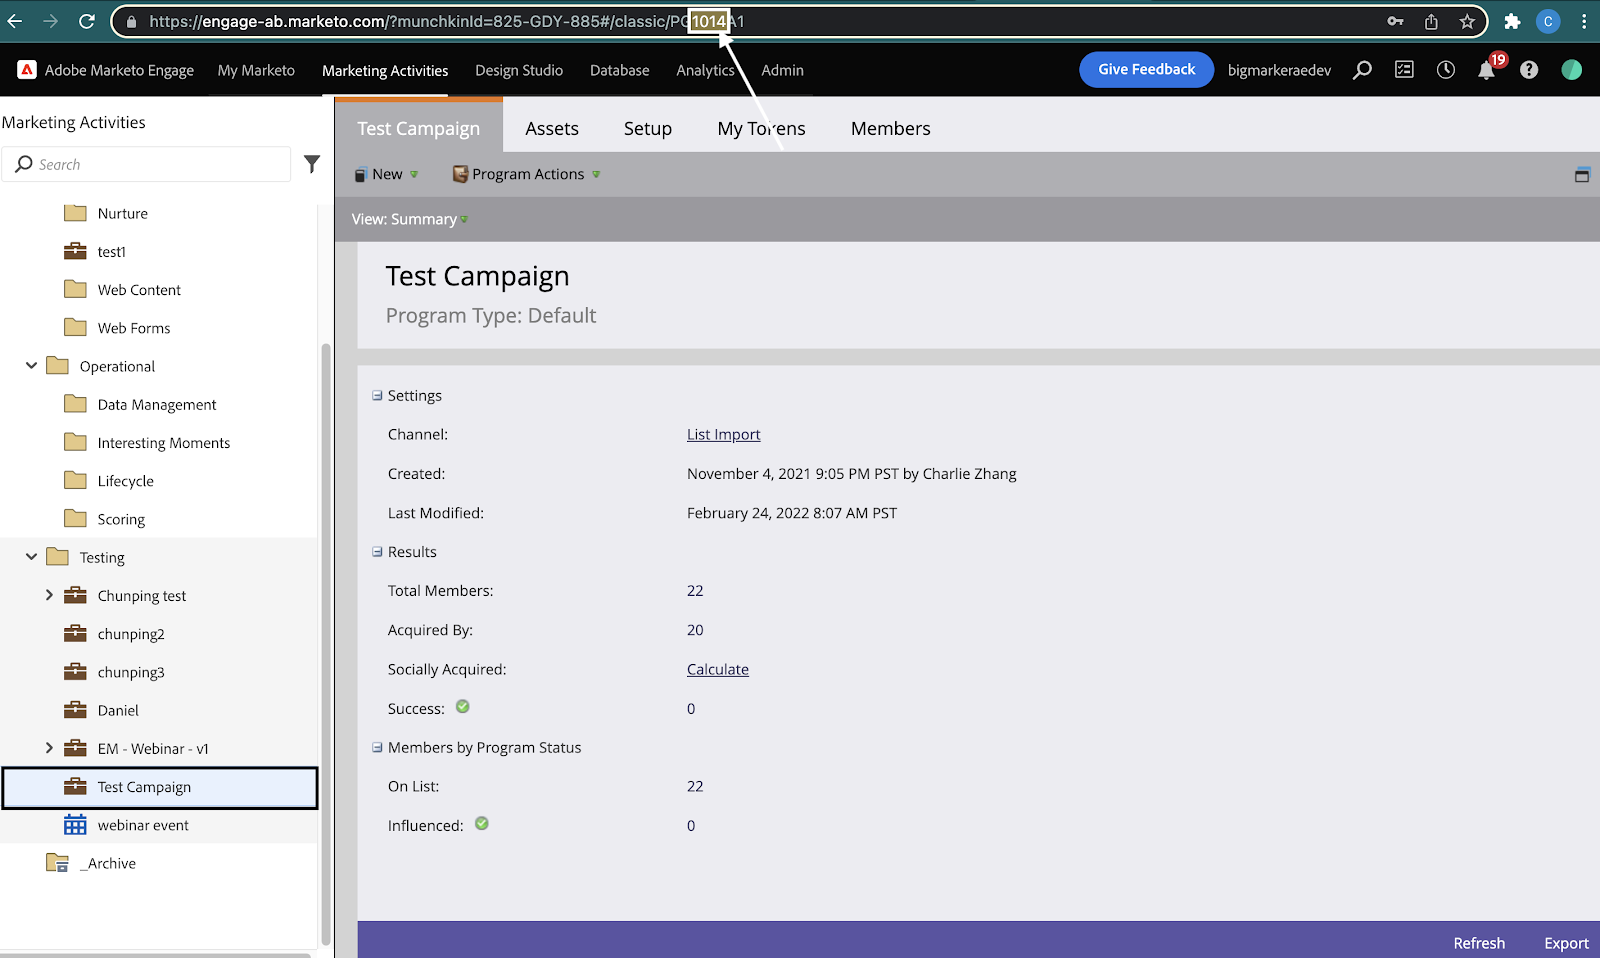
If the program you are looking for is not showing up in the dropdown, you can search for it using the program ID. This 4 digit numerical code can be found within Marketo. Go to your program in Marketo, and in the URL you will need to copy over the 4 digit numerical code found after the last /, and before the last 2 digits. Below is an example program ID found within the URL in Marketo.
With exporting, you have more additional settings you can apply:
Program Statuses - You can assign different program statuses to your registrants based on their activity: If they registered, If they attended the webinar, if they were no-shows, and if they watched the on-demand recording,

Conditional Export - Just after the field mapping settings you'll find the conditional export settings. Choose which BigMarker registration field and what value that field needs to have in order for a registrant to be exported.

Export Marketo Activities
What is a Marketo Activity? While Marketo Leads track the individuals that interact with your company, Marketo Activities track the specific actions that those Leads take to interact with your company. From Marketo’s developer page, “There are several ways a person can interact with your organization. They may visit your company's website, attend one of your trade shows, or perhaps click a link in an email you sent them. These actions are activities, and whatever action they take, Marketo captures it so your Marketing Team can better understand how to send them timely and relevant communication.”
So when people sign up for a webinar, you will know not just that this person has interacted with your content, but they signed up for this webinar in particular.
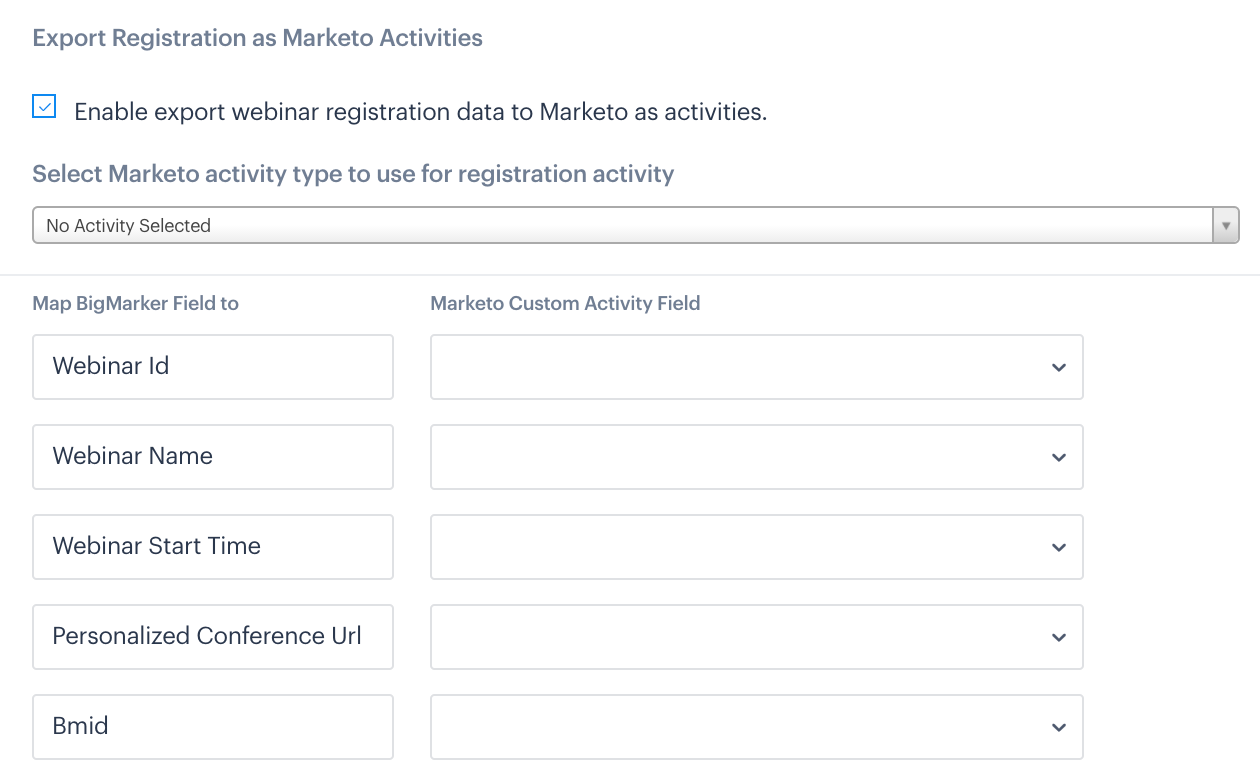
First, check Enable export webinar registration data to Marketo as activities. Then select your desired Activity from under Select Marketo activity type to use for registration activity. Most likely, this will be “New BigMarker webinar,” or something similar.
Note: As in previous steps, you will choose from Activities that have already been created on your Marketo account in the provided dropdown (you will not be able to create a new one.)
Then, map each data field on BigMarker to its counterpart in Marketo, as you did in the previous step. For instance, if you’re tracking each webinar ID as “webinar name” in Marketo, you would select “Webinar Name” in the corresponding dropdown menu.
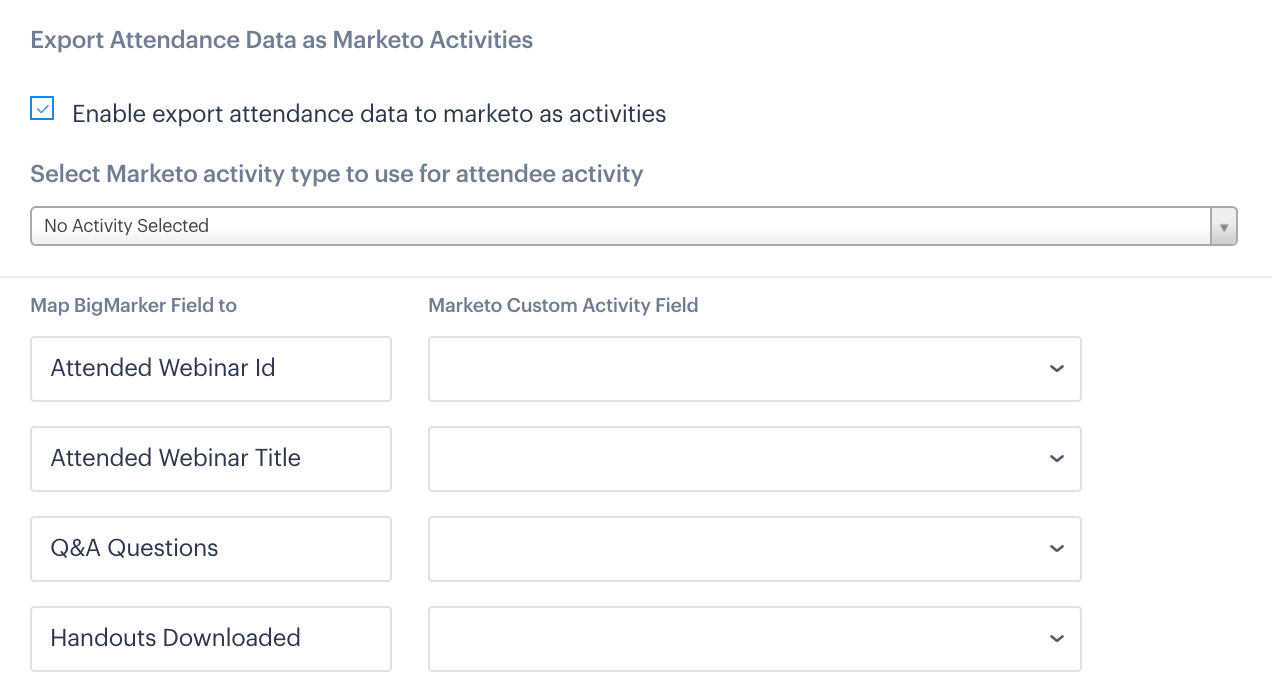
Export Attendance Data as Marketo Activities
You’ve just exported your registration data to Marketo Activities—now you are going to export your attendance data to Marketo Activities. This way, you can track the actions your attendees are taking once they’re in the webinar room itself.
Like the previous step, check Enable export attendance data to Marketo as activities… then select your desired Marketo activity type in the following dropdown menu. Then map each data field on BigMarker with its corresponding custom field in Marketo, e.g., if you are tracking “handouts downloaded” on BigMarker as “# of handouts downloaded” on Marketo, select “# of handouts downloaded” from the corresponding dropdown menu under Marketo Custom Field.
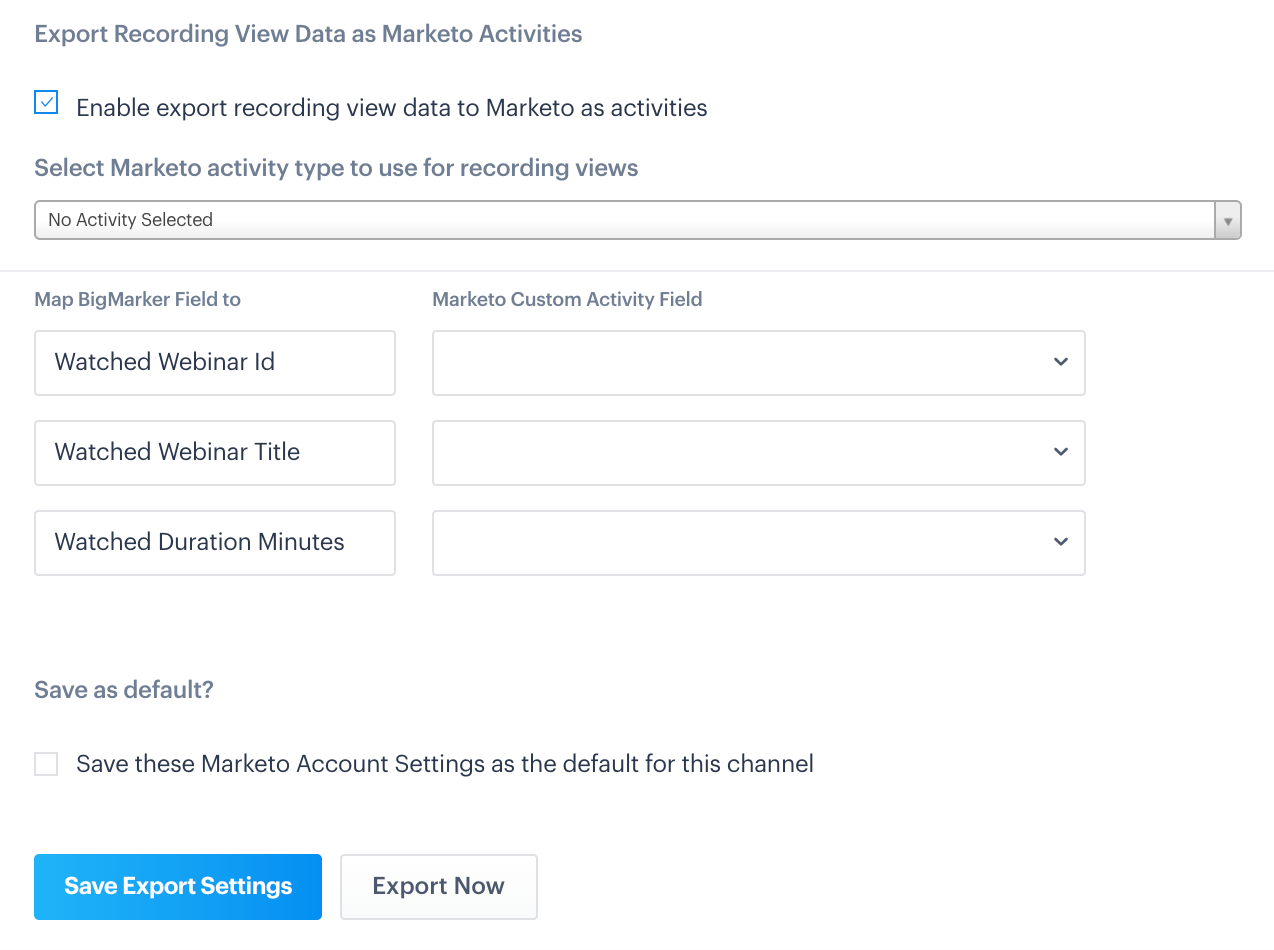
Export Recording View Data as Marketo Activities
You can also export your recording viewers’ data to Marketo Activities, following the same steps used in steps 6 and 7. To make all of the settings configured in the previous eight steps the default for the rest of the webinars hosted by your channel going forward, check save these Marketo Account Settings as the default for this channel. Then click Save Export Settings to complete.
You can set up your Marketo integration to automatically update on-site attendee status during check-in, and pull that audience data directly into your CRM. Below is a screenshot of the integration set up to select.

Export Program Member Data
You also have the option to map additional fields and export your registrants as program members. In this setting you will have a list of additional fields from the webinar and attendance data that you can map to Marketo.

Export to Marketo Custom Object
If you want to export your registrants to a custom object in Marketo instead of just as leads, you can use these settings. Enable and choose which custom object to use. From here, the settings are identical to what you find in the Export Leads settings, without any program status settings.

Progressive Profiling
9. Automatically fill registration fields from Marketo
Once you've successfully implemented your Marketo integration, you can take information from your records in Marketo, and migrate them into a registration on BigMarker.
When someone tries to register, BigMarker can perform a lookup of the Marketo records, based on their email. If the user information matches, then BigMarker can pre-fill in registration fields, making the process that much simpler for the registrant. This process can also give clients more peace of mind that registrants are more likely to finish their registration because a lot of the information has been pulled through for them.
This setting is in your integration dashboard, under Marketo -> Progressive Profiling -> Enable. Then correspond each field you'd like to include in the registration process. Then, Enable Marketo Profile Lookup on Submit & Save Progressive Profiling.