This article covers BigMarker settings that are only visible to customers with an existing Azure SSO integration. You can now connect any SSO service using your channel's SAML SSO Settings.
You can learn more about these settings in this article.
Prerequisites:
- An active Azure subscription.
- Admin access to the BigMarker channel.
Steps:
1. Login into Azure at their https://portal.azure.com/#home and search for Azure Active Directory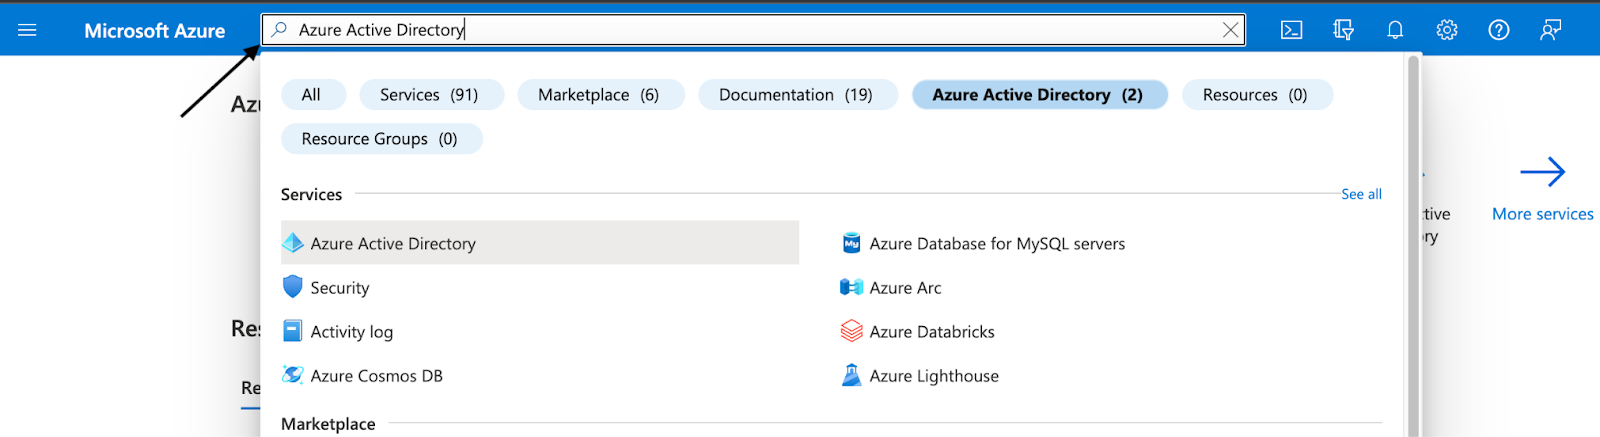
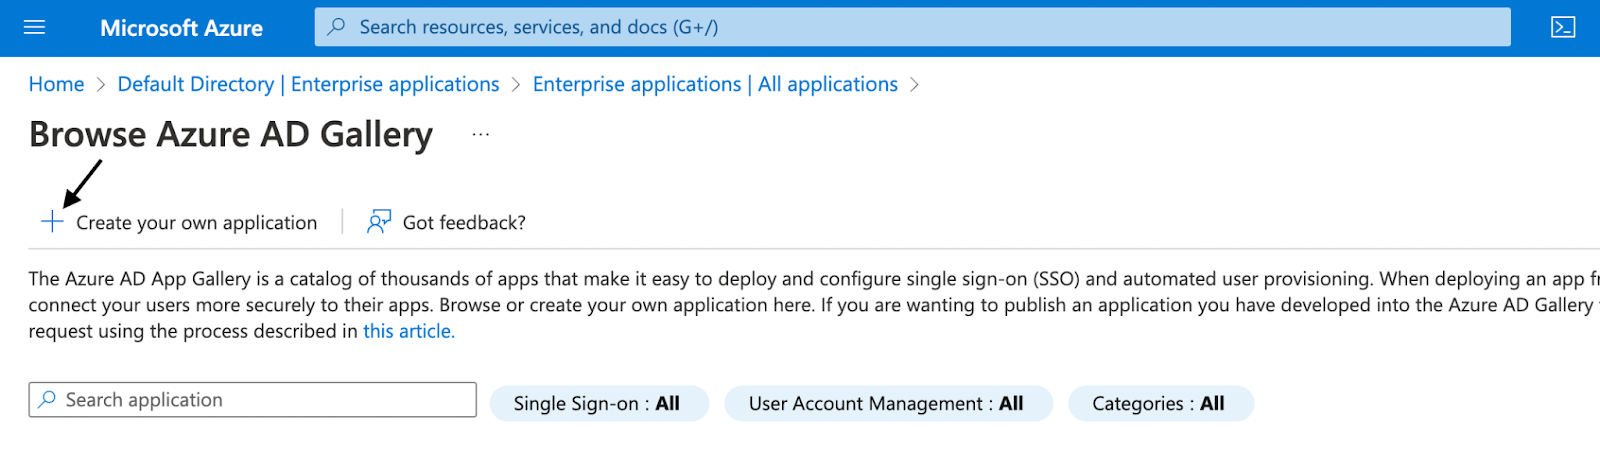
2. Click Enterprise applications in the left hand menu.

3. Click New Application, then click Create your own Application.

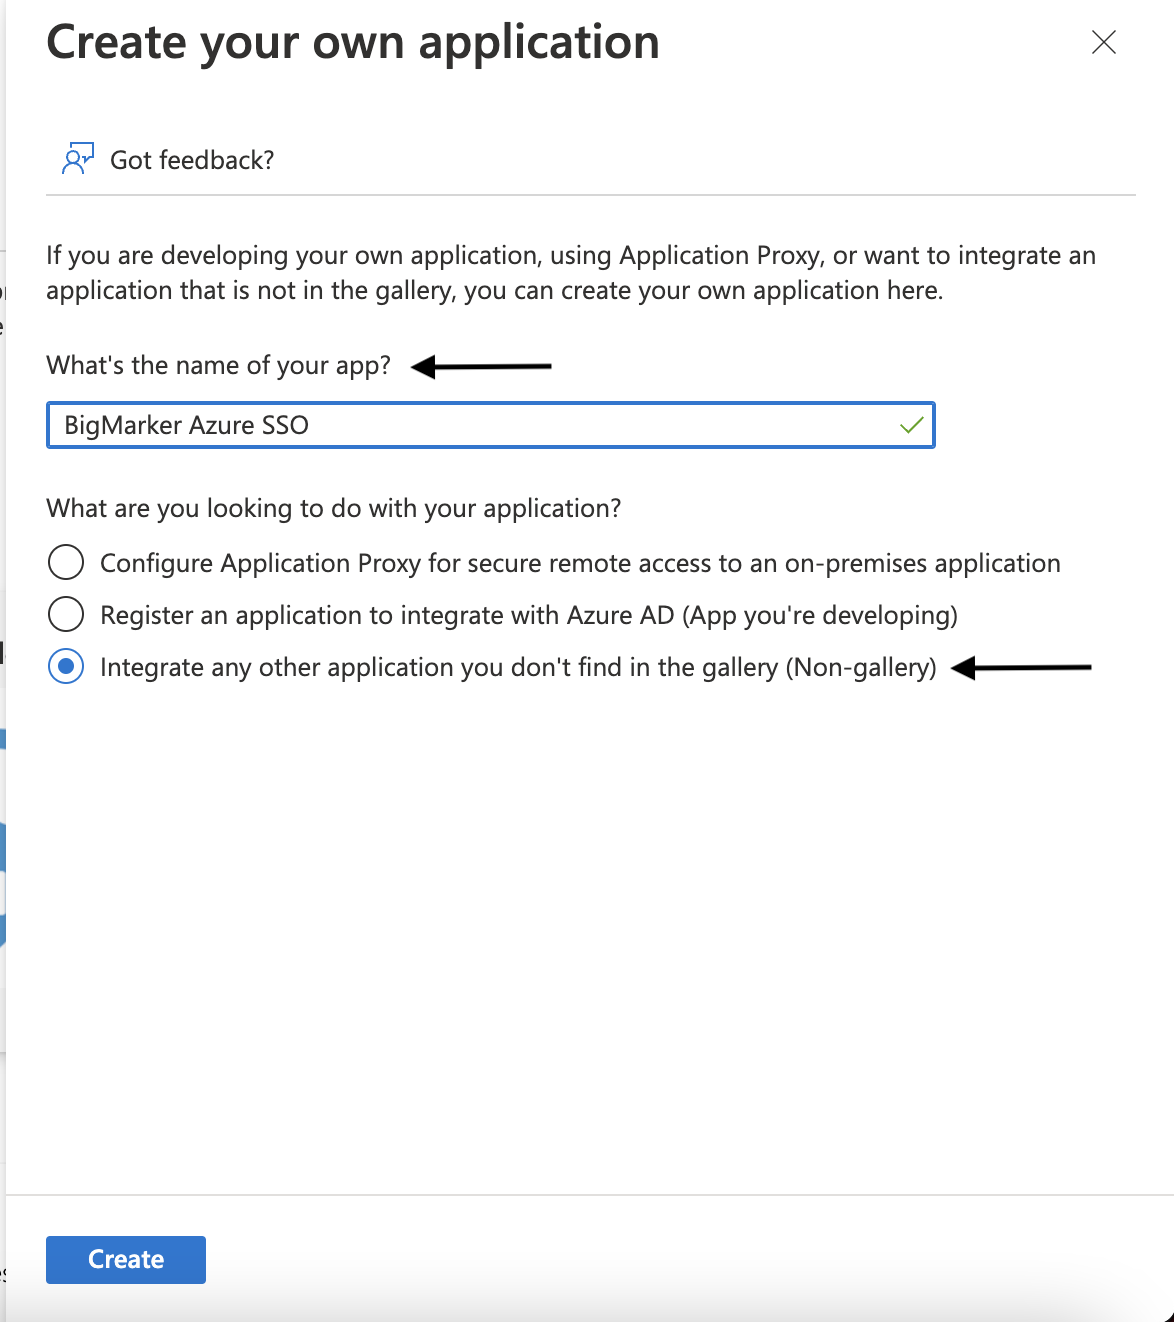
4. Input your app name, then select Integrate any other application you don’t find in the gallery (Non-gallery) option. Click Create.
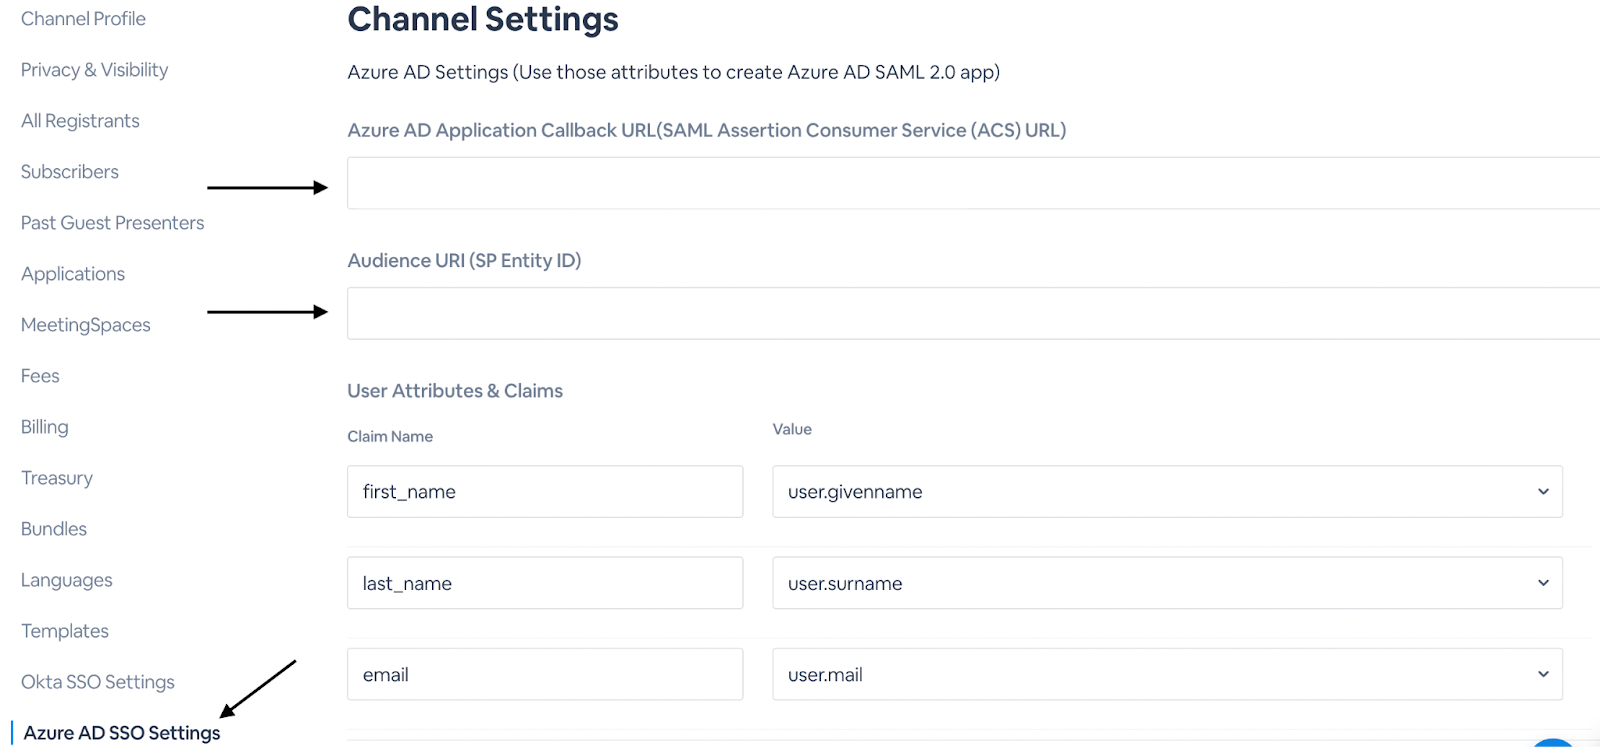
5. Go to your BigMarker Channel’s Settings, and scroll down to the Azure AD SSO on the left hand side. Click there, copy the Azure AD ACS URL and SP Entity ID.
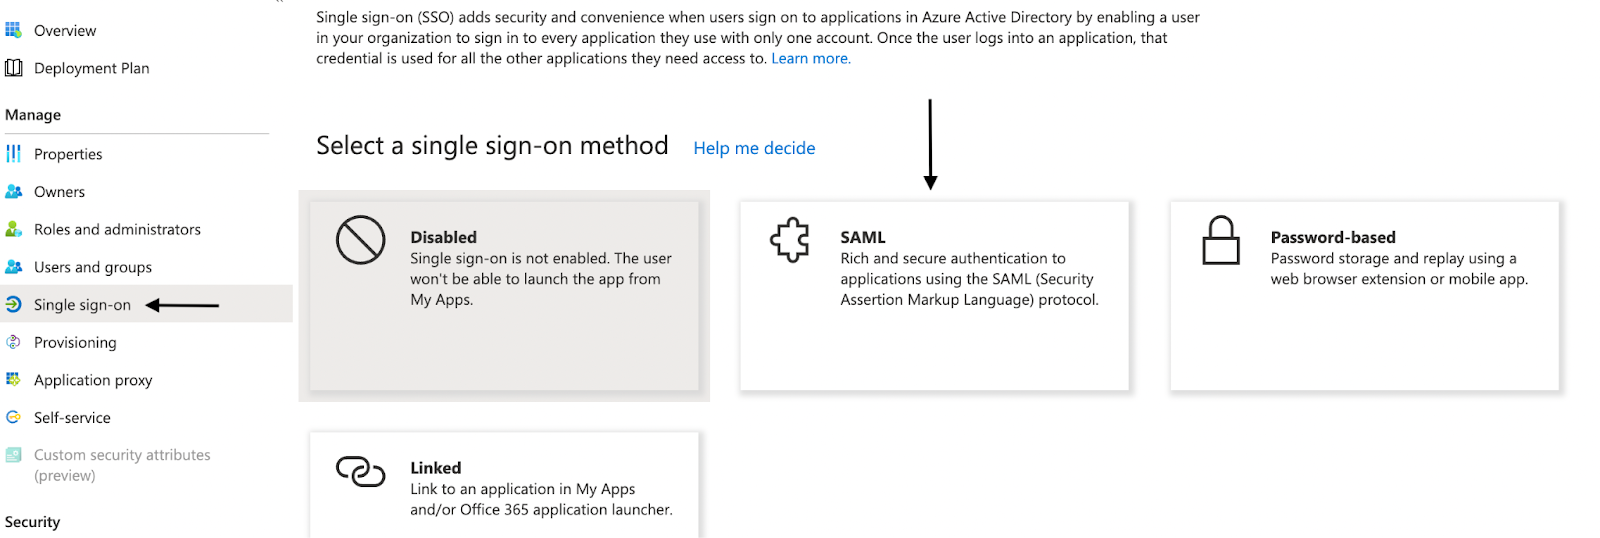
6. Go back to Azure AD. Click Single Sign On in the left hand menu, then SAML. From there, click Edit on the Basic SAML Configuration section.
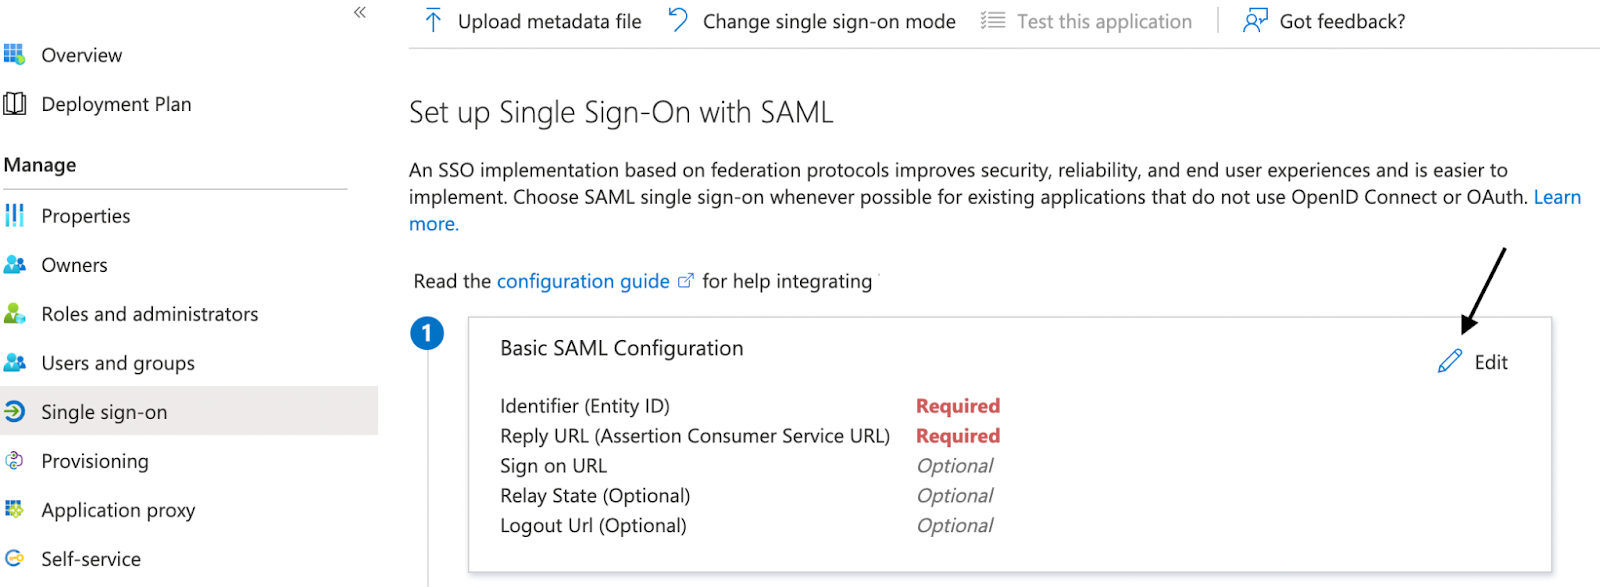
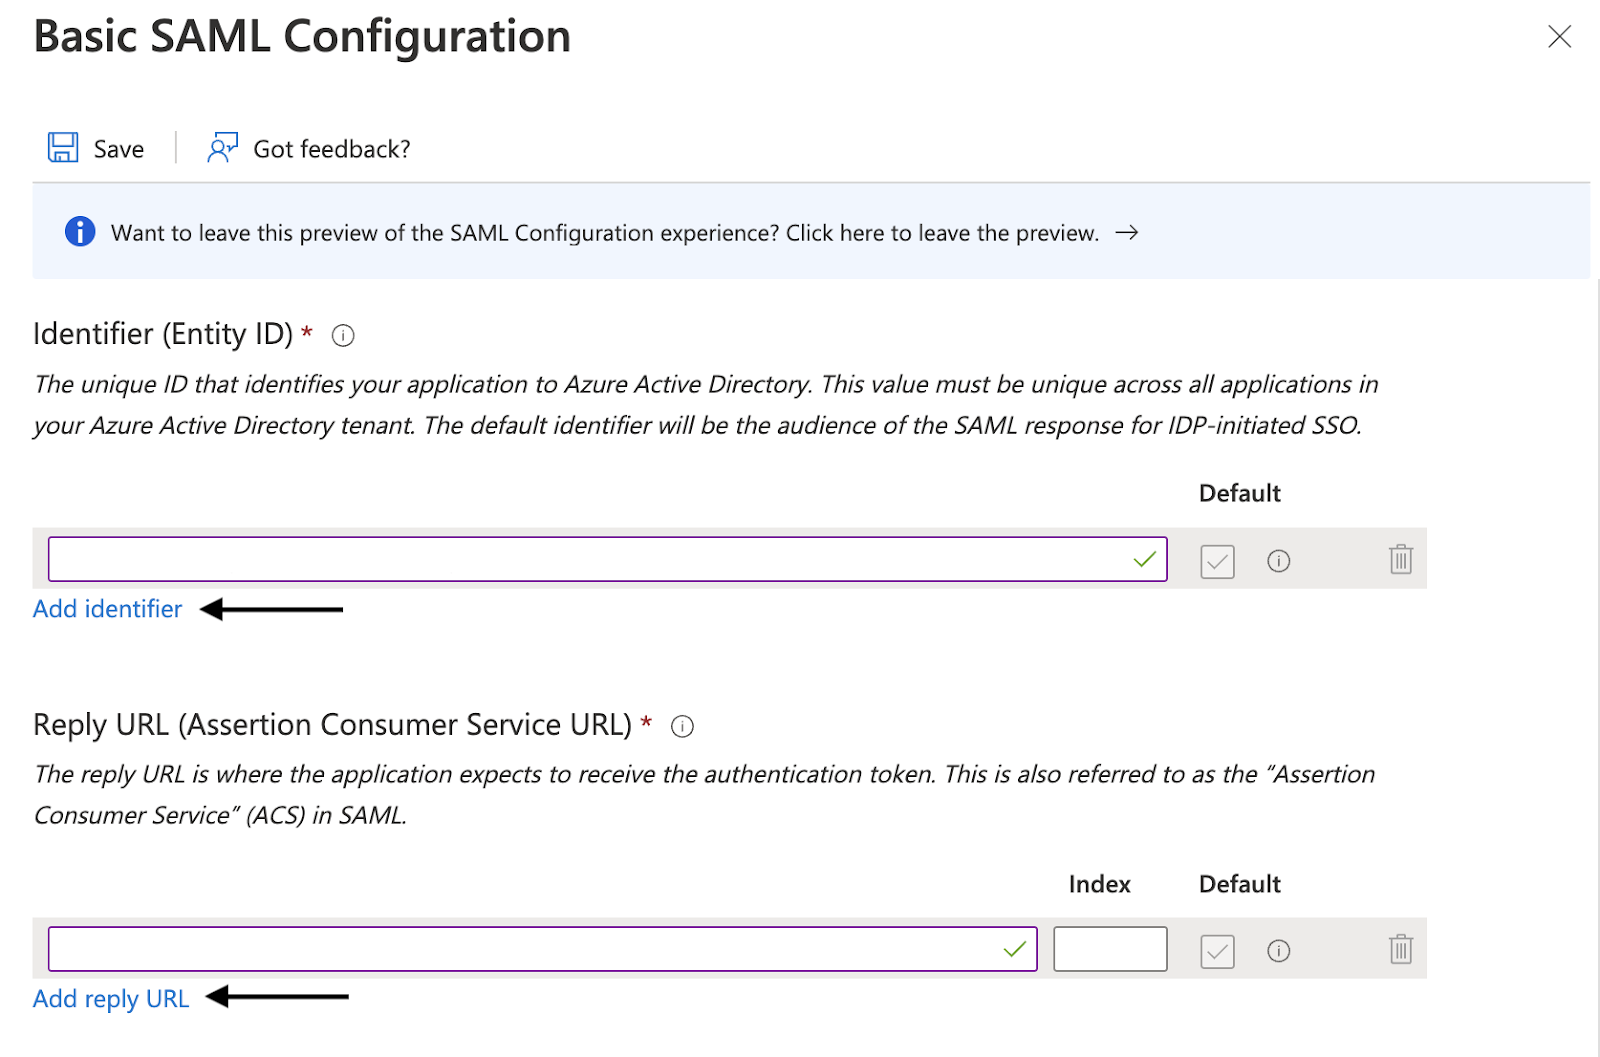
7. Click Add Identifier and Add reply URL to paste the ACS URL and SP Entity ID from BigMarker into the Reply URL and Identifier fields. Click Save.
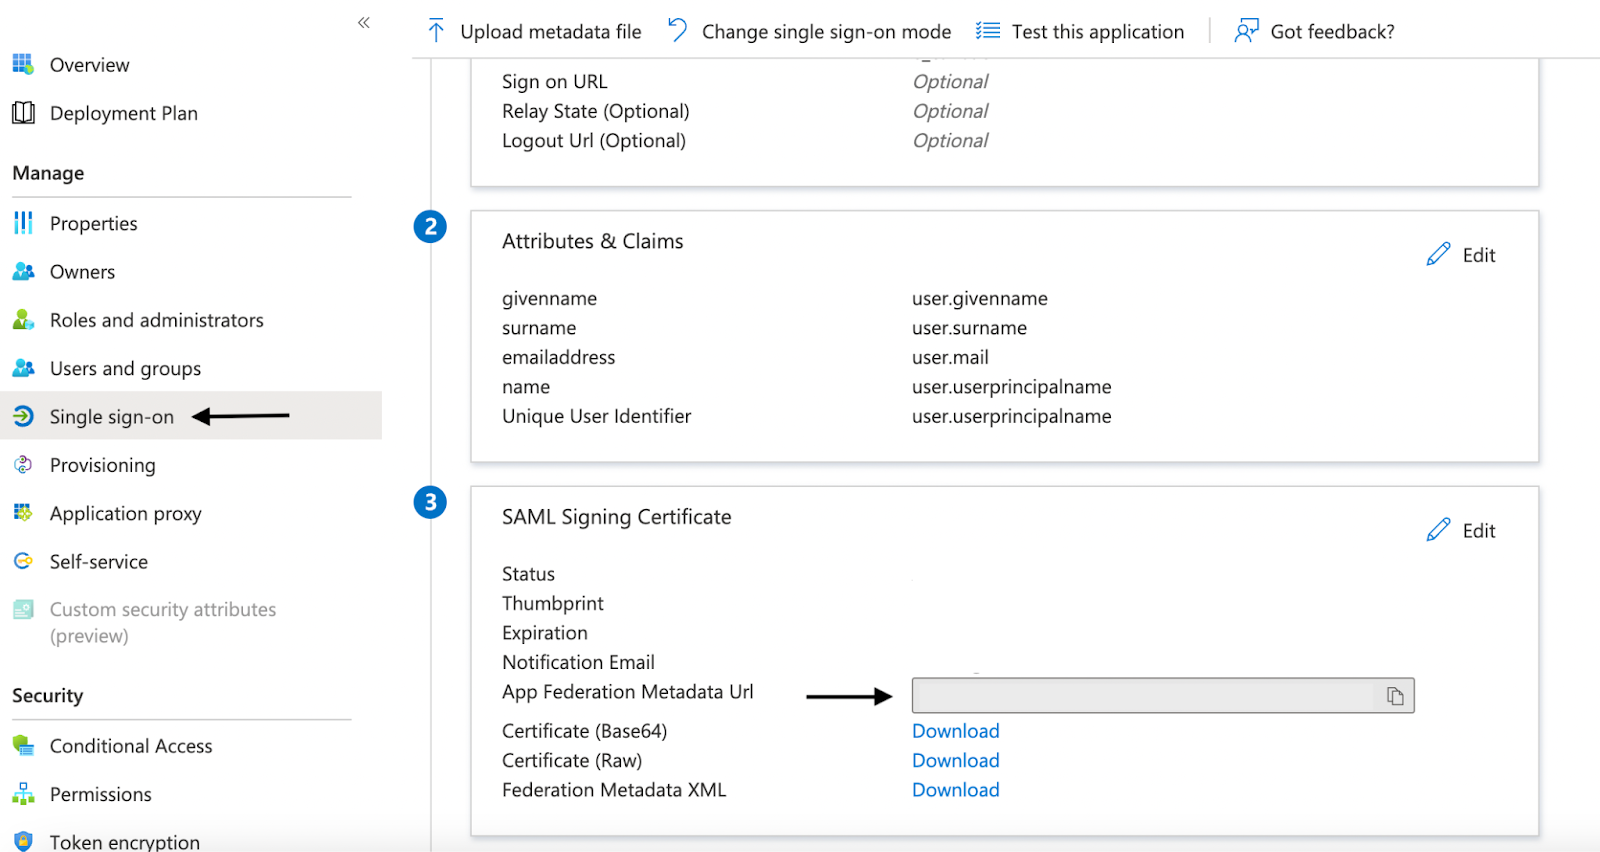
8. After that has been configured, go to the Single sign-on section in Azure, and under the SAML Signing Certificate section, copy the App Federation Metadata URL from the SAML configuration you just created.

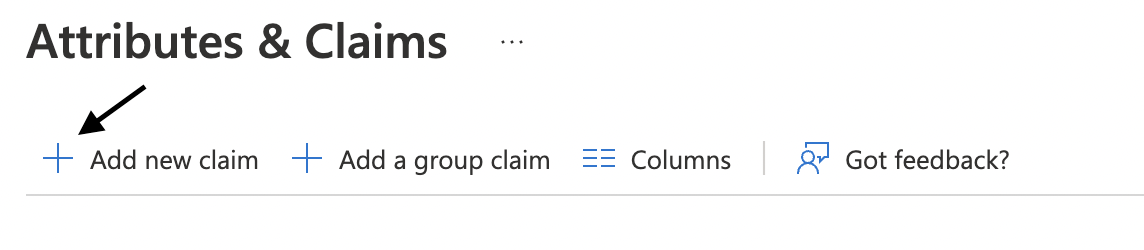
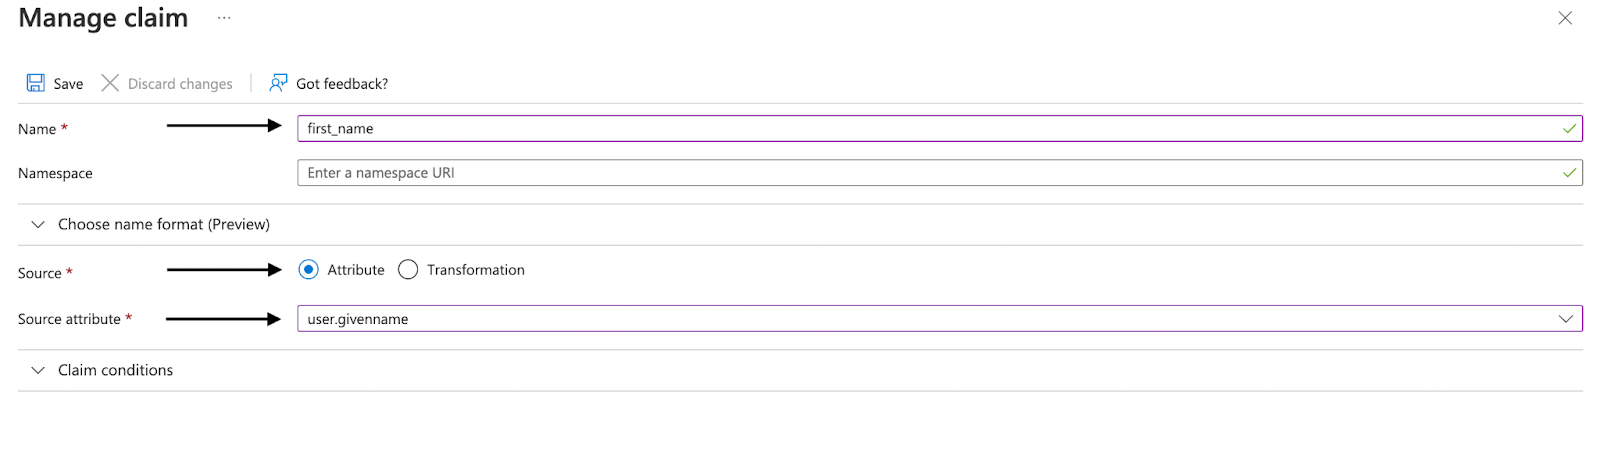
10. Next, configure your user attributes & claims in Azure . Click Edit, and add claims in the format of:
-
- Name field is “emailaddress” and the source attribute as “user.mail”
- Name field is “givename” and the source attribute as “user.givename”
- Name field is “surname” and the source attribute as “user.surname”
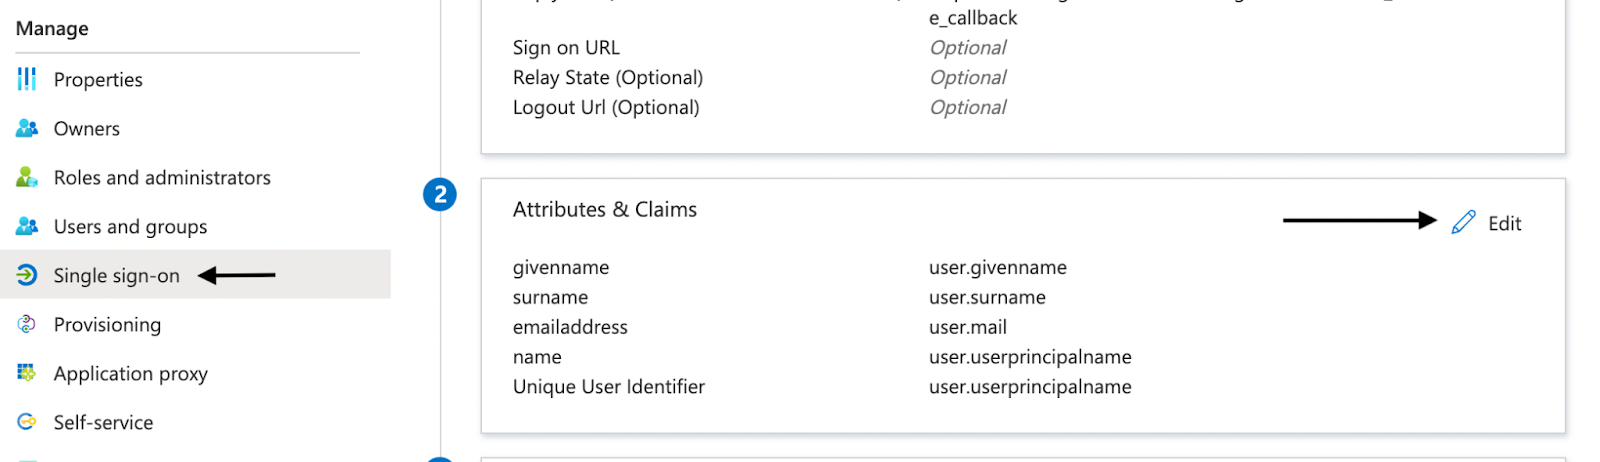
Note: These attributes may be already configured in Azure. You can double check this under the Additional Claims section in the Attributes and Claim - Edit section.
11. Click Save when finished and Submit in BigMarker.