Allows participants to learn about one another more quickly and identify potentially valuable connections among the crowd by including your custom registration fields into the Chat Panel
Custom registration fields, which ask attendees to provide additional information including their job titles while registering for an event, give hosts additional audience insight that can be leveraged for marketing and follow-up.
Hosts now have the option to display custom registration field values in the chat panel of their sessions. This allows participants to learn about one another more quickly and identify potentially valuable connections among the crowd.
For example, if I created a custom registration field called Job Title and set it to display in the webinar room chat, each participant's job title will appear alongside their name when they send a chat message. However, this applies only to participants who submitted their job title when they registered for the event.
Note: Hosts can create required and optional custom registration fields, regardless of whether they will display in the webinar chat or not.
How do I display custom registration field values in the webinar room chat?
1. Log in to the webinar and select the Manage Webinar tab. In the left-hand menu on this page, select Custom Registration Fields.
2. This page displays all of the custom registration fields that are currently active on your event's registration form. To create a new registration field, click the blue Add Field button.
3. In the pop-up that appears, enter the name of the field you'd like to add to your event's registration field. This is the information that you want to collect from your attendees (for example, Job Title, etc.)
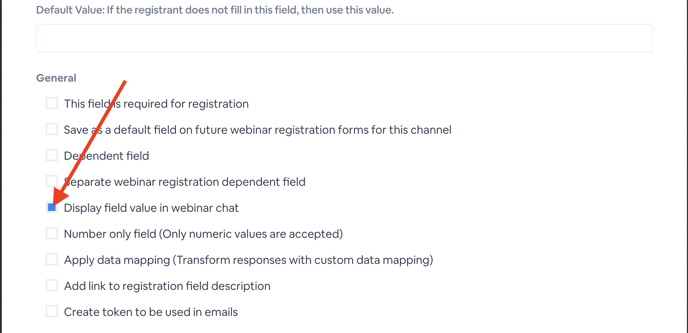
4. Check Display field value in webinar chat. Once active, every participant's job title will appear below their name when they send chat messages.
If you want to require all of your guests to provide their job title before registering, also check This field is required for registration, which is located at the very top of this list.
Click Save Field to complete.

