Note: Closed Captioning is only available for Enterprise plans. If interested, please contact our Events Experts at sales@bigmarker.com
Using the new classic admin? Click here to learn where you can find the closed caption settings for on-demand sessions.
Closed captioning improves comprehension and accessibility for your on-demand content. Whether you let BigMarker process your captions or if you have a file ready to upload, you can reach your whole audience across the globe with on-demand captions. Learn more about enabling closed captions in On-Demand webinars below.
How can I display closed captions for my on-demand webinar?
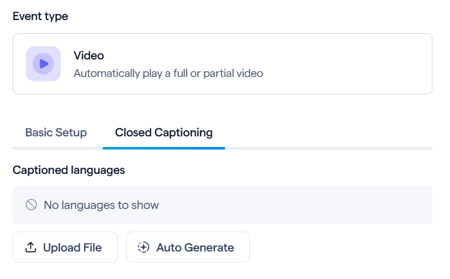
Open the session admin of your on-demand session and go to Production > Languages & Captions. From there go to On-demand Closed Captioning.
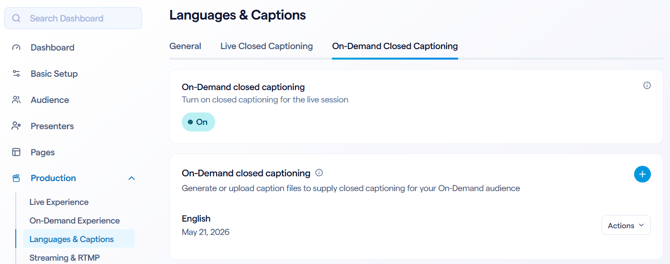
Once enabled you'll see a new setting for selecting the languages to have captions for. Click on the plus button to get started.
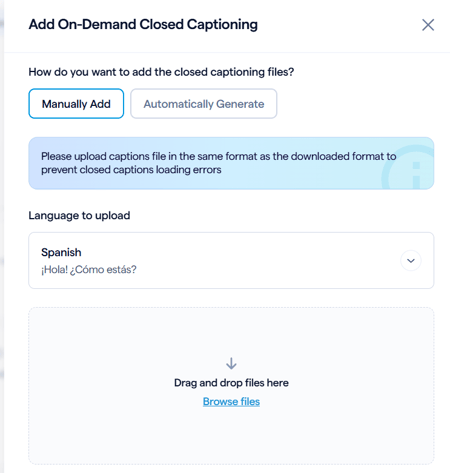
You have two options for adding languages. Either you can manually upload vtt files for each language, or click on Automatically Generate and choose which languages you want to process languages for. The generation option will take some time to complete, depending on the length of your video.
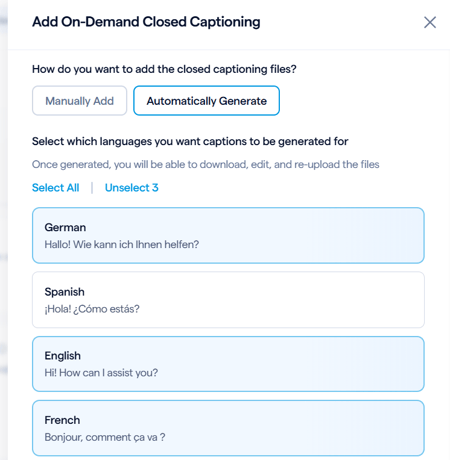
Once those captions are added you'll see them in your list of languages in the on-demand captions setting. You can download a copy of the captions, replace that language with another vtt file, or delete it to start over.

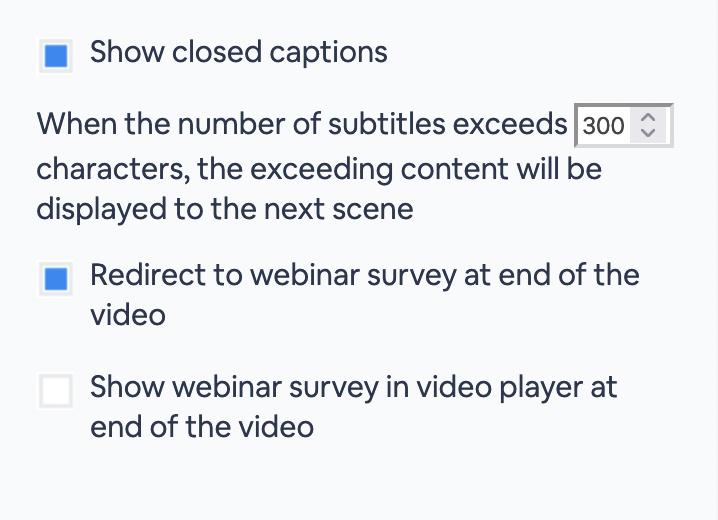
In the recording player settings, you'll want to go to the customize player settings to enable closed captions on the player itself.

Scroll down on the left-hand panel and select Show Closed Captions. Once this is checked, closed captions will be visible to your on-demand viewers.

Once you have enabled closed captioning, you can select a character limit for the closed captioning content. This ensures that the captions don't overlap with your presentation. Enter the character limit number in the box provided (shown below), or use the arrow keys to adjust the character count. The default is set to 300 characters.
How can on-demand viewers turn on closed captioning?
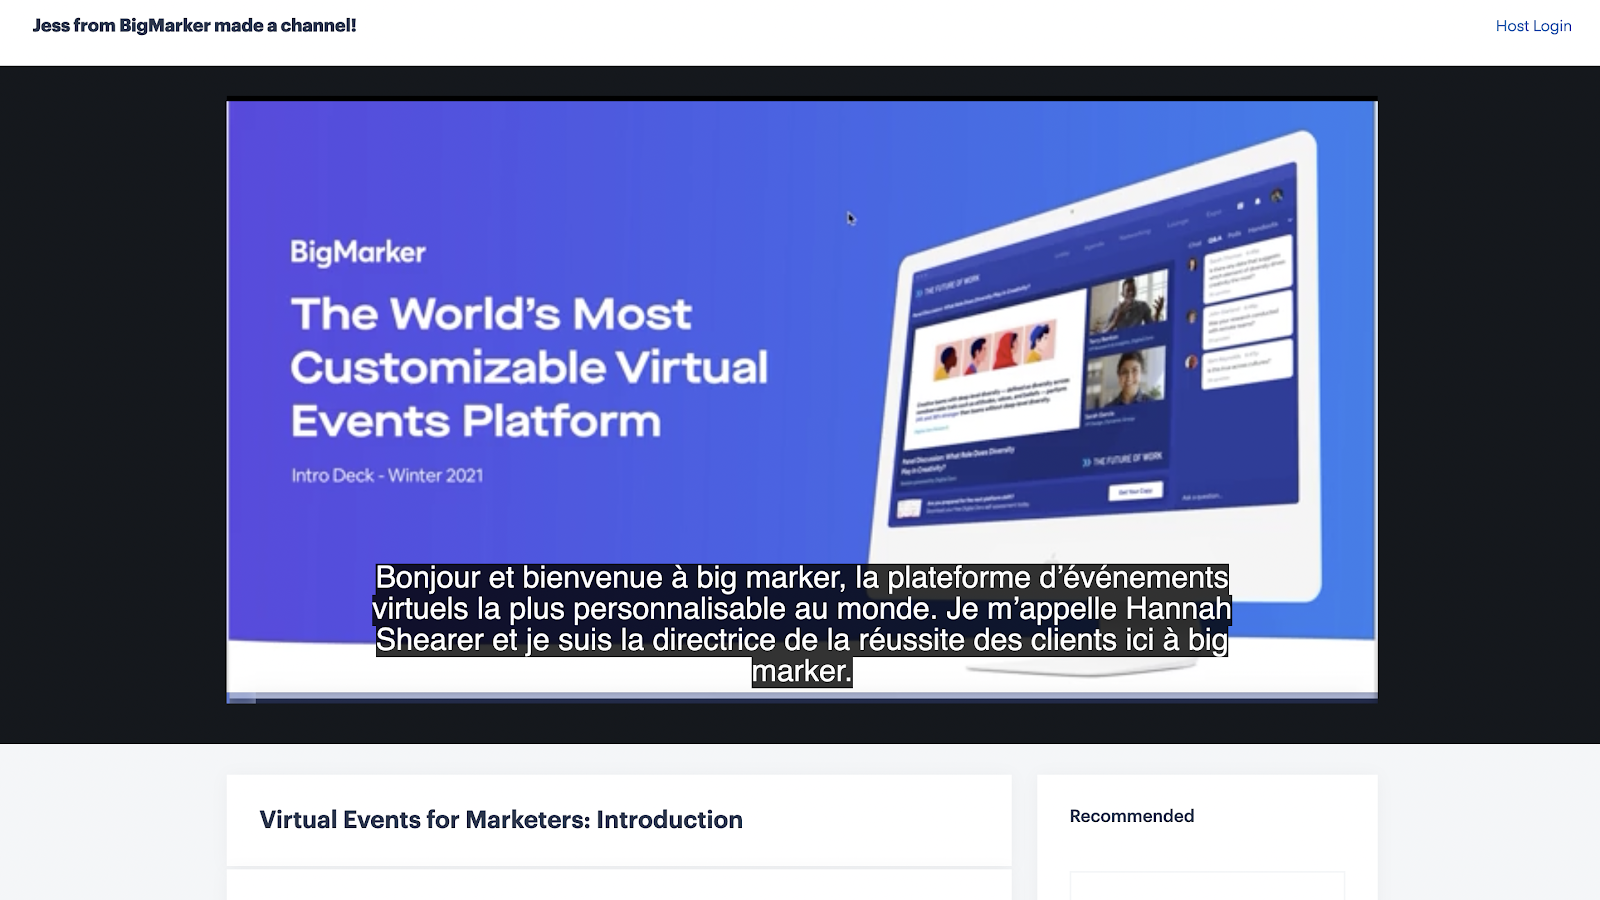
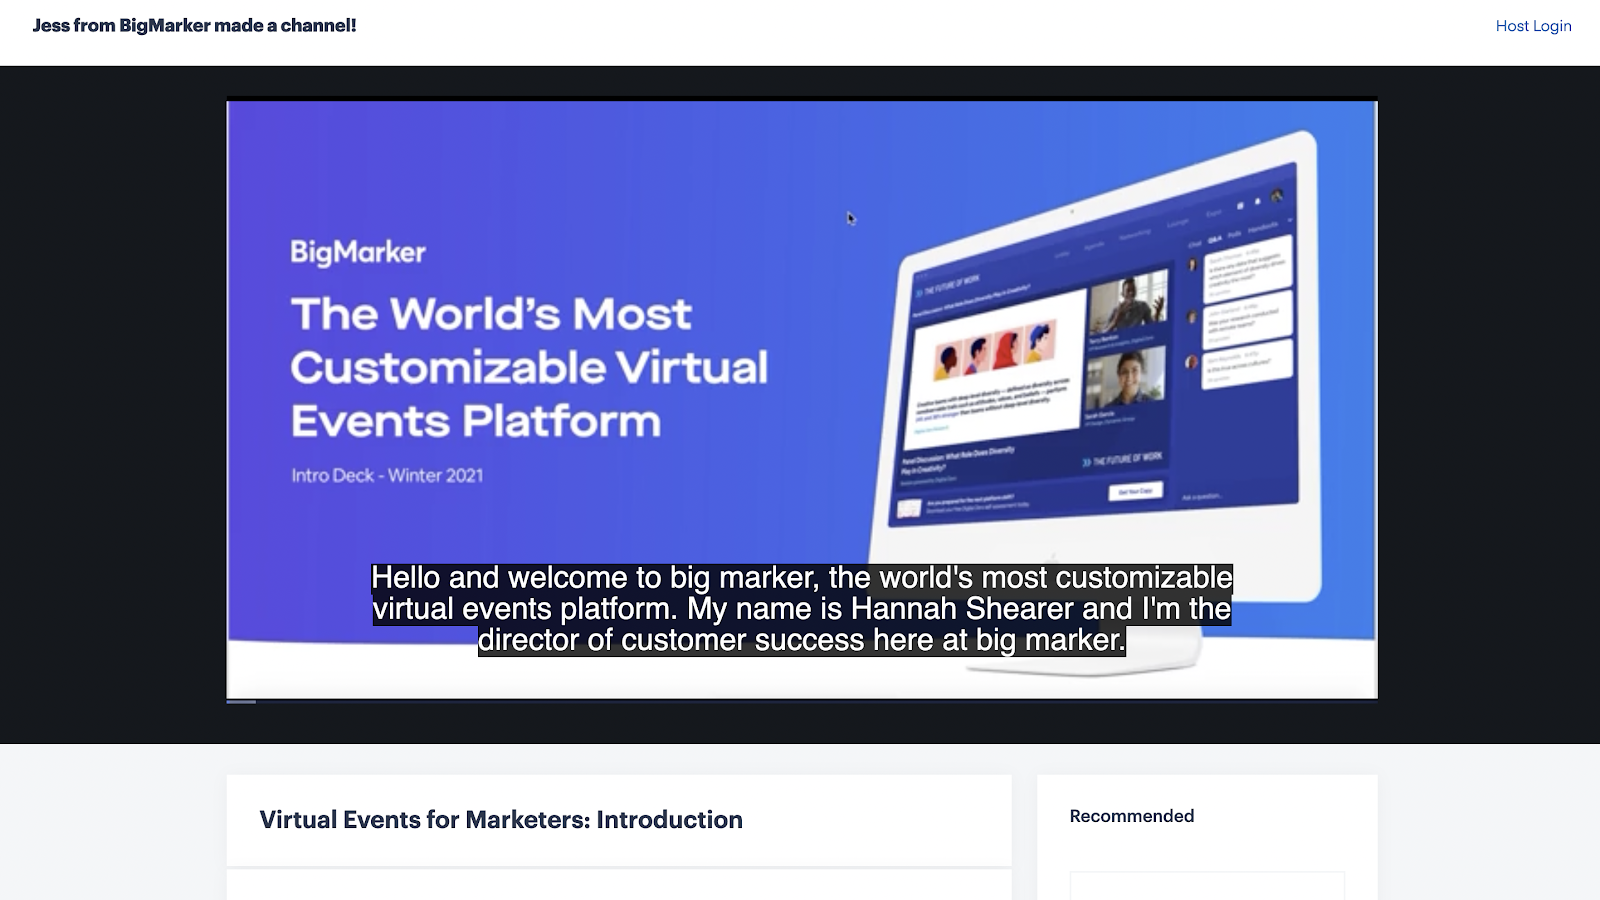
If closed captioning is enabled during a session, the "CC" icon will appear in the top right-hand corner of the video. Click this button to turn on closed captioning for the session.

A dropdown featuring different language display options will open (options include English, Spanish, French, Portuguese, German and Chinese). Click your preferred display language. Once you select a language, closed captioning will appear in this language.
How to Enable Closed Captions on Evergreen Webinars
Note: this setting can only be made available by a BigMarker Admin. Reach out to your BigMarker point of contact for more information
When configuring your automated or evergreen webinar, in the automation timeline you are able to add videos. When you do so, you'll see a new option to add captions to that video.
After adding a video, go back to that video in the timeline and open up the details. You'll see a new tab for Closed Captions. Here you'll have the same options to upload or generate captions for specific languages.
Once your Evergreen Webinar begin, your attendees will be able to click the CC icon at the top right hand corner and select their preferred display language.

On-demand captions in the Classic Admin
To add or generate closed captions in the classic admin go to the dashboard of you on-demand webinar and click on Edit Closed Captions.
