For your event, you can create a specific ticket pass that is only available to specific registrants. For example, if they have a "regular" ticket pass, you can create an upgrade pass that would allow them to get a "VIP" pass.
Note: This is only available for channels with an event license. If interested, please contact our Events Experts at sales@bigmarker.com or your customer success manager.
The settings here are used primarily if you are using the BigMarker-provided event page templates. If you are using or are interested in using custom pages, contact your customer success manager for more information.
Table of Contents
1. How to Set Up Pass Upgrades
3. Creating an Upgrade Pass Navigation
4. Gate access to Modules Only if Ticket is Upgraded
How to Set Up Pass Upgrades
Upgrade passes will not be compatible with custom pages.
There are a few steps to setting up your pass upgrades. First you will need at least two passes (you can learn how to do this here.). Then, follow the below steps.
Creating an Upgrade Pass
1. On your Virtual Events backend, click to Registration & Passes, then Upgrades. From there click New Upgrade Pass

2. Create your new upgrade pass. You will customize many things such as the title and price, but importantly you'll specify how this pass interacts with your existing ticket passes.
First, you'll specify Which ticket pass this will be upgraded from. This is your "Regular" pass, what users start with and will upgrade from.
Next, you'll specify Ticket pass included in the upgrade. This is you "VIP" pass, what users will get in with the upgrade.
Lastly, consider If enabling Registrant will no longer have original pass after upgrading. With this turned on, the original "Regular" pass will be removed from the user's information. This is useful if both of your two passes have exclusive content that the other one doesn't.
3. Click Save & Exit when finishedCreating an Upgrade Pass Navigation
To have your upgrade pass show after your registrants selected their tickets and passes, they will be able to view them on your Virtual Events main page. However, you will need to create a new navigation that will show this upgrade pass. 1. On your Virtual Event’s backend, click to Event Modules. Once there, click to Navigation. 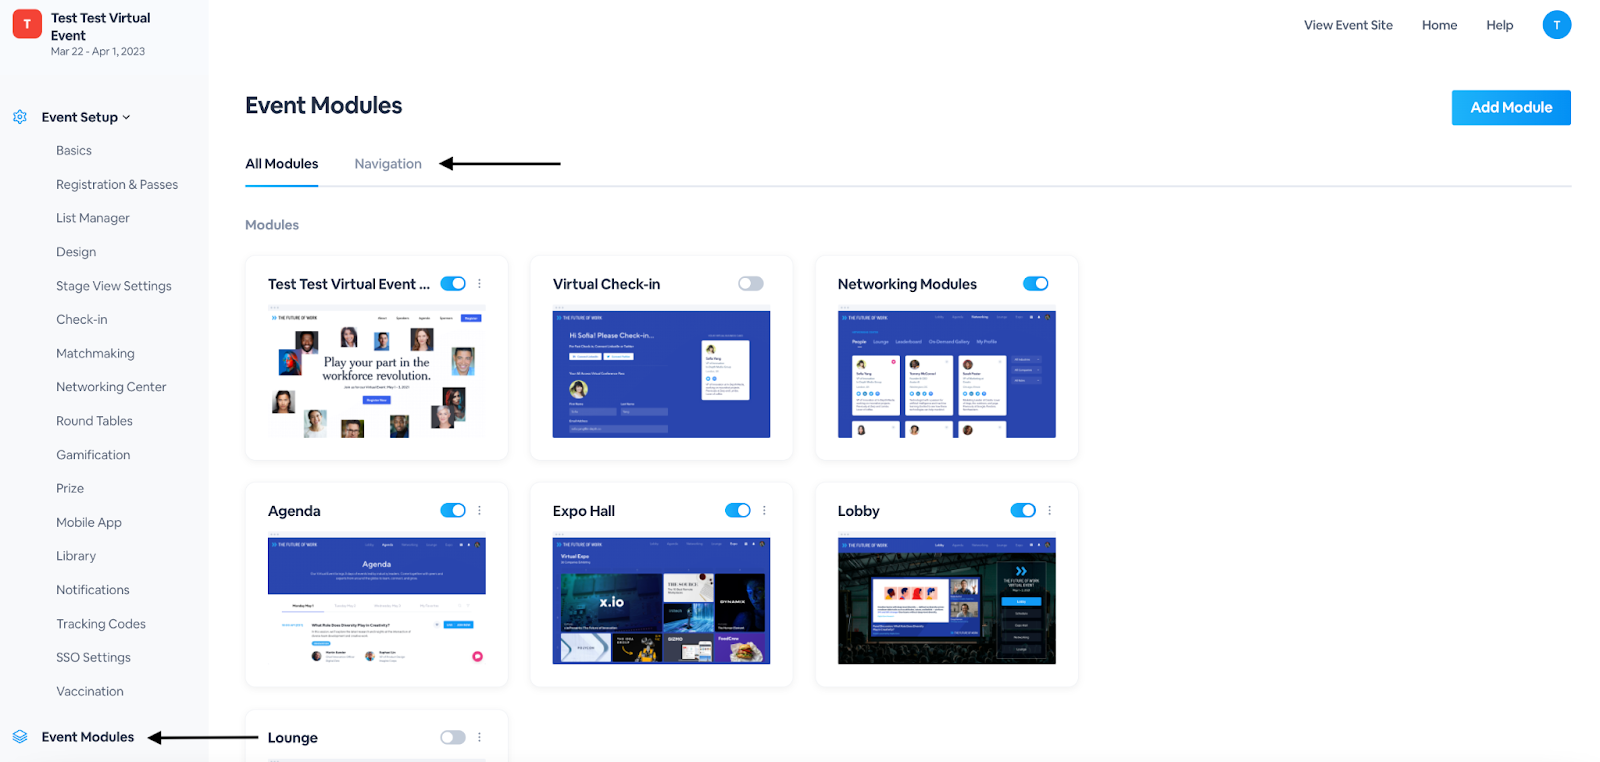


4. Click Save & Exit
After registration, your attendees will be able to view the link in your Virtual Events header and click to upgrade their pass. View the video below to see the setup and attendee experience in live action:
Gate access to Modules Only if Ticket is Upgraded
You can gate access to certain event modules (lobby, expo hall, agenda, etc.) to attendees until they purchase an upgraded pass. Follow the steps above to create your upgrade pass, then go to the Navigation tab once more.
1. Select Edit to your navigation of choice
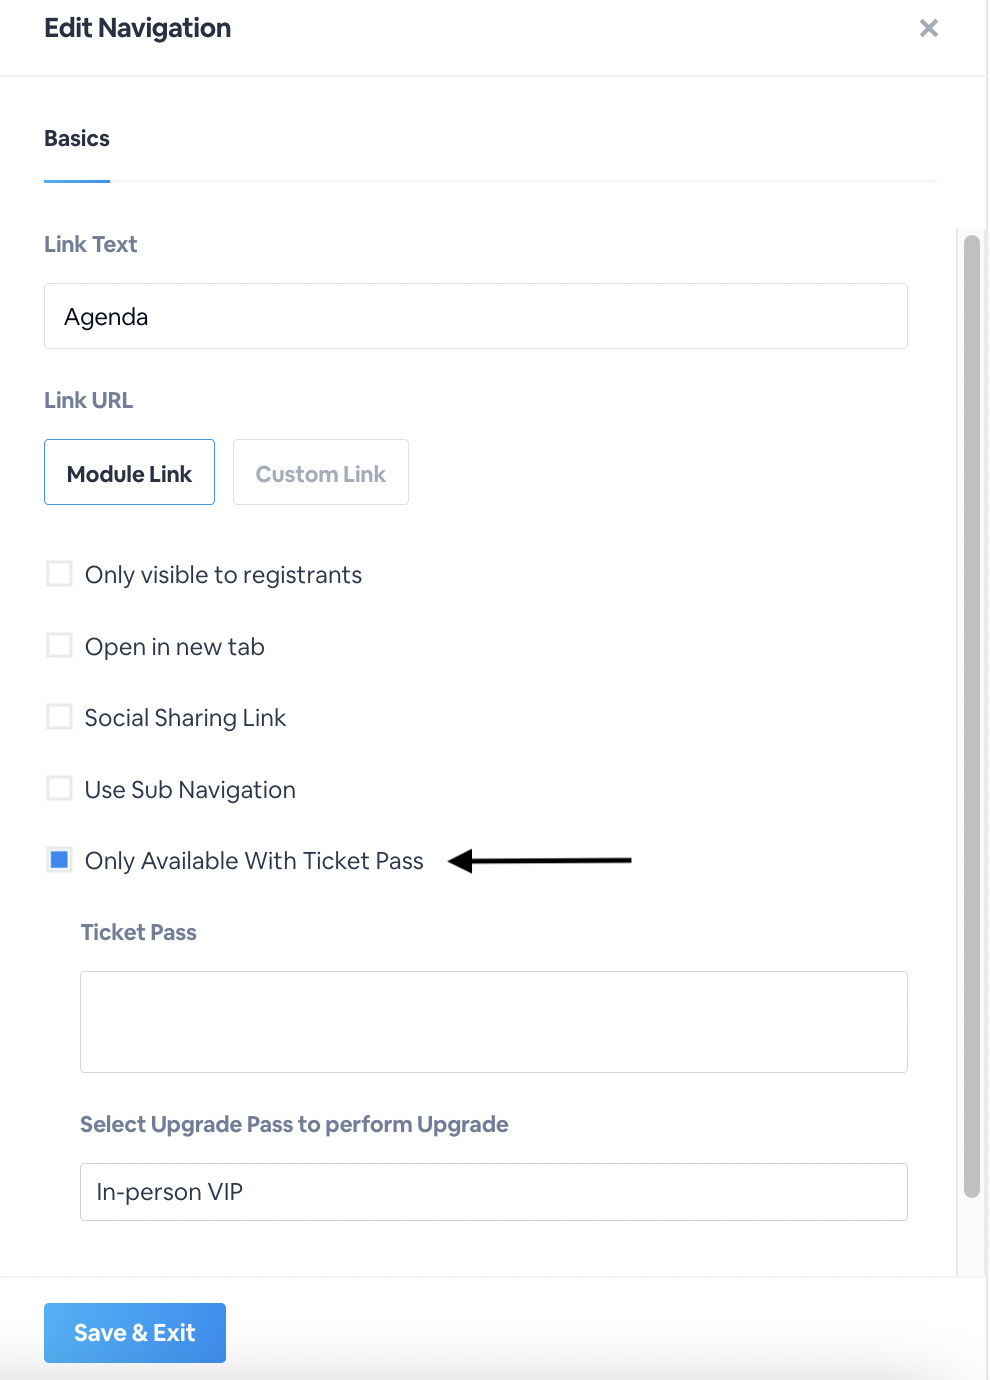
3. Click Save & Exit.
This will effectively block access to those navigation modules unless the upgraded pass is purchased.