Hosts and Presenters can add Sticky Notes across all tabs in the webinar room. This allows hosts to create notes that display on each tab of the Chat Panel, regardless of which one the attendee is currently using. That means a pinned message can display across all tabs in the Chat Panel, call to actions remain consistent throughout the event, important chats are never missed, and more.
 In this article, learn how to use Sticky Notes on all tabs during your session.
How to Create a Sticky Note
Go into your session admin and go to Engagement > Interactive Tools > Settings. Scroll down to see the sticky message setting. Here you'll see options to add text, add a link, and update the colors of the sticky note.

You are also able to personalize these messages. You can use tokens for the registrant name or the webinar name, making it easy to configure as part of a webinar template.

Note: The Sticky Note will display across all tabs with the same message. For example, if you enter in “Hello Everyone”, that message will display on the top of the Chat, Q&A, Polls and Handouts tab as well.
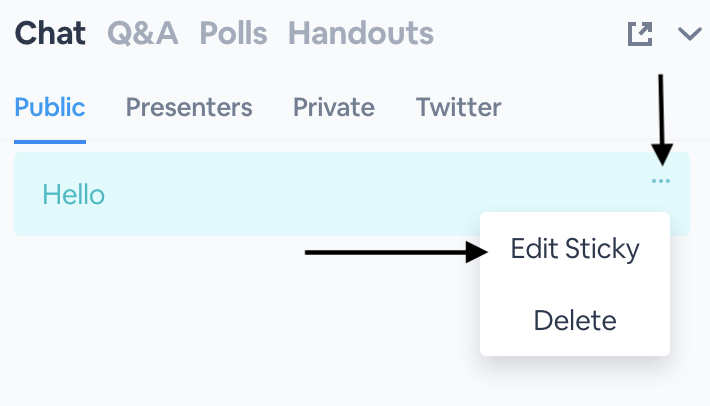
Editing a Sticky Note
Sticky Notes can be edited at any time throughout your event. You can edit the text, links, and colors of any Sticky Note with the following steps:
- Click the three dots in the corner of the Sticky Note.
- In the dropdown that appears, select Edit Sticky.
The Sticky Note will populate once more at the bottom of the chat panel. Edit as needed, then click Save once more to re-post the Sticky Note. 
From here, you can also edit the color of your note. Simply select a color from the menu of colors at the bottom of the edit screen.
Additionally, you are able to add links to your Sticky Notes. You can provide URLs to surveys, websites, PDFs and more. When users click the link, the document or website will open in a new tab. Follow the same steps to edit, and click the link icon at the bottom left corner to add your URL. Save Link to successfully update the note.
Have an automated webinar? Adding and swapping sticky messages can be part of your automation timeline.
Sticky Notes in the Modular Webcast Room
If you are using the modular webcast room for your live session, the sticky note will appear a little differently. The sticky will appear as it's own "module" and you can customize where it appears in the room. If you have added a sticky, it will always show and is unable to be hidden by the registrant.
