Note: This feature is an add-on package to the Networking Center and is available to Events and Enterprise plan holders. If interested in utilizing this feature, then please contact your BigMarker customer success manager or an events expert at sales@bigmarker.com.
Our Meeting Scheduler is a great opportunity for exhibitors to connect with attendee’s 1:1 in a separate meeting space.
Now, we’ve extended this capability to attendees overall, where they can create meeting spaces of their own, with their own availability, and set meetings with one another. This capability will be present in the Networking Center, so attendees can connect during your event and after.
Note that these settings and features are primarily for virtual meetings. Meetings scheduled this way will have users connect in an interactive webinar room as if they were presenters.
Table of Contents:
- How to Enable the Meeting Scheduler
- Using the Meeting Scheduler in the Networking Center
- The Meetings Tabs
- How to Edit Meeting Settings
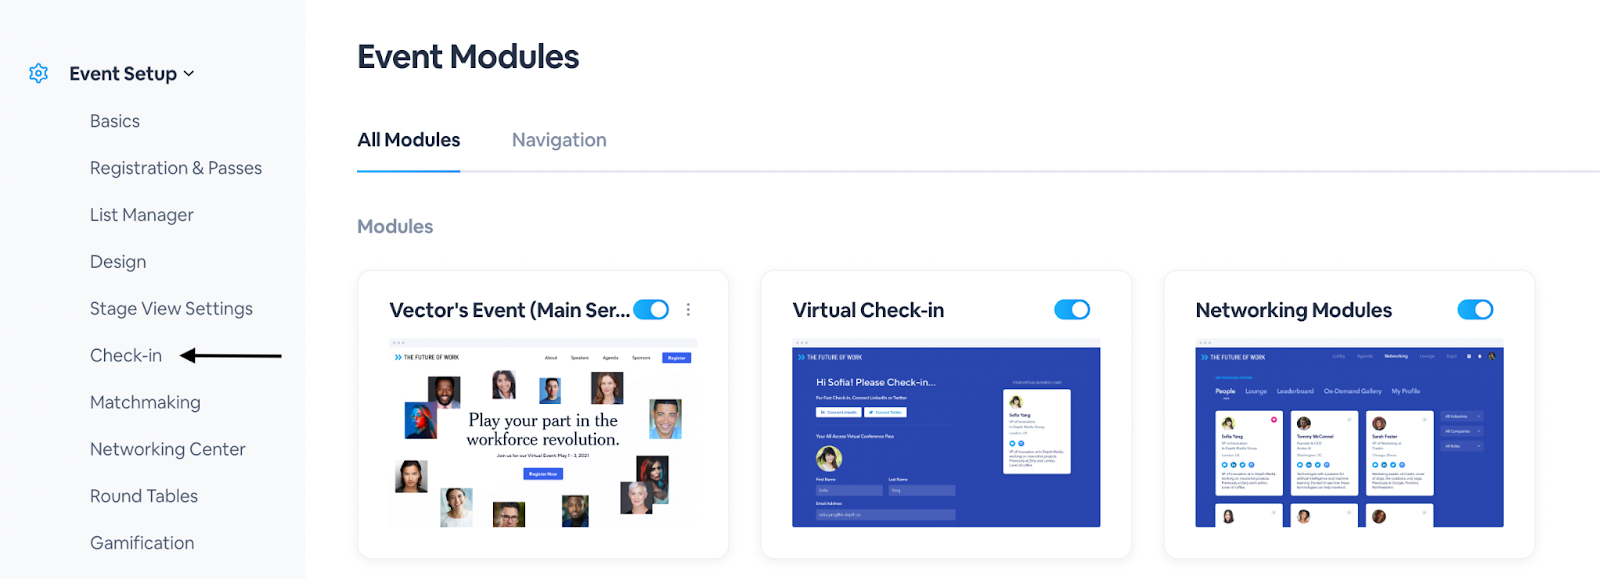
How to Enable the Meeting Scheduler
On your main series, click Manage Event

Go to the Check In section on the left hand side.
3. Enable on Meeting Scheduler
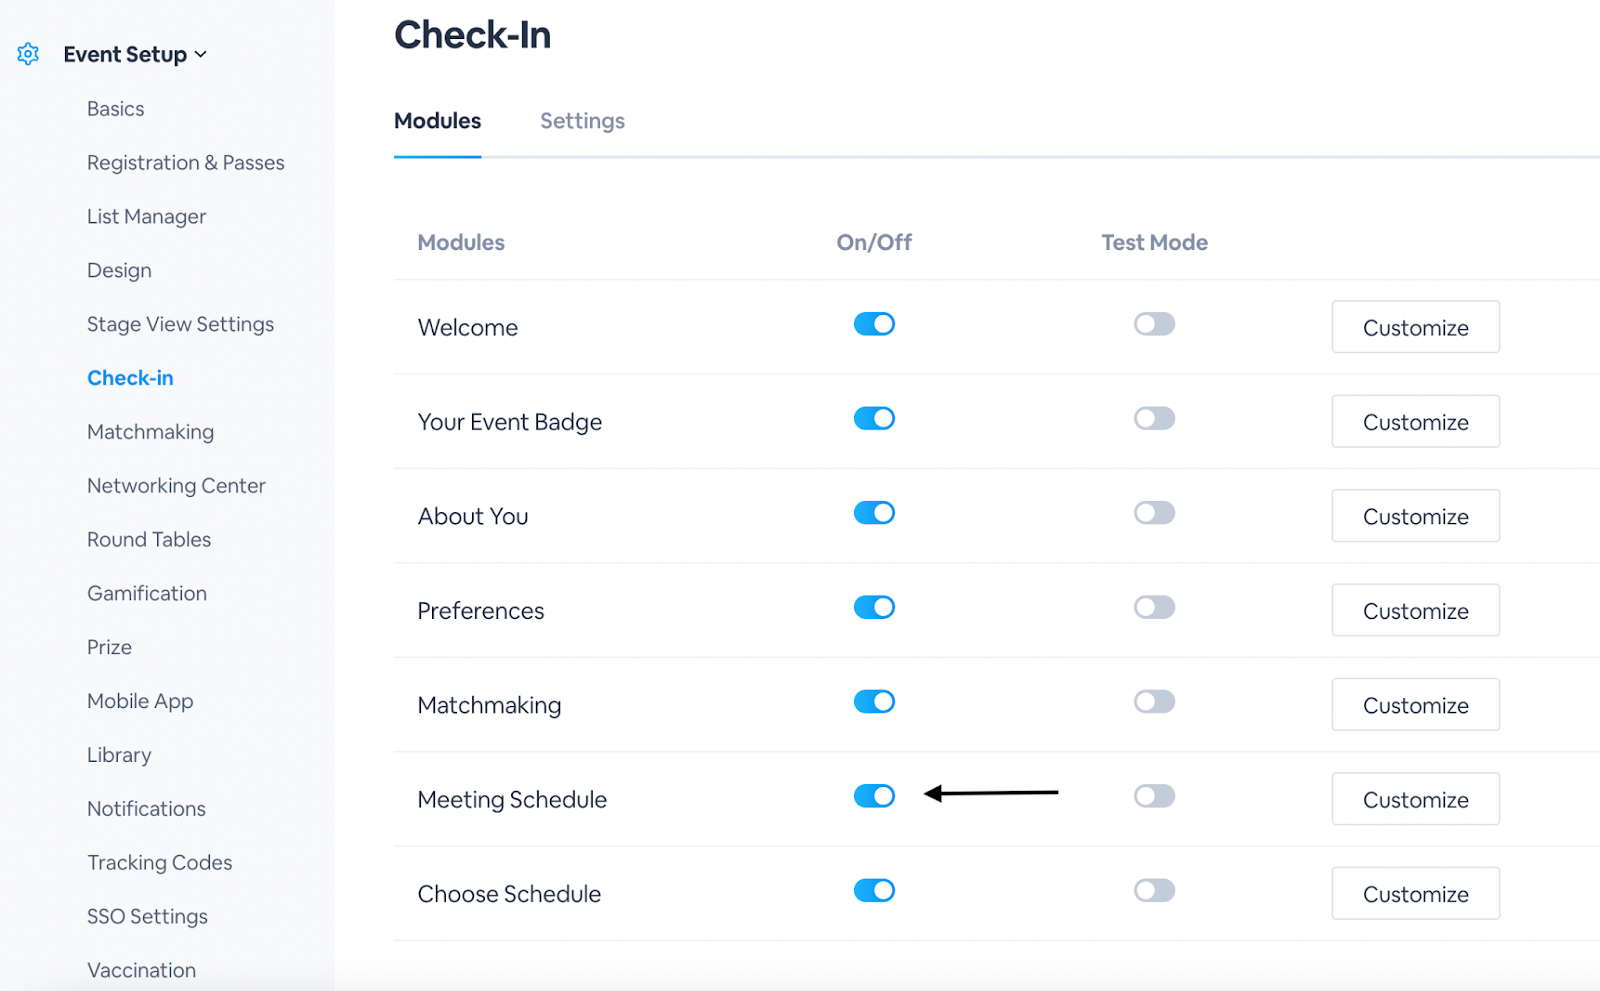
Your meeting schedule will be all set for attendees to utilize during check-in.
Using the Meeting Scheduler in the Network Center
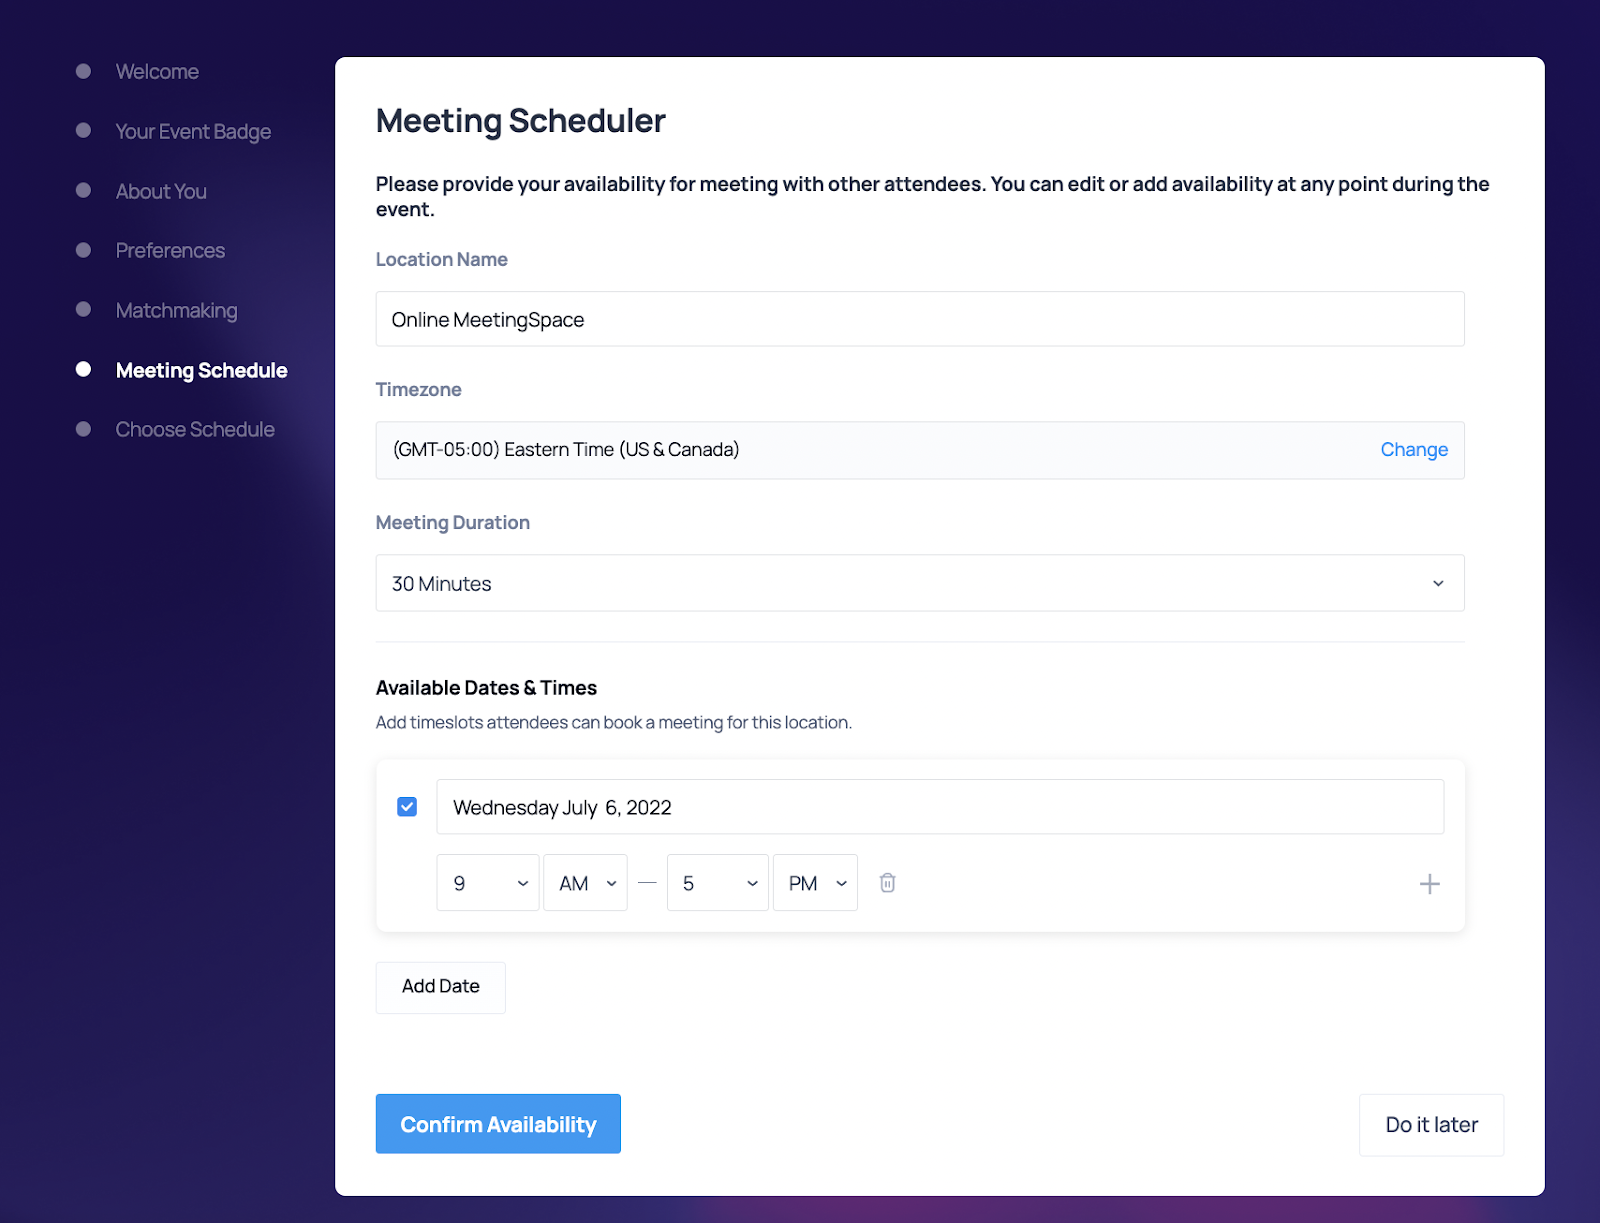
When attendees check-in, they will be able to set their meeting availability for other attendees to use when scheduling. Attendees can update the title, time zone, duration and available dates for their meetings
Once meetings are set, attendees will then be able to click a Meeting icon on each other’s virtual event badges to be taken to that attendee’s meeting scheduler. Watch the video below to see this in live action:
Meeting Requests: Connection Requests:
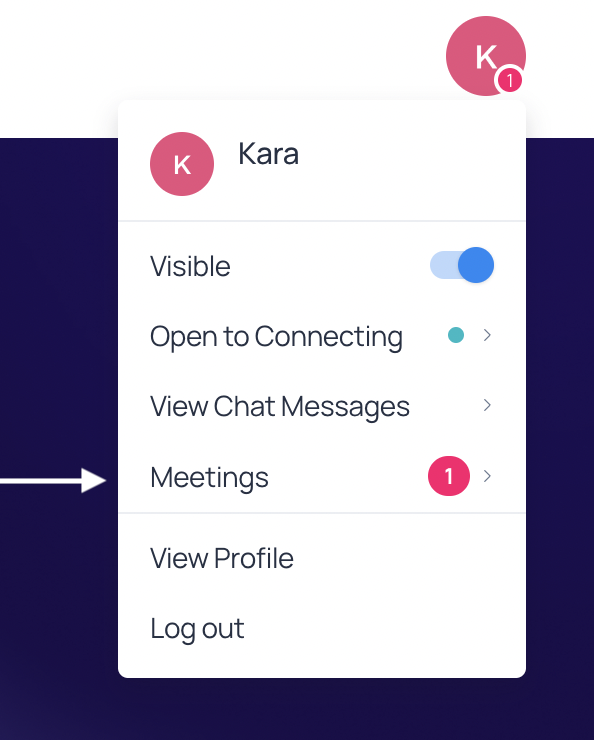
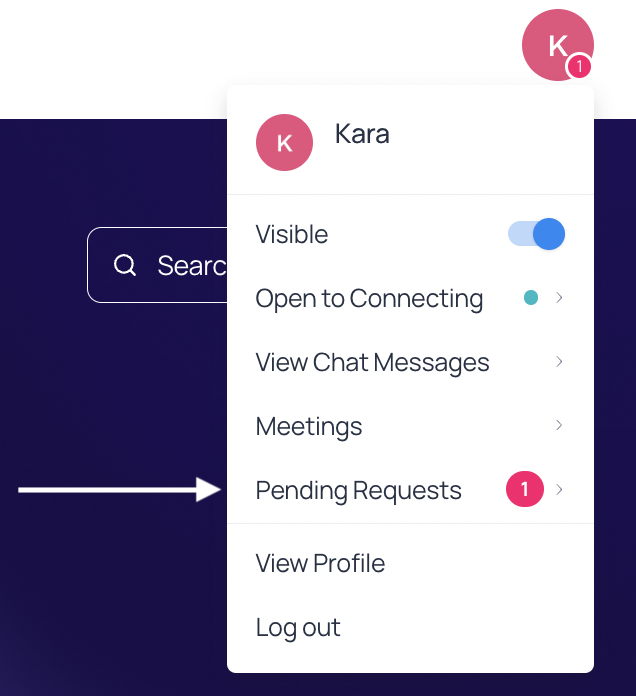
The Meetings Tab
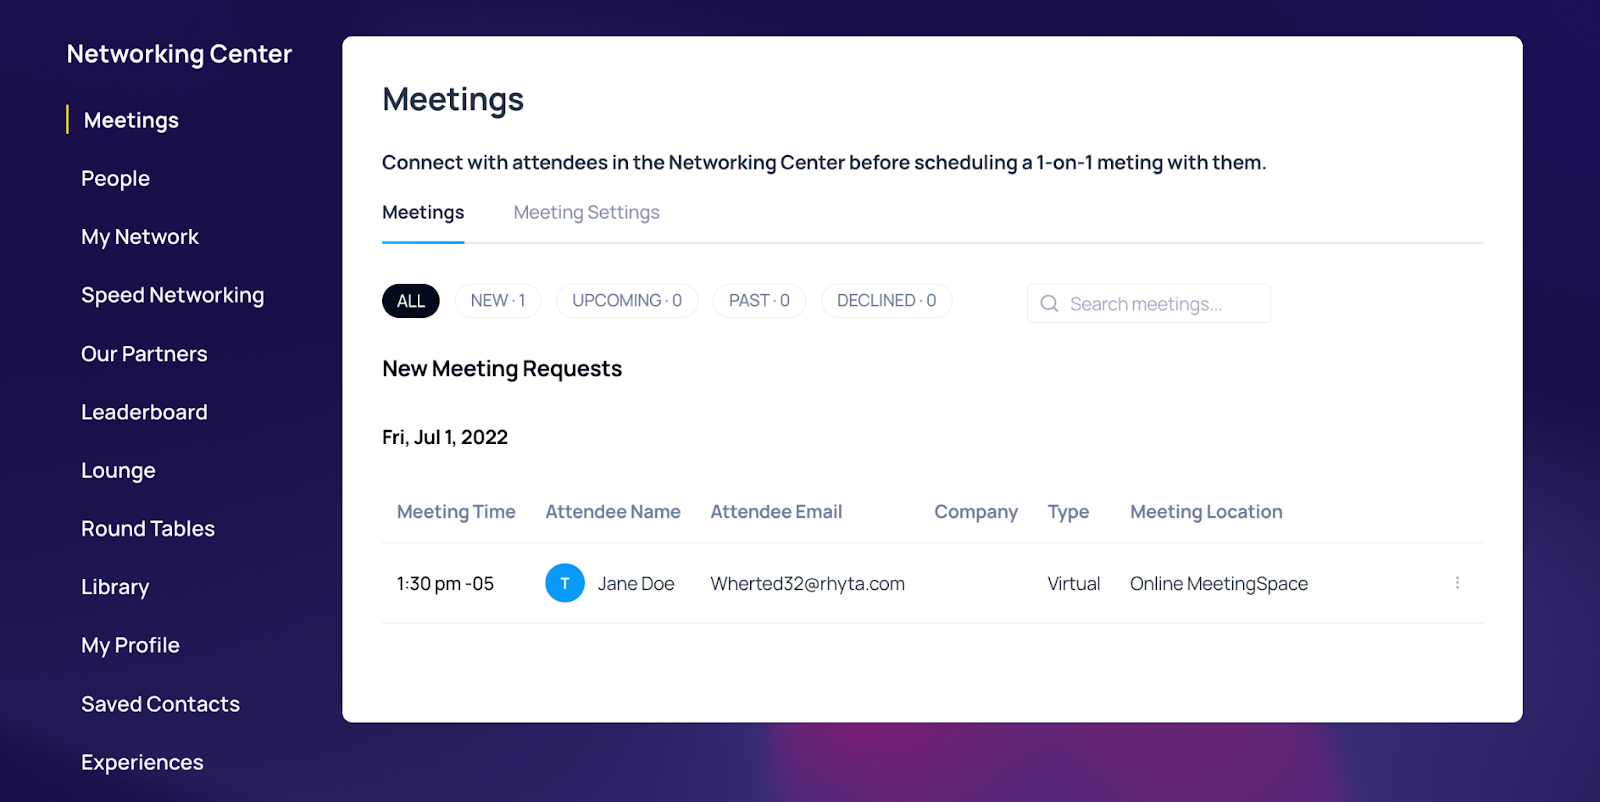
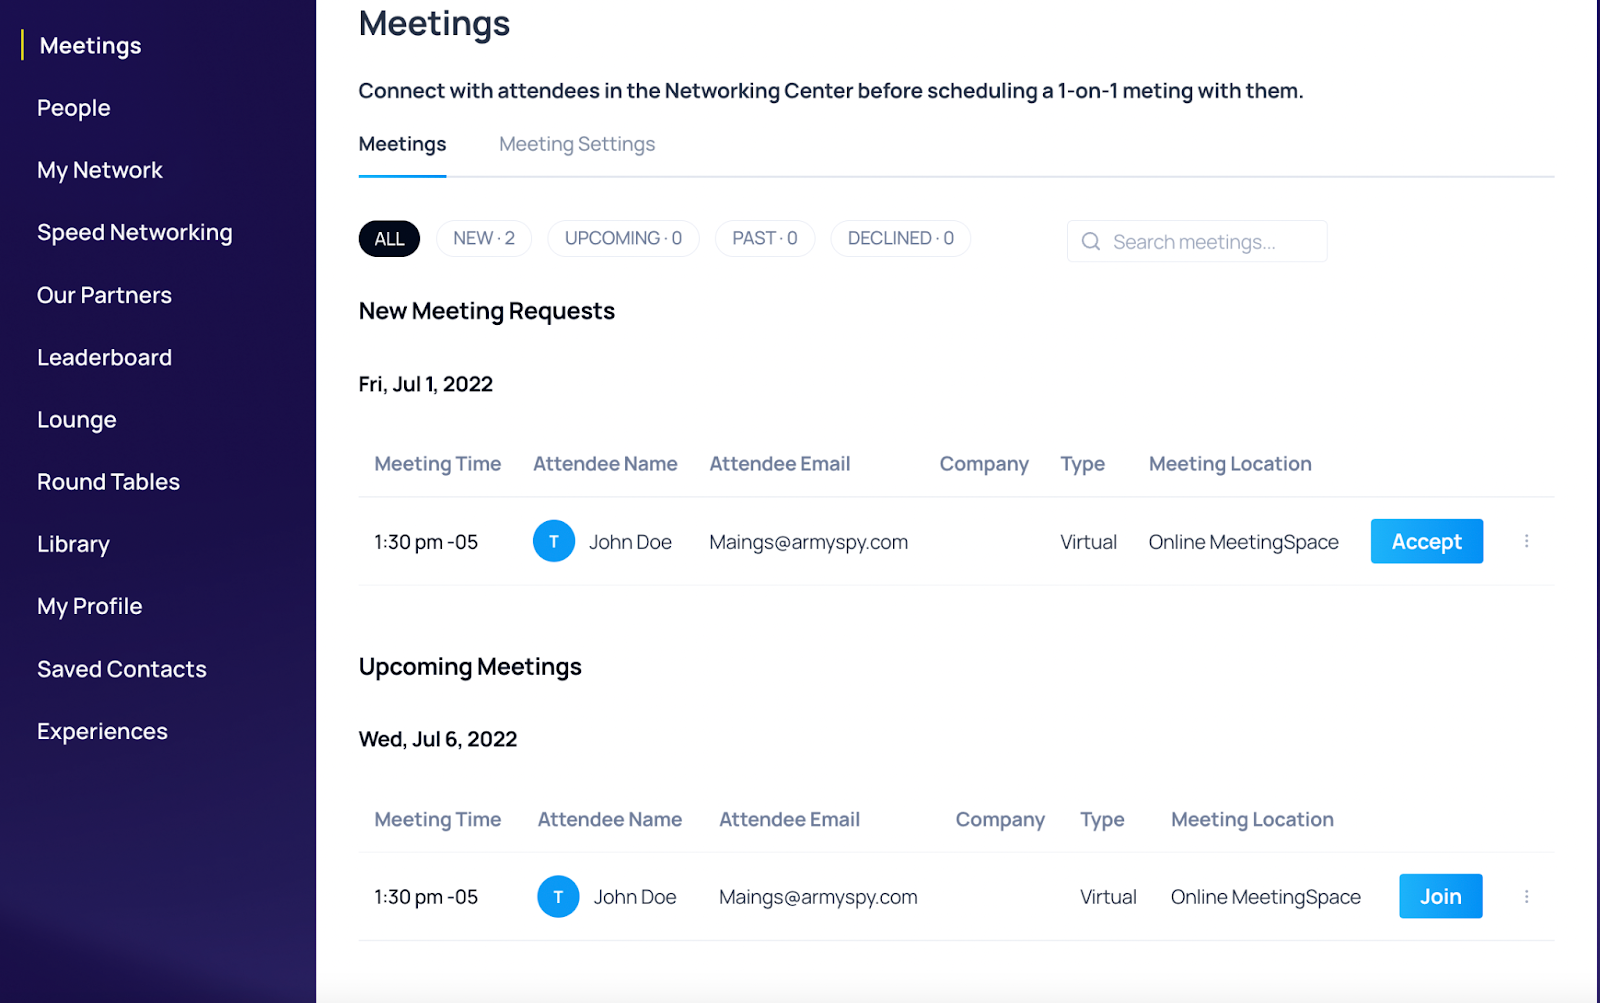
On the Meetings tab, attendees will be able to see all new and past meetings. The main view of the Meetings tab will provide you with an overview of the date of the meetings, the times of the meetings, who you are meeting with, their email address, their company, the type of meeting and the meeting location. Here, you can decline any meetings if needed and also view the status of the meeting, such as if it has been completed or not.
Additionally, when it’s time for the meeting, there will be a Join button to join the meeting. These will fall under the All or Upcoming Meetings section.
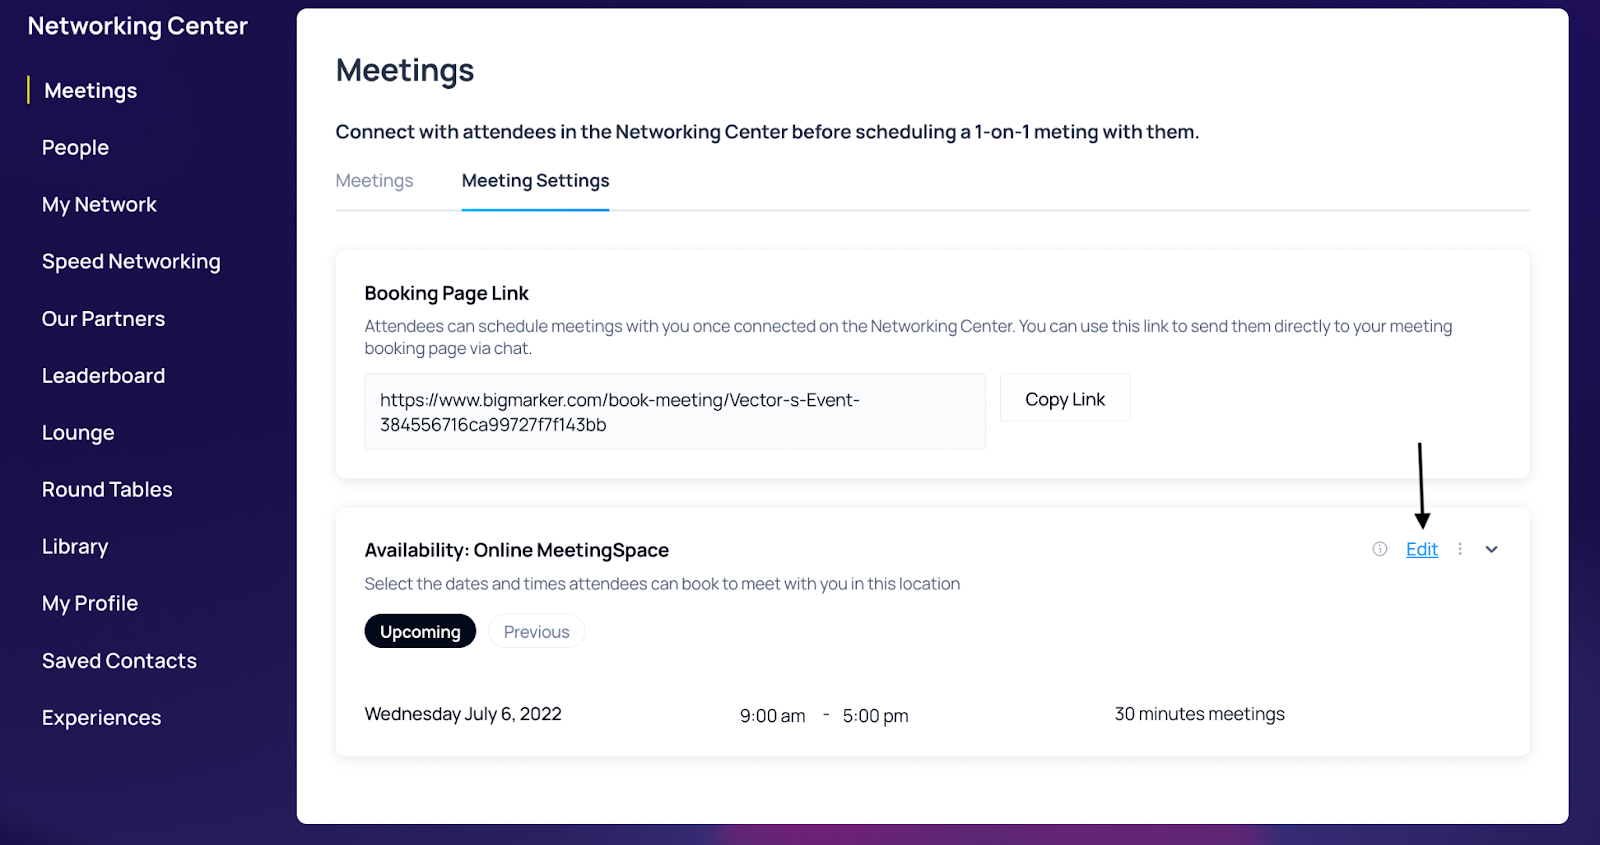
The Meeting Settings
Here is where you can edit all the settings for your meetings. You can click Edit in the top right hand corner of the meeting to have a shelf appear where you can edit the meeting’s title, time zone, duration, date/times and add additional availability.
To send the meeting link directly to each other, click Copy Link under the Booking Page Link and send within the Chat Panel or Private Chats.
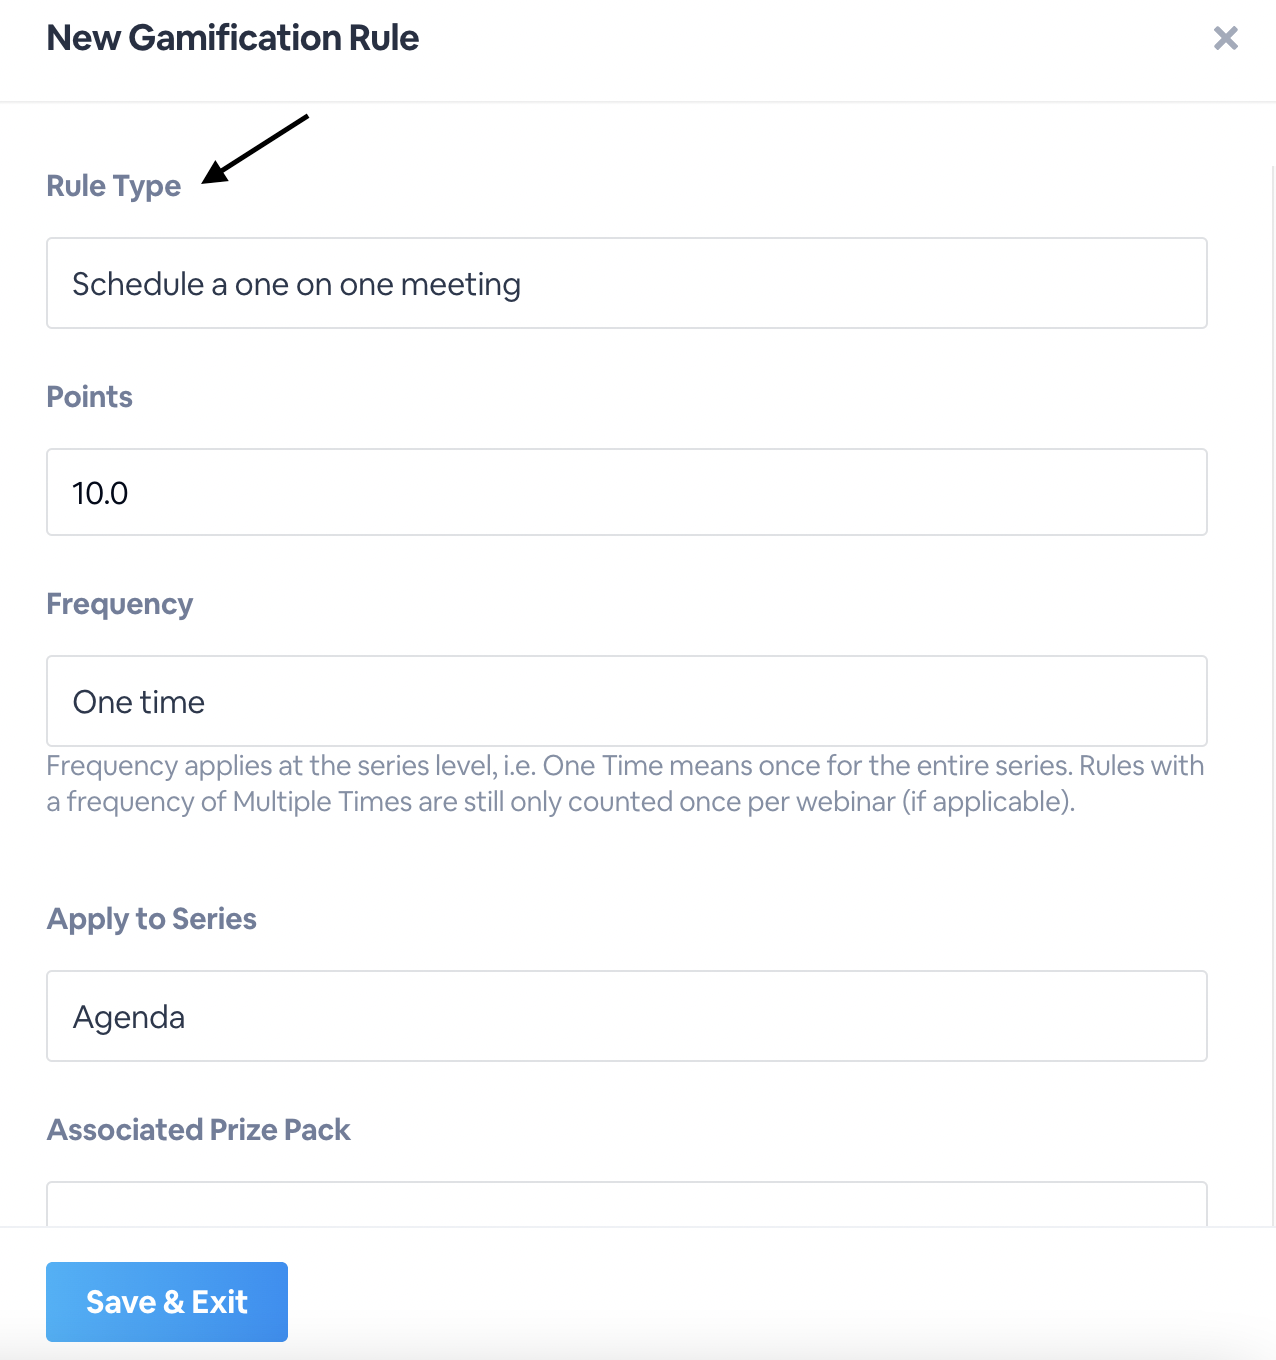
Adding Gamification to the Attendee Meeting Scheduler
Give attendees points for setting a set amount of meetings within a specific time frame or setting 1 on 1 meetings with other attendees. These points will be reflected on the leaderboard for attendees to view, encouraging attendees to connect with more and more people.
On your event’s backend, click to the Gamification section. Click Add New Rule, and under the Rule Type, click Schedule a one on one meeting or Schedule x meetings a month.
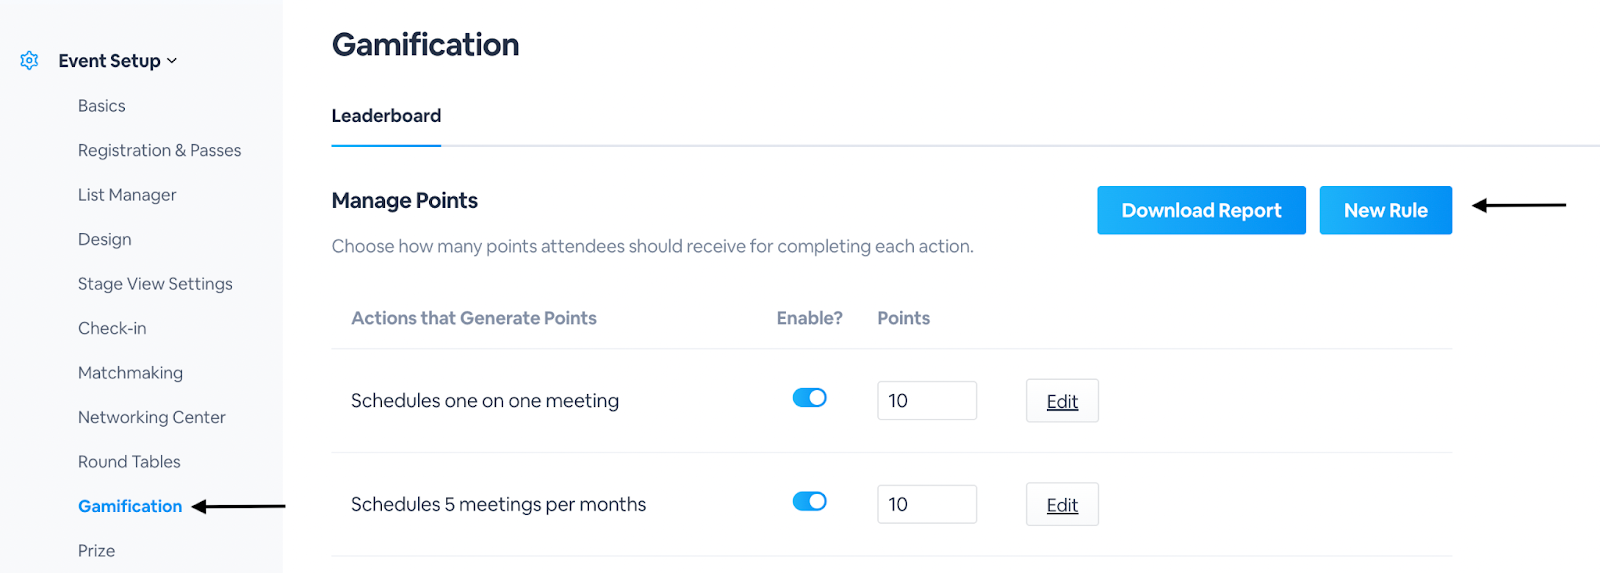
- Schedule a one on one meeting: Attendees will only need to schedule a 1 on 1 meeting to get the points.
- Schedule x meetings a month: Enter the number of times attendees need to schedule 1 on 1 meeting to get the points.