Whether you have existing data that you want to import into BigMarker, or if you want to export your registrant and attendee information from BigMarker, integrating with HubSpot is a powerful way to accomplish this. In this article we'll earn how to enable the HubSpot integration and start sharing your registrants and attendance data between HubSpot and BigMarker.
Contents
Setting up your HubSpot integration
Setting up your HubSpot integration
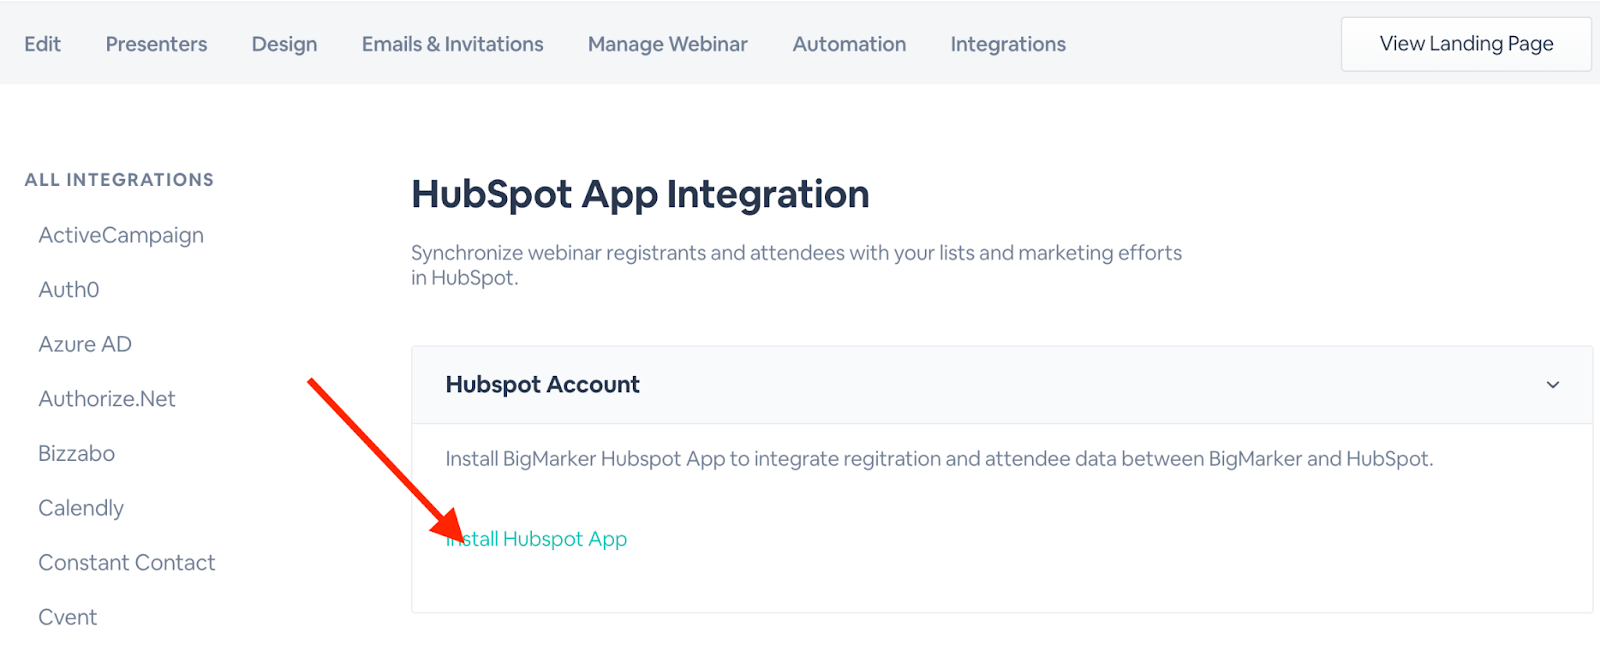
After creating your webinar or series, go to the integrations section in the session admin or classic dashboard. From here, find and click on HubSpot.

Click Install HubSpot App to be redirected to HubSpot for Authentication.
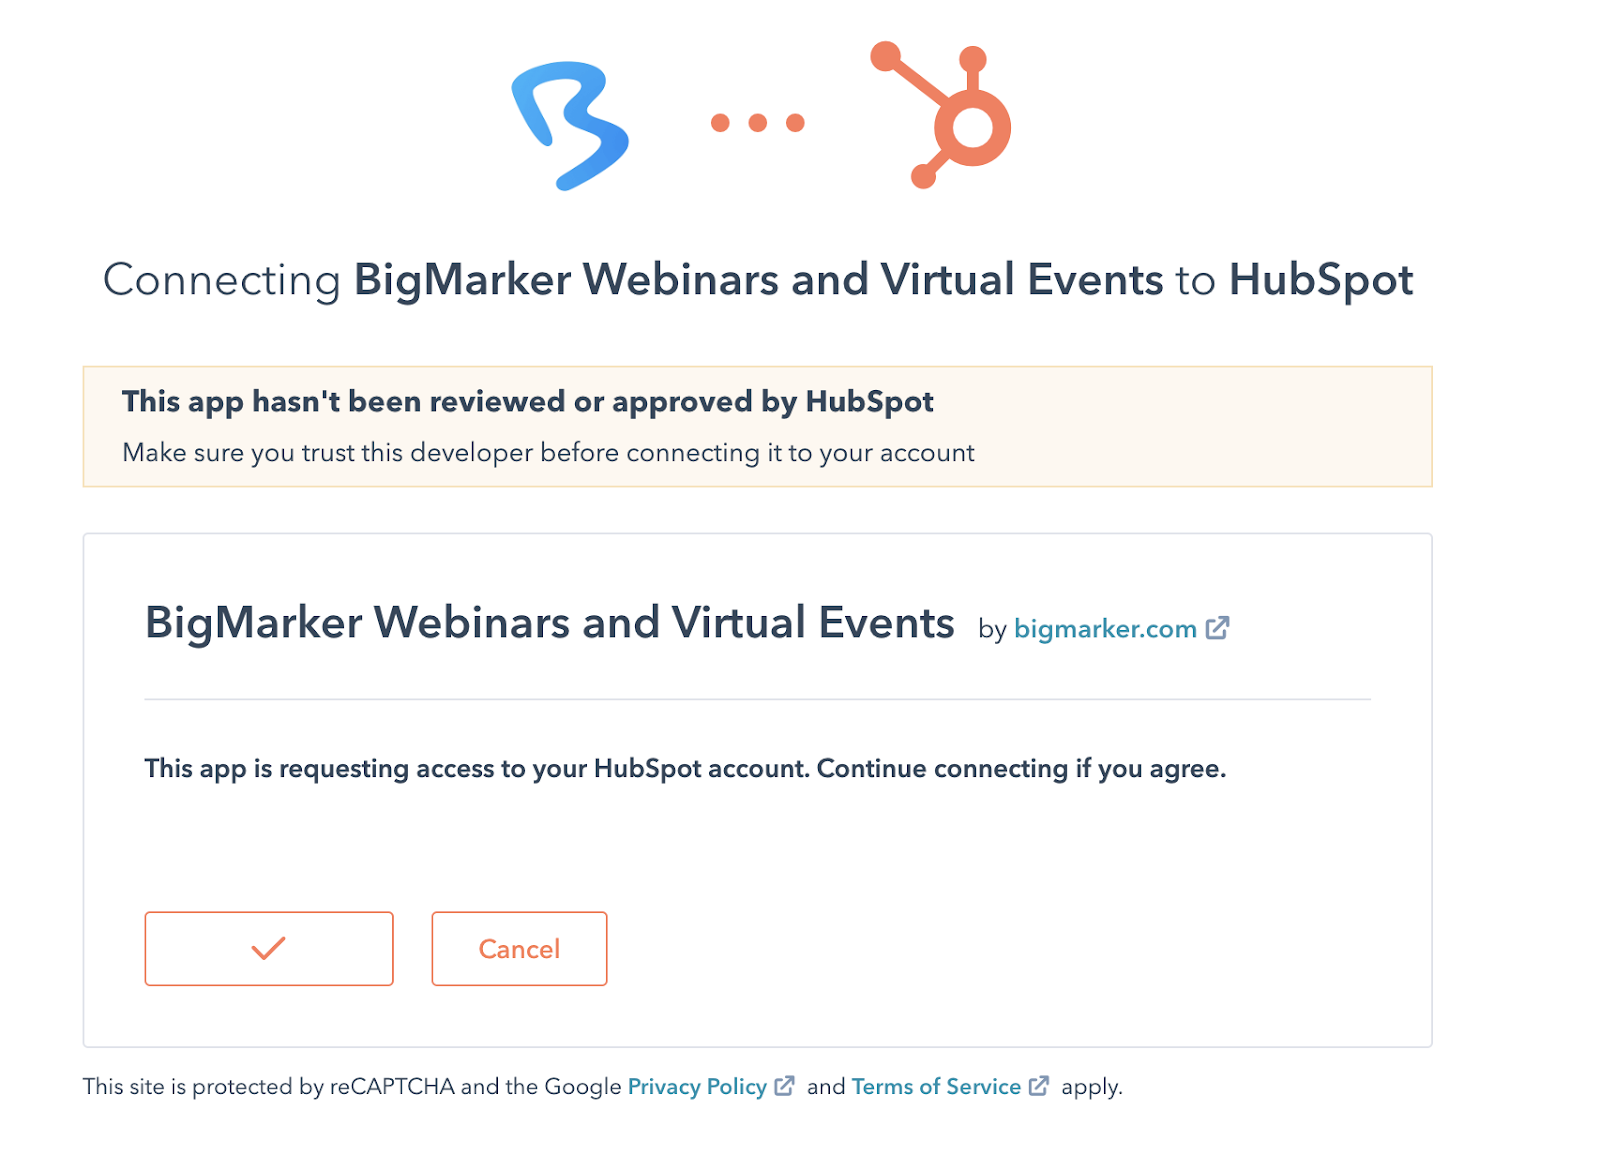
After logging in to HubSpot, you'll confirm to connect BigMarker with your HubSpot account. If you have multiple accounts, you'll first select which account to connect. After confirming you'll be all set to start configuring your integration on BigMarker.
Note: You can authenticate and set up your HubSpot account on your Channel's Settings. This will carry your HubSpot authentication across all your webinars and series.

Import from HubSpot Lists
If you want your contacts from specific HubSpot lists to be imported, open up and enable Import from HubSpot Lists. HubSpot lists (also called segments) group records based on property values and other characteristics.

You'll need to select which list to import either registrants or invitees from. You can also choose whether to sync this import every 15 minutes, so new additions to the list will be added to BigMarker. If you are importing registrants to an email list for invitations, you'll still need to configure an invitation email that uses that list.
Import using HubSpot Forms
Instead of relying on HubSpot lists to import registrants, you can also use Import using HubSpot Forms to tie your webinar registration to users filling out a form from your HubSpot account.

After enabling, you'll need to select which HubSpot form to using for importing registrants. Select the form you want, and save the settings to have those that fill out the form become automatically registered to the session.
If you select a form that was built with the legacy editor on HubSpot, there is no further action required. However if you select a form that was made with their updated editor you'll need to take a few more steps:
- Go to the same form in HubSpot and add a Hidden Field
- Fill in the hidden field with these exact details:
You'll also see these instructions when you select on of these newer forms, along with the ability to copy those values for easy editing.

Export to Contacts and Lists
If you are collecting registrants on BigMarker and want to export them to HubSpot, find the settings for Export to Contacts and Lists.
The first settings you'll see are to configure how the export behaves under certain conditions, such as if you want to export without a list selected, or if you want to automatically add new registrants and recording viewers.

Below these settings, you'll have the ability to choose what list each group or registrants exports to: registrants, attendees, no-shows and recording viewers. If you have enabled Let BigMarker create Registrants, Attendees, No-Shows, and Recording Viewers lists on HubSpot in the settings above, BigMarker will automatically add list for the categories here. For example, the list created for registrants would be “WebinarName_Registrants.”
Additionally, each list can have a static value assigned as a property so that each contact added to that list will have the configured value applied to them.

Map Data Fields for export
Scroll further down in these settings to find the map of your fields to HubSpot. Here you will find all custom registration fields as well as fields for various webinar details and engagement data.
Note: If your event includes multiple polls, the answers from every poll will appear in one data field on HubSpot unless you manually separate them prior to completing the integration. In the blank following “Character to separate polls,” enter a character (“a”, “test”, etc.) that separates the results of one poll from the next within your HubSpot database.

To do this process automatically, check off Auto-create Property on HubSpot and map it to BigMarker box in each field row. What this will do is automatically map all the data fields from BigMarker into your HubSpot integration and adding new properties to do so.
When you auto create the properties, property names will follow this format: "fieldname | webinarname_webinarId". The webinar name might become truncated in order to fit within the characterlimit for HubSpot properties.
Export to Meeting Logs
Note: This feature is only available to HubSpot accounts using the Sales Hub module.
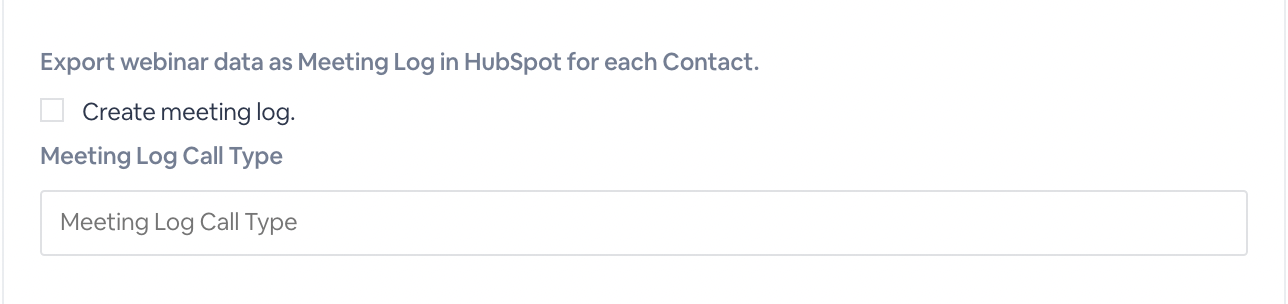
A meeting log is BigMarker’s optional way of exporting a “log” of all the registrant’s data over to HubSpot. You are able to see who did what with the data mapping fields within HubSpot in an easy format to read. These meeting logs are applicable to any registrant who attends or registers to your events.
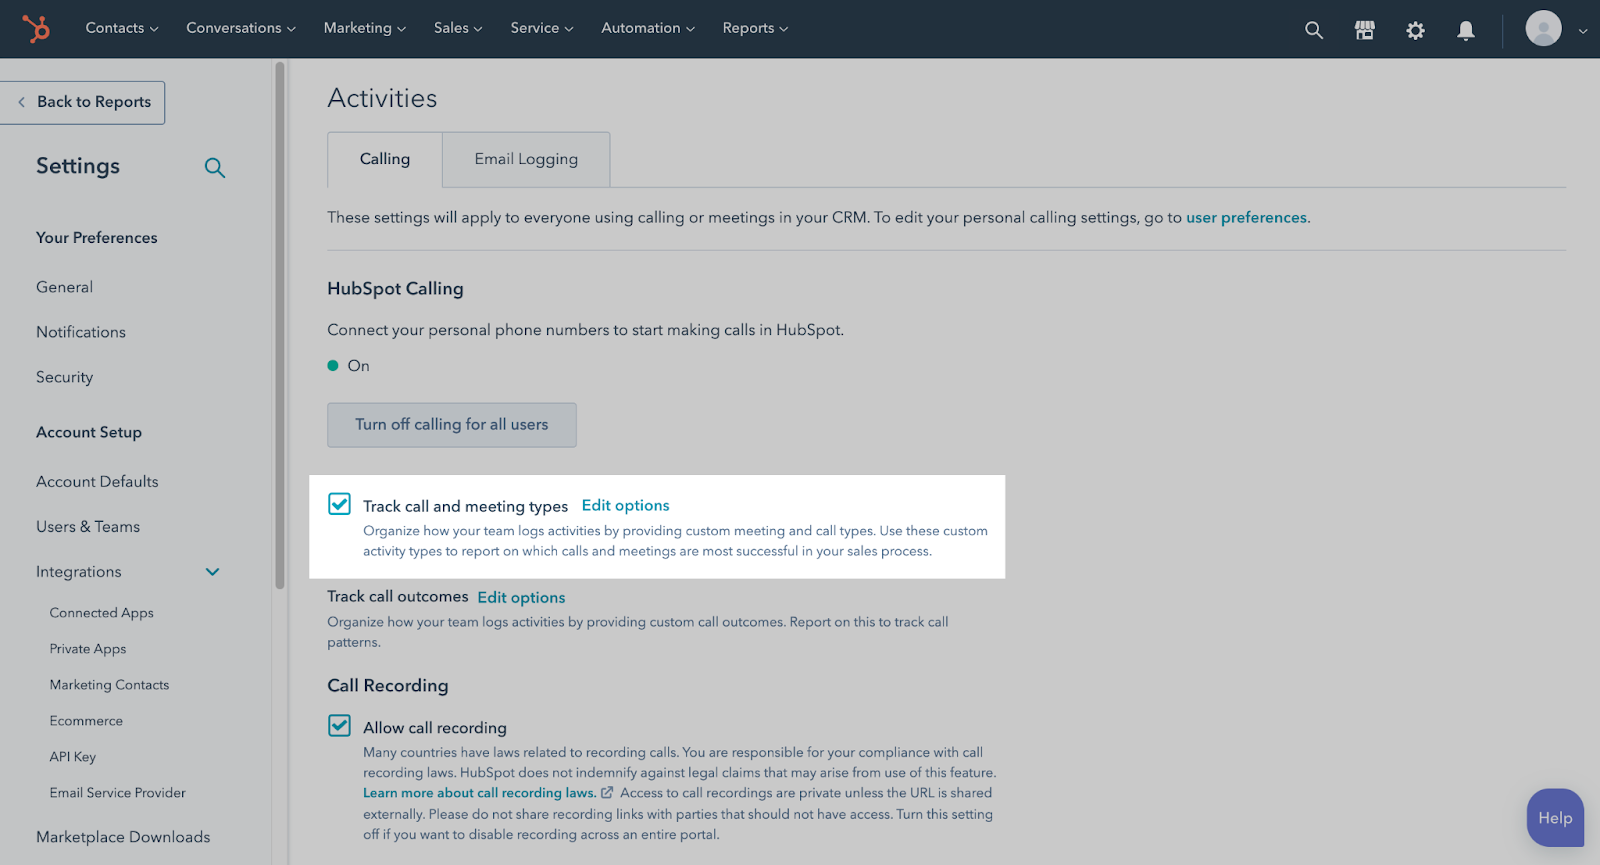
To do this, check off the Create meeting log box, and give it a name in the text box below. In HubSpot, check off Track call and meeting types box.
Note: You must enter in an existing custom activity type in the Meeting Log Call Type text box.
When they are populated, the Meeting Logs will appear like the below in HubSpot:
.png?width=600&height=322&name=image%20(38).png)
Export to Marketing Events
If you wish to connect a BigMarker webinar to a HubSpot marketing event you can now do so. Export your tags from the session and update subscriber states for each of your registrants immediately after the BigMarker session ends.
Within the HubSpot integration, look for Export to HubSpot Marketing Events. The first settings control which marketing event in HubSpot your are connecting to, or if you want to create a new marketing event for this webinar.

Updating market event properties
The next group of settings would be to map values to the properties of the marketing event. You’ll need to copy the HubSpot property name into the fields in order to map them.
You have two options to add value to these properties:
- Use the webinar tags - Copy the values from your webinar tags to the properties in the marketing event
- Use static values - Type in a value to be exported into a specific

Updating subscriber states
Unlike other export options in the HubSpot integration, setting up the marketing event export does not export registrants. Instead you will add a subscriber state for this event to your existing contacts.
There are 3 standard states a subscriber can have:
- Registered - Registered users will have this state
- Attended - Users who attend the live session or watch the on-demand will have this state
- Cancelled - Users who have canceled their registration will have this state
All of these options can be enabled or disabled in the checkboxes near the bottom of the marketing event settings.

Export to Timeline Events
With our BigMarker App on HubSpot, you can create timeline records of your contacts on your HubSpot account. These timeline events for your contacts contain registration, webinar attendance and on-demand views, as well as a full transcript of any chat or Q&A Messages. You can use this data to focus individualized attention on leads or gauge effectiveness of marketing campaigns launched at specific times.
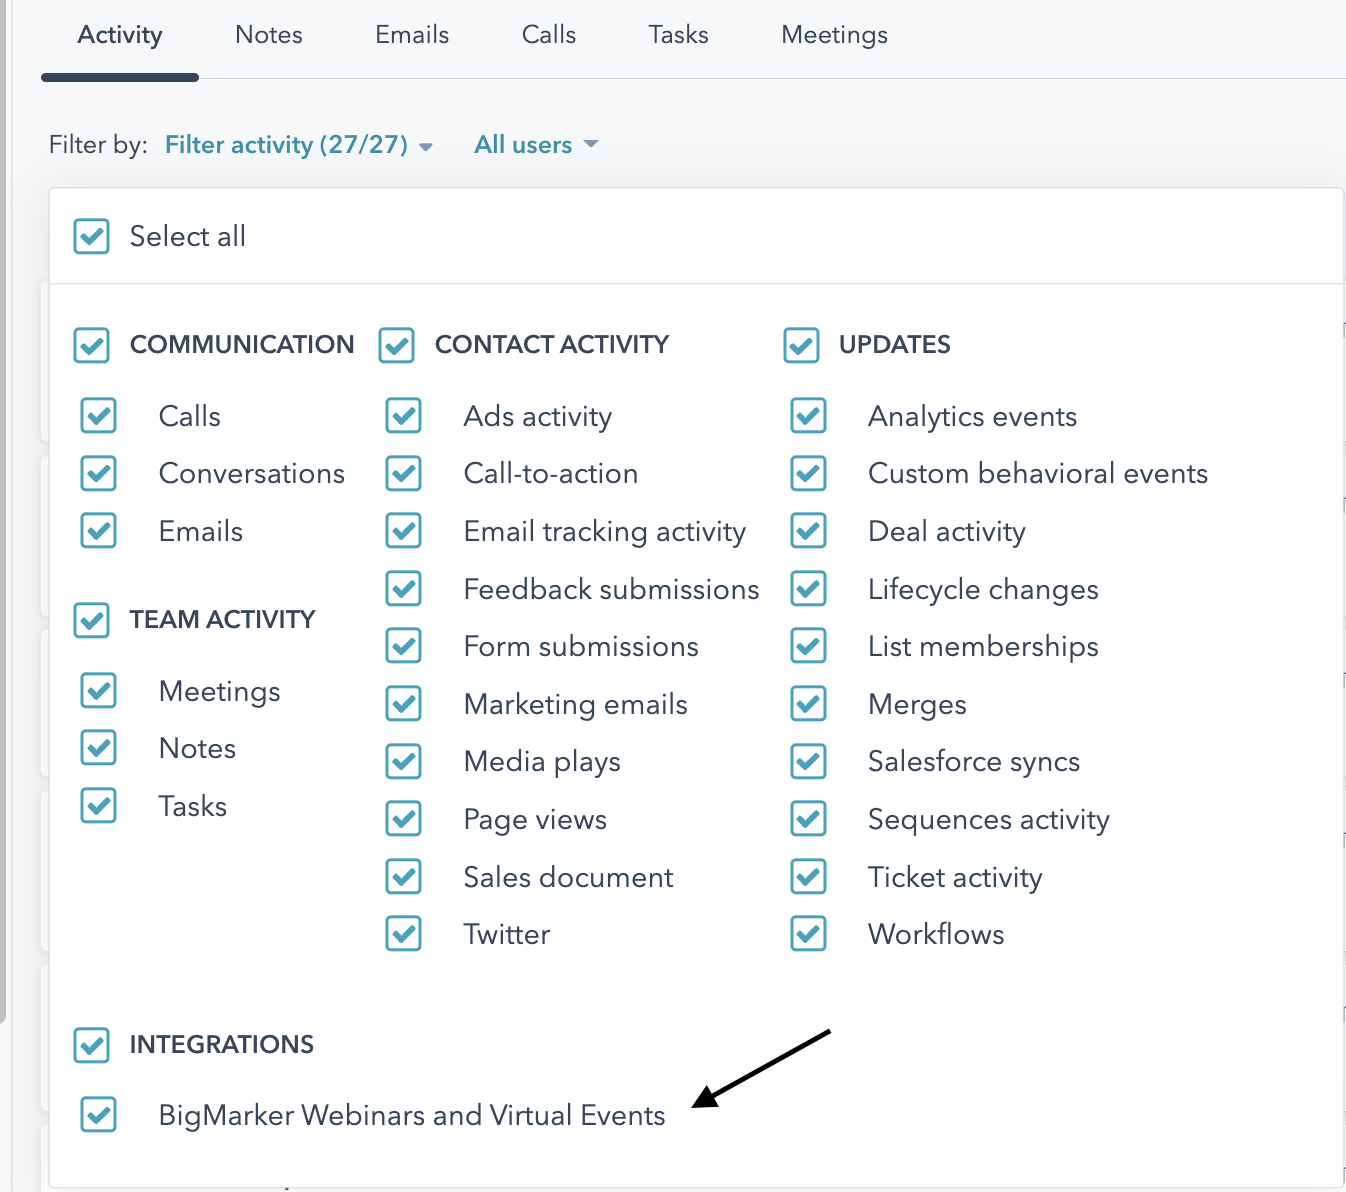
Go to your HubSpot account and click on the contact you would like to create these timeline records of. Under the contact’s activity, find the Integrations section and check off BigMarker Webinars and Virtual Events.
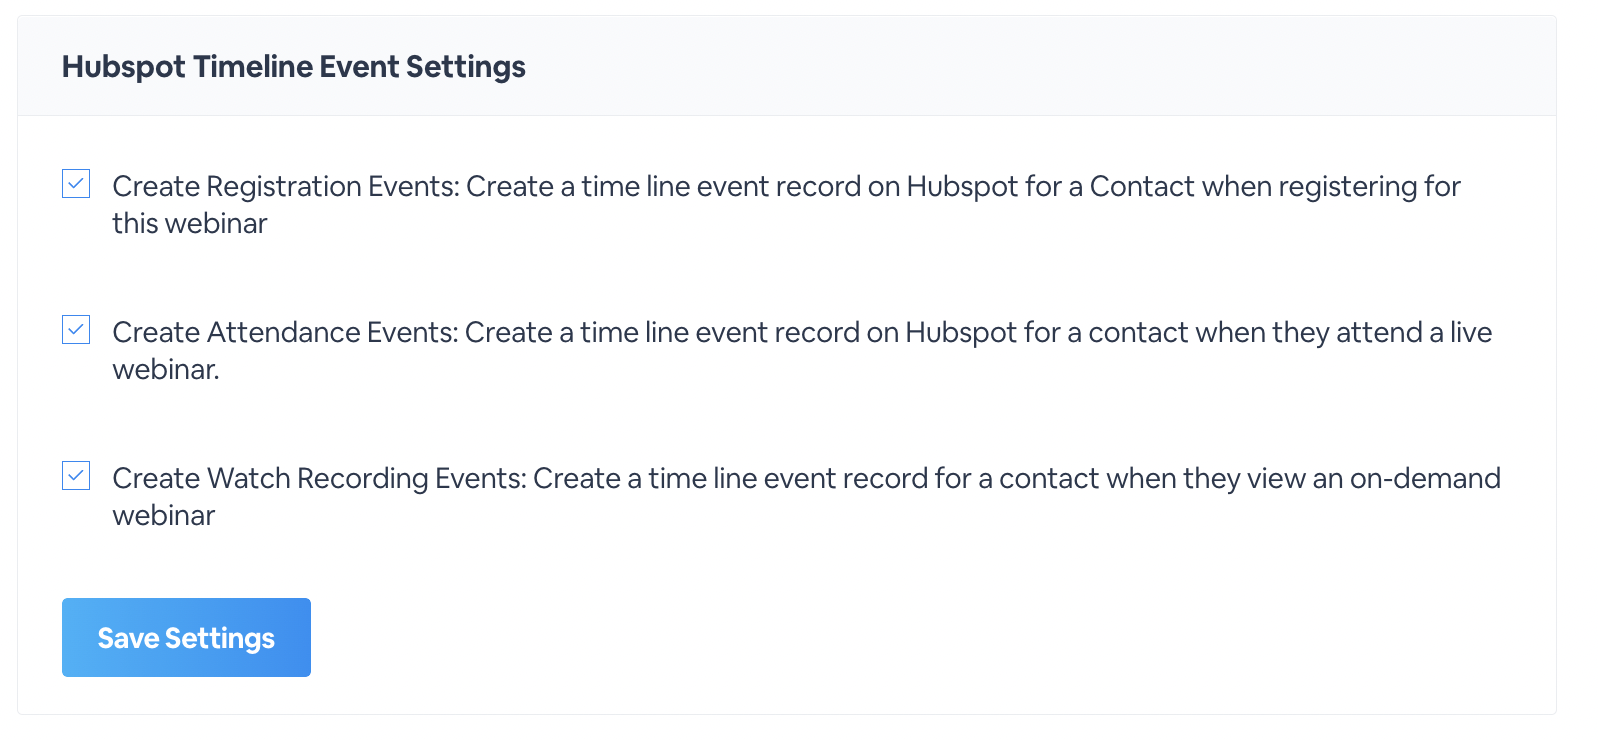
From there, go back to BigMarker and check off all the timeline records you would like to create for your contacts. You can create timeline records of registration events, attendance events and watch recording events. This will all be viewable under each contact in HubSpot. When finished, click Save Setting.
Export to Custom Objects
If you want to export your registrants into a custom object instead of a list, you can do so in this section. Once you select an object, you'll have the option to automatically export new registrants, attendees and/or on-demand viewers. After that, you'll go through a process similar to the list export where you will map the BigMarker fields to your custom object properties.