Using the classic admin? Click here to learn where you can find the ICS settings
BigMarker hosts can add ICS files (learn more here) to their invitation emails to ensure that when someone registers for their event, the event is automatically blocked off on that registrant’s online calendar, no matter which email provider they are using. Now, registrants can automatically get sent a meeting invite to be put on their calendars automatically or manually. This new feature allows for registrants to get periodically reminded of your event to help boost attendance.

These ICS files now are available in two formats: PUBLISH or REQUEST.
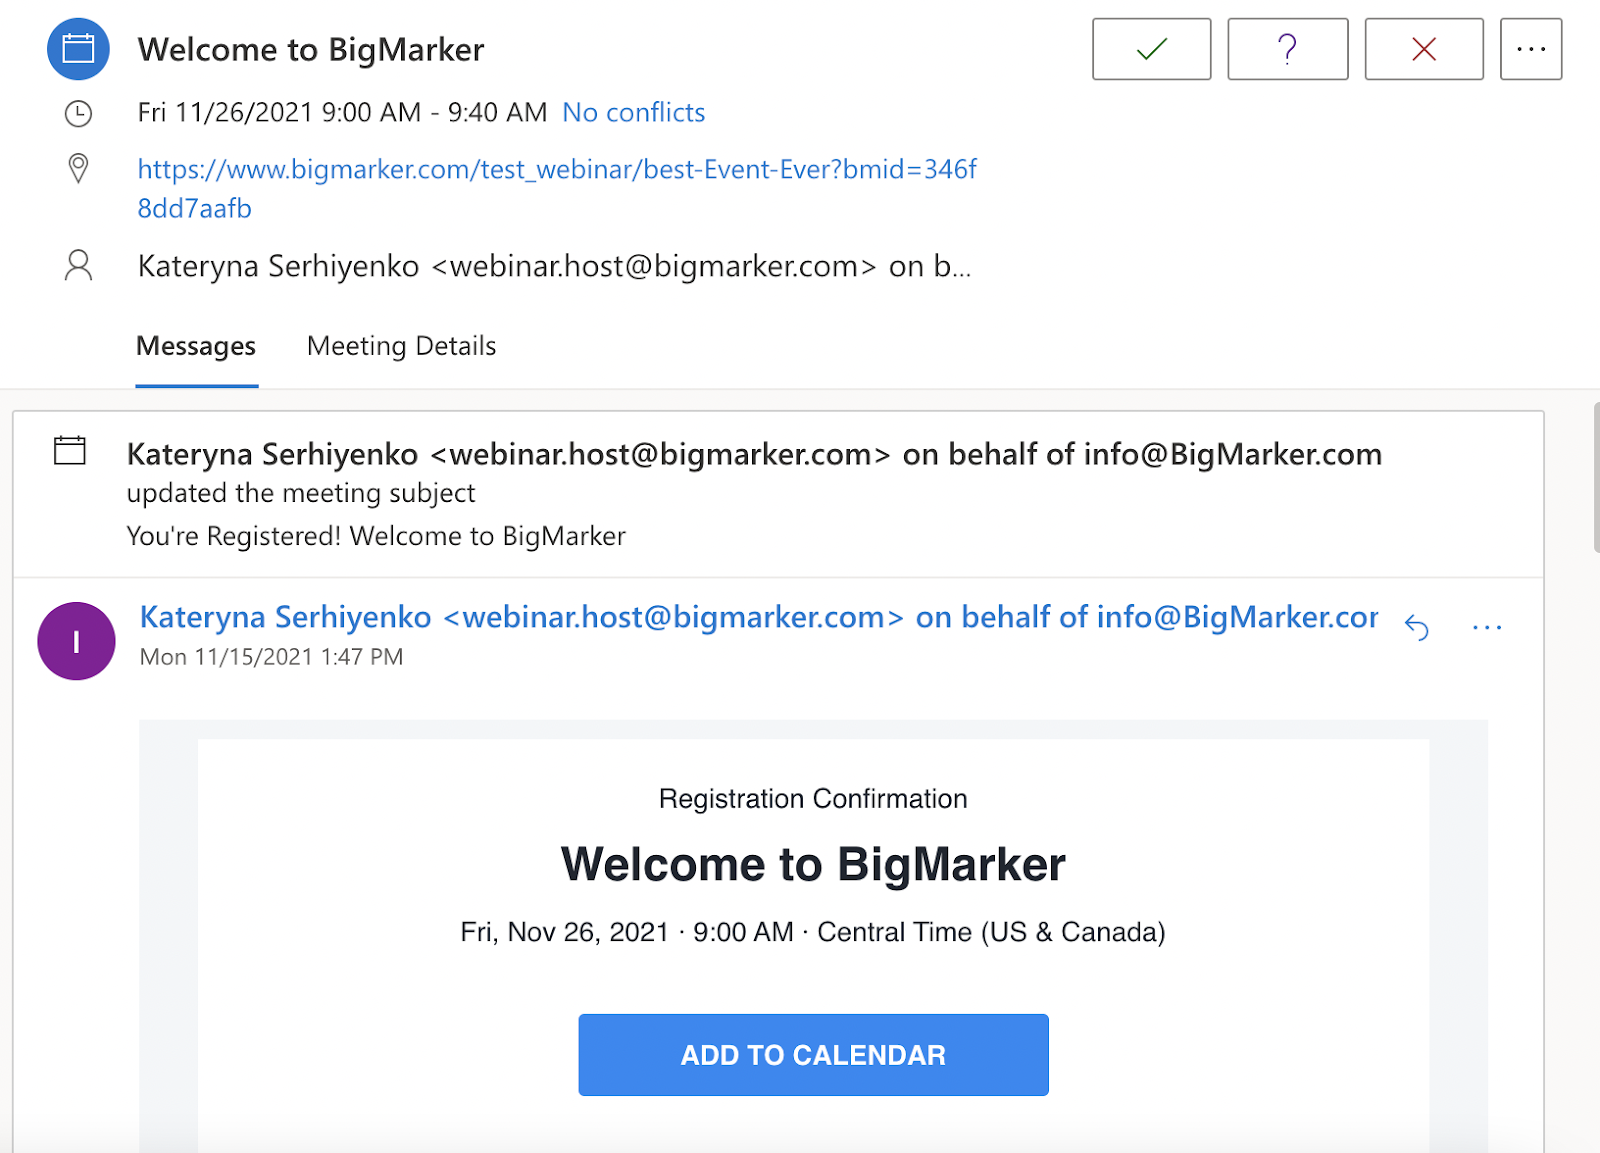
When REQUEST is selected, the event is automatically sent to each recipient’s calendar as a tentative meeting. The recipient will need to accept, deny or tentatively accept the meeting, but the meeting will display automatically on their calendar.

When PUBLISH is selected, everyone who receives an event invitation email will also receive a meeting invite for the event. Recipients need to manually accept this meeting request in order to add the event to their calendar.
How to Change the Format Of Your Event’s ICS Files
In your Session Admin head over to the Emails page. Then click on Customize ICS.

In the settings, you'll find the option for Request and Publish methods.

ICS Files in the classic admin
In your classic dashboard, head over to the Emails & Invitations tab and click on ICS File
