
Gallery View helps your audience participate more actively and feel more connected to the session. If you want to go beyond passive viewing and text chat, Gallery View gives attendees a more interactive way to be part of the experience.
Gallery View is only available after the BigMarker team unlocks it for your channel. Currently, this option is only available for Enterprise channels. Reach out to your BigMarker point of contact for more information.
Enabling Gallery View
Head over to the session admin and go to Production > Advanced. Look for the Gallery view setting under the Experience tab.
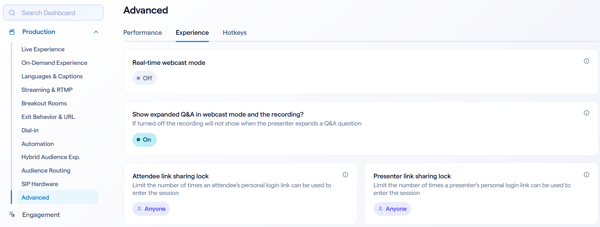
Once enabled, your session is ready to use once it's live. While the setup is easy, using Gallery View comes with the need for additional planning and considerations:
- Audience layout - Currently Gallery View is only available when using the classic webcast layout
- Network requirements - Sessions that use Gallery view will require more bandwidth from your attendees than Webcast sessions that do not use Gallery view.
Using Gallery View
Once your session is live, there are two distinct modes that you can switch between: Presentation Mode and Discussion Mode. Presentation Mode gives attendees the ability to navigate between the presentation and the audience tabs in the live room. This option is chosed when the session begins.
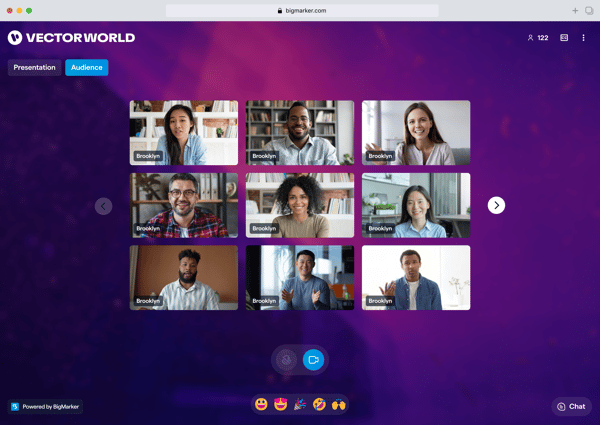
Under the presentation tab, they'll see the webcast stream: the presenters, videos, screensharing etc. In the Audience tab, they'll be able to turn on their camera and view other attendees that have turned on their cameras. When the session is in presentation mode, the audience is able to share their cameras, but not their microphones.
Presentation Mode / Tab
.png?width=600&height=425&name=image%20(8).png)
Audience Tab
If the admin or moderator hasn’t enabled Discussion Mode, you’ll see that attendees cannot activate their microphones at this time.
To enable discussion mode, a presenter inside of the Studio will go to the Audience View then click on Discussion mode.
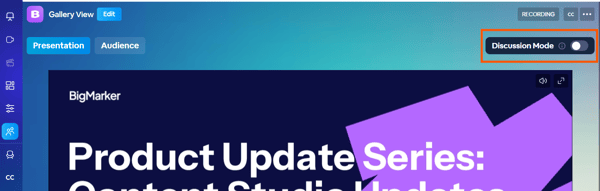
Once Discussion Mode is selected, attendees can then share their mics. Any audio from the presentation will not be heard by the audience or those in the audience view. In this mode, presenters and admins can also disable all audience mics, individual audience members, and remove attendees from the room.
For admins and moderators that are still in the Studio but want to participate in the discussion, they'll want to stay in the Audience View to participate in real-time with the audience.
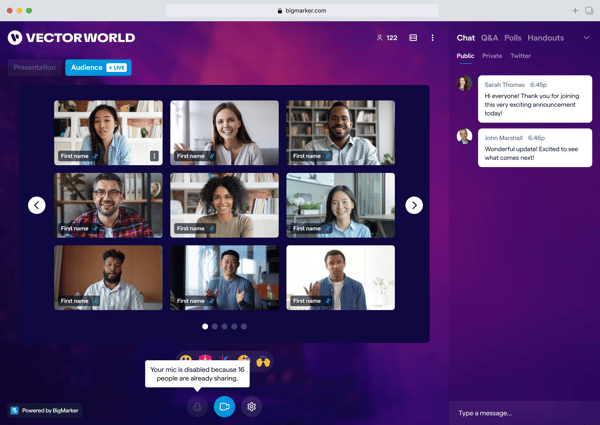
Note: Only 16 audience mics can be enabled at one time.