Snowflake enables you to move faster at every stage of the data lifecycle—from ingesting and processing data, to analyzing and modeling it, to building and distributing data and AI applications—so you can unlock more value from your data. With this integration, you can export any information from your sessions and series from BigMarker to Snowflake and gain those insights right away.
Getting OAuth Credentials From Snowflake
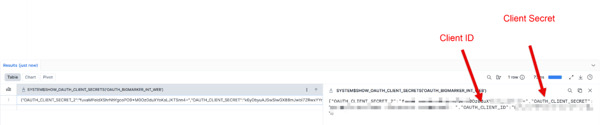
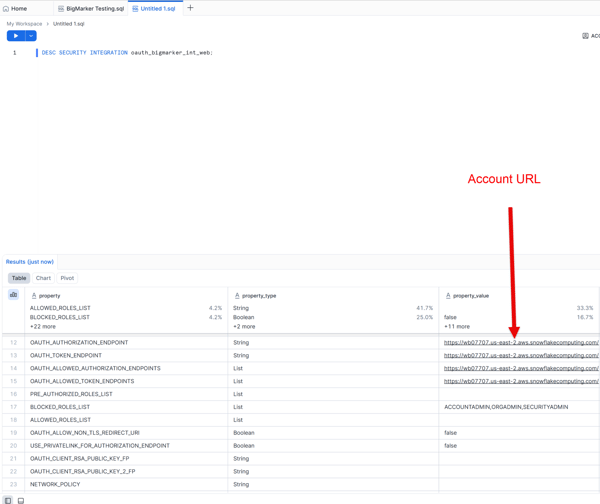
To connect BigMarker with Snowflake, you will first need a Client ID, Client Secret, and your Snowflake Account URL. These will be generated inside the Snowflake environment.
Within your Snowflake worksheet, run the following commands to create the integration and retrieve your credentials:
SQL

// OAuth

// create integration

CREATE SECURITY INTEGRATION oauth_bigmarker_int_web

 TYPE = OAUTH

 ENABLED = TRUE

 OAUTH_CLIENT = CUSTOM

 OAUTH_CLIENT_TYPE = 'CONFIDENTIAL'

 OAUTH_REDIRECT_URI = 'https://web.bigmarker.com/snowflake_integration/authentication'

 OAUTH_ISSUE_REFRESH_TOKENS = TRUE;

// show client id & client secret

SELECT system$show_oauth_client_secrets('OAUTH_BIGMARKER_INT_WEB');
SQL
// desc integration to get url

DESC SECURITY INTEGRATION oauth_bigmarker_int_web;
Connect Your Account to BigMarker
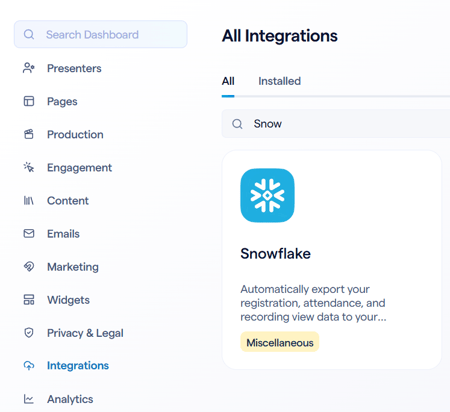
Once you have what you need, head over to the session admin and then to the Integrations page. Within this page, look or search for the Snowflake integration.
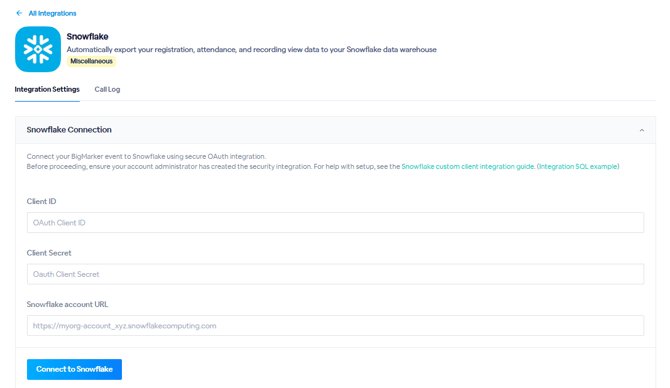
On the Snowflake integration page, enter your Client ID, Client Secret, and Snowflake Account URL, and click Connect to Snowflake.
Export Data From BigMarker to Snowflake
Create Target Database in Snowflake
To export registrant data, you will need to configure a destination database in Snowflake to receive it and grant the appropriate permissions.
Run the following commands in Snowflake using your database name in place of BIGMARKER_TESTING_ZS:
SQL
CREATE OR REPLACE DATABASE BIGMARKER_TESTING_ZS;

GRANT USAGE ON DATABASE BIGMARKER_TESTING_ZS TO ROLE SYSADMIN;

GRANT CREATE SCHEMA ON DATABASE BIGMARKER_TESTING_ZS TO ROLE SYSADMIN;

GRANT USAGE ON SCHEMA BIGMARKER_TESTING_ZS.public TO ROLE SYSADMIN;

GRANT CREATE TABLE ON SCHEMA BIGMARKER_TESTING_ZS.public TO ROLE SYSADMIN;

GRANT USAGE ON WAREHOUSE COMPUTE_WH TO ROLE SYSADMIN;
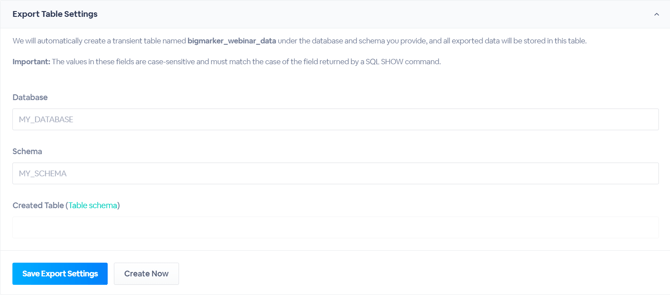
Configure Export Settings
With your database created, navigate to the Export Table Settings section of the Snowflake integration page on BigMarker. Enter your database and schema names in the available text boxes. You can also click the Table schema link by Created Table to view the SQL code that will create the table for your data. Please note that you cannot edit this code.
Click Save Export Settings and then click Create Now.
Continue to the Export Data Settings section of the page. Select a warehouse for the export from the dropdown menu, and enable your desired registrant categories. Then click Save Export Settings to apply your configuration.
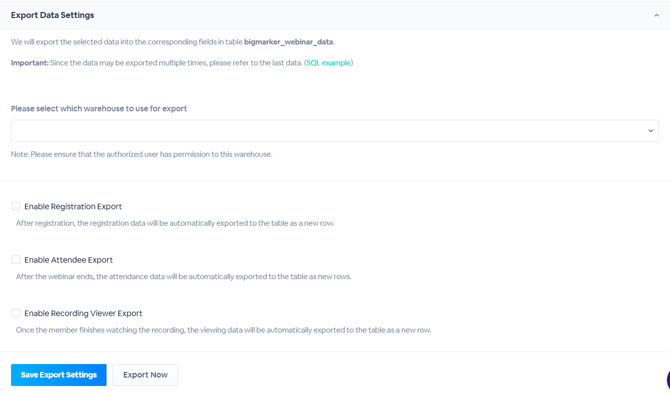
Once your event takes place, BigMarker will push the data into your Snowflake database under the bigmarker_webinar_data table. If you would like to export data immediately, or your webinar has already ended, click Export Now.
View Exported Data
When querying this table in Snowflake, you will see your standard webinar metrics (Webinar ID, Start/End Time, Name, Email) alongside dedicated columns (REGISTRATION_INFO, ATTENDANCE_INFO, and RECORDING_VIEW_INFO) containing detailed JSON payloads for the registrant categories you enabled during setup as seen in the below examples.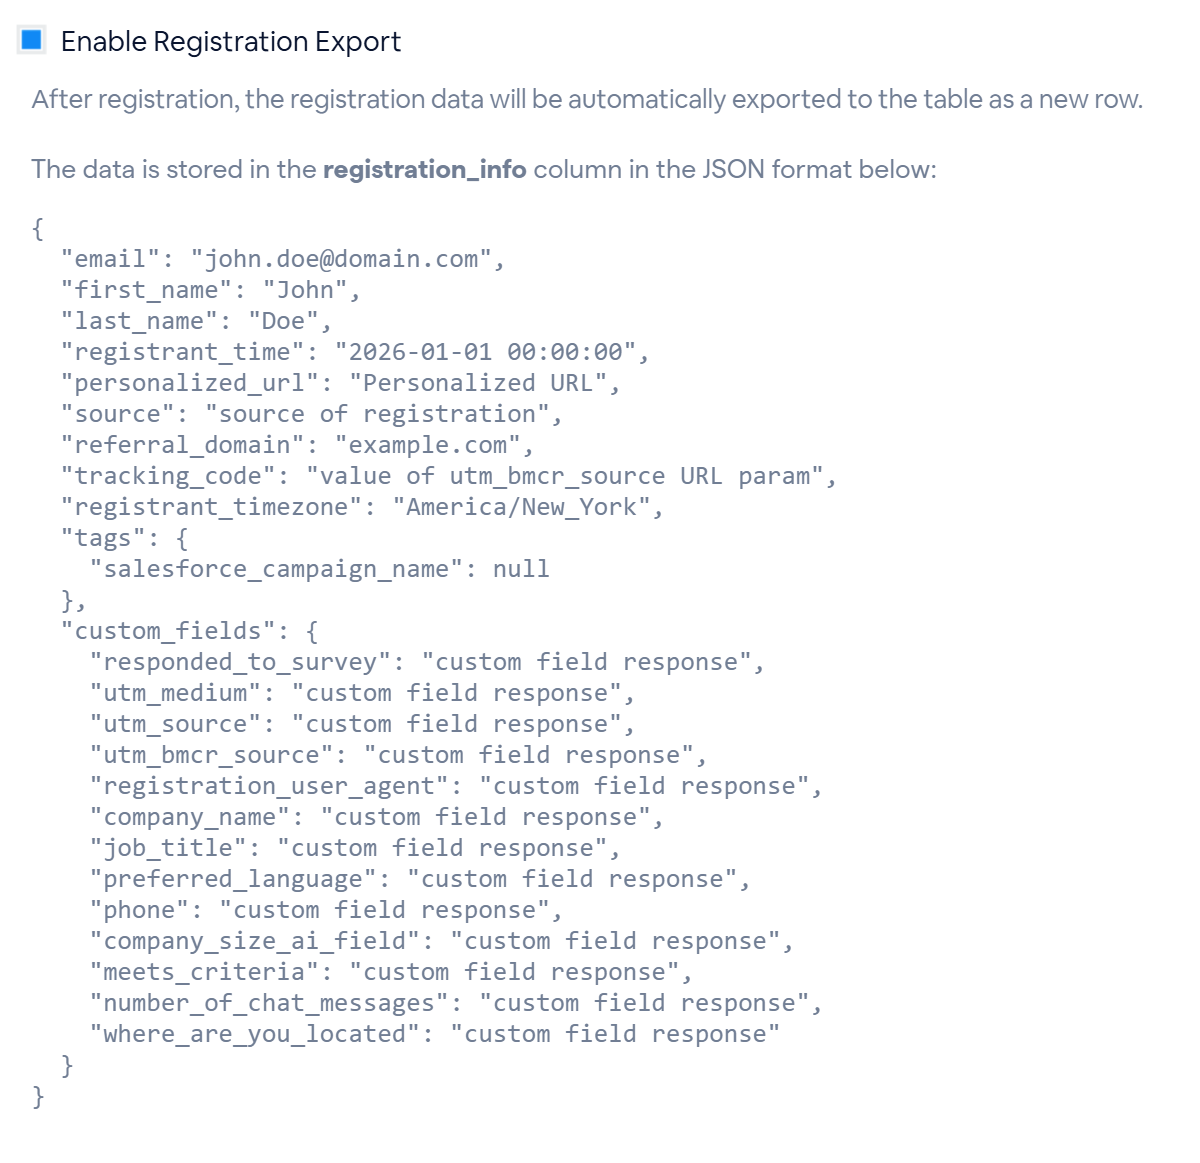


Please note that because data may be exported multiple times, multiple rows can appear for the same record. To ensure you are pulling the most recent unique rows, use the following query:
SQL
SELECT * FROM bigmarker_webinar_data
QUALIFY ROW_NUMBER() OVER (PARTITION BY identifier ORDER BY created_time DESC) = 1;