Using the classic admin? Click here to learn where you can find the recording settings
Recording your live session lets you preserve your content for future use. You can keep the recording for your records or publish it as an On-Demand Webinar so your audience can watch after the live session ends.
Your Webinar recording captures the Webcast experience, including when you host an interactive Webinar. You can record and publish interactive Webinars, but you'll need to configure the Webcast settings to control how the recording appears.
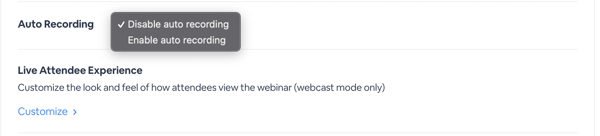
Auto Recording
Auto-recording will start the recording for the on-demand session as soon as the session starts and opens for attendees. To find the auto recording settings in the Session Admin, go to Production > Live Experience and then click on the Studio Experience tab and scroll to the bottom.

Auto recording is disabled by default. When disabled, the recordings will need to be manually started. However, once enabled, the recording will start when either the waiting room is opened for attendees or at the webinar start time if there is no waiting room.
Manually record in the live webinar room
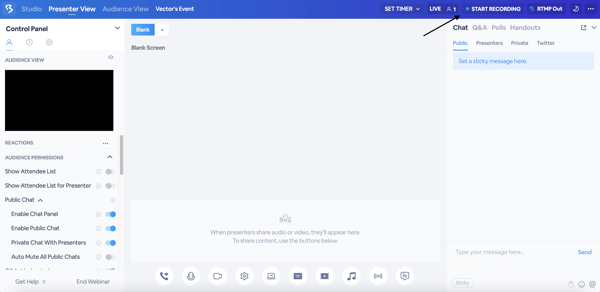
If you choose not to auto-record you will need to manually begin the recording. When you are inside of the Studio look to the top control panel and click Start Recording.
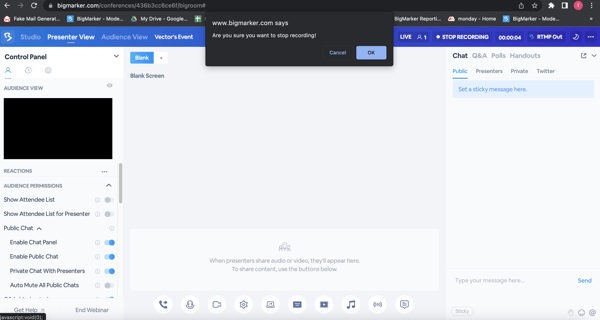
Click Stop Recording and you will be prompted to verify stopping the recording. Ending your webinar will also automatically stop the recording.
For more information, check out the Recording FAQs
Recording settings in the classic admin
From your Manage Webinar Dashboard scroll down to Auto Recording. Select Disable auto recording or Enable auto recording.